Sunday, March 28, 2021

"Peter - The Primitive Farmer & Margaret - The Dutiful Farmer's Wife" Primitive Stump Dolls Free E-Patterns


If you love making whimsical cloth shelf sitter dolls then you're going to love our "Peter - The Primitive Farmer and Margaret - The Dutiful Farmer's Wife" free  e-patterns.

Peter The Primitive Farmer believes that every day should be spent working hard and providing for your family. There is nothing like a good hard day of labor.  He gets up in the wee hours of the morning to start working on his farm. 

Margaret, being the dutiful farmer's wife that she is, gets up even earlier than her husband.

Why?

Because she has to prepare his breakfast so he has plenty of energy for working all day.

Margaret The Dutiful Farmer's Wife believes that she should do everything that she can to help her husband, Peter. 

So, she always has a home cooked meal ready for him at the end of a hard day of labor and at the beginning of the day so he has enough energy for all the demands of the farm.

Margaret gets up so early in the morning to prepare breakfast for Peter that at the end of the day she is a little tired. 

Peter understands this and when Margaret falls asleep on the sofa he just lets her sleep. 

She works so hard. 

She deserves her rest, too.


To view and download my free combo e-pattern please CLICK HERE. You'll be brought to Google Drive where you can view my free e-book. Then just download my free .pdf e-book by clicking on the down arrow in the top center.  


To view and download my free e-pattern please CLICK HERE. You'll be brought to Google Drive where you can view my free e-book. Then just download my free .pdf e-book by clicking on the down arrow in the top center.  

Friday, March 19, 2021

How I Made My Lacy Mixed Media Victorian Collage Stump Art Doll Free Tutorial


I fell in love with mixed media art dolls several years ago after taking online courses at Artful Gathering.  I loved those classes as I learned so much and they really had a delightful effect on my
 creative soul. 


When I first started creating my Victorian "Lady" dolls I decided to make them stump dolls as I wanted to focus on their outfits.  So, it's totally understandable that after falling in love with mixed media art dolls, I would experiment with mixed media stump dolls as well.  

Well, experiment I did! The Lucy, Lacy, and Lilly dolls, shown above, are a trio of "stump doll" sisters who are as different as they are beautiful.


 Lucy, who is on the left in the pictures above, is a delicate flower who has an over abundance of compassion.  Lacy, who is on the right in the pictures above, is whimsical and flirtatious while Lilly, who is in the middle in the pictures above, is a deep thinker who cares about everyone and everything.

They are mixed media Victorian collage stump art dolls that I made back in September of 2014. 

I had so much fun making these mixed media stump art dolls I thought you might like to know how I made them. So, I decided to create a free tutorial on how I made Lacy.  

I hope my free tutorial inspires you to create a mixed media stump art doll of your own.


Lacy - 4 1/2" x 6" x 3/4" Handmade Mixed Media Victorian Collage Stump Art Doll

Lacy is a 4 1/2" x 6" x 3/4" mixed media Victorian stump wood doll with a paper face, sponge painted wood body, paper collage and embellished outfit. Her fabric gathered and covered bamboo bonnet with paper floral and silk floral embellishments is fastened with a purple check ribbon that is tied in a bow under her chin. Her sides and back are sponge painted and her outfit  is an embellished paper collage dress with a two tier cape with raised black dots. White lace trim adorned with a beautiful pearl and silk ribbon flower is wrapped around her neck.

Her beautiful brown thick alpaca yarn hair from Rock Garden Alpacas Fiber is wrapped in a bun. A bouquet of flowers and butterfly add charm to her collage outfit.

Supplies Needed:

3/4" wood pine - 6" by 6" by 3/4"
Acrylic Paint - Dark Green, Light Teal Green, Yellow, Coral, Pink
Low Temperature Hot Glue Gun and Hot Glue Sticks
Various Mixed Media and Scrapbook Papers - Lilac, Light Teal Green, Silver and Other Colors
Victorian Lady Graphic Image For Face
Victorian Graphic Image Paper Embellishments For Front of Body
3/8" Purple and White Checkered Decorative Ribbon Trim - 30" Long For Bonnet Tie
Blush for Cheeks - Coral Color
4” Bamboo Hat
Purple Fabric - 12”Square For Bonnet
1/2” Scalloped White Lace Trim - 12” Long For Neck Line
1” Cream Colored Ribbon & Bead Embellishment For Under The Neck Decoration
1” Lilac Paper Flowers - 3 For Bonnet Decorations 
1/2” Silk Ribbon and Flower Trim For Bonnet Decoration - 12” Long
Light Brown Alpaca Handspun Yarn For Hair
Metallic Marker - Silver
Puffy Paint - Black
Sandpaper
ModPodge
Liquitex Matte Medium
Paint Brushes
Lead Pencil
Stabilo Pencil - Black (for shading)
Tortillions (for blending stabilo lines)
Band-saw and Table Saw to Cut The Wood
Paper Towel
Small Nail Files or Emery Boards
Scissors
Sea Sponges
Small Wallpaper Roller
Pencil
Black Micron Markers
Decorative Paper Edger Scissors

Instructions:


1) Using the paper body template example and measurements from Diagram #1 draw a body template on a white piece of paper with the lead pencil.  Adjust as necessary so your measurements match the ones in the Paper Body Template Example - Diagram #1.

2) Highlight the outside edges with the black micron markers and then cut the paper body template outside the black marker edge lines.

3) Cut a piece of 3/4 " pine 6" by 6" square with the table saw.

4) Center the paper body template on the 6" by 6" wood square and draw along the outside edge with the lead pencil.  


5)  Cut the wood body out along the outside edges with the band saw. Your wood body and wood body measurements should be similar to the wood body example shown in Diagram #2 and be able to stand evenly.

6) Sand all edges of the wood body so they are smooth to the touch.  Make sure the sanding doesn't affect the ability of the wood body to stand evenly.

7) Once you're satisfied with the sanding wipe all the edges and sides down with a wet piece of paper towel.


8)  Paint the front (except the head area which you need to leave bare), sides, bottom and the back of the wood body with the dark green acrylic paint (See Diagram #3).


9)  Using the sea sponges paint the sides and the back of the wood body with the light teal, green, yellow, coral, pink and then dark green acrylic paint (See Diagram #4). 


10) Your sponge painted areas should look similar to the pictures above.

11)  Apply Liquitex matte medium to the front (except the head area which you should leave bare), sides, and back of the wood body to seal your painted areas.  Let dry completely


12) Cut a piece of scrapbook paper to fit the front area of the front side leaving the head area bare (as shown in Diagram #5) and making sure the edges slightly overhang the side and bottom edges.

13) Apply ModPodge to the front side of the wood body (leaving the head area bare) with a brush.

14)  Position the front piece on the front side of the wood body and press down until it is firmly in place.  Roll it with the small wallpaper roller until it is securely in place and adheres to the front side.

15)  Gently sand the side and bottom edges of the scrapbook paper with the small nail files or emery boards until they are flush and smooth with the sides.

16) Apply a thin layer of the ModPodge to the scrapbook paper piece on the front of the wood body.


17) Cut a piece of the scrapbook paper for the left vest using the shapes shown in Diagram #6 making sure the side edges slightly overhang the side edges of the wood body by 1/32" and that the bottom edge is cut with the decorative paper edger scissors for the scalloped edge.

18) Apply ModPodge to the back side of the left side of the vest with a brush.

19)  Position the left side of the vest scrapbook paper piece on the left front side of the wood body and press down until it is firmly in place.  Roll it with the small wallpaper roller until it is securely in place and adheres to the front side. Make sure the left side of the vest piece slightly overhangs the left side of the wood body by about 1/32".

20)  Gently sand the left side of the vest scrapbook paper piece with the small nail files or emery boards until it is flush and smooth with the side wood. 

21) Apply a thin layer of the ModPodge to the scrapbook paper piece on the front of the wood body.


22) Cut a piece of the scrapbook paper for the right vest using the shapes shown in Diagram #7 making sure the side edges slightly overhang the side edges of the wood body by 1/32" and that the bottom edge is cut with the decorative paper edger scissors for the scalloped edge.

23) Apply ModPodge to the back side of the right side of the vest with a brush.

24)  Position the right side of the vest scrapbook paper piece on the right front side of the wood body and press down until it is firmly in place.  Roll it with the small wallpaper roller until it is securely in place and adheres to the front side. Make sure the right side of the vest piece slightly overhangs the right side of the wood body by about 1/32".

25)  Gently sand the right side of the vest scrapbook paper piece with the small nail files or emery boards until it is flush and smooth with the side wood. 

26) Apply a thin layer of the ModPodge to the scrapbook paper piece on the front of the wood body.


27) For the face you may need to re-size and re-print the image you will be using several times before you are able to get the right proportions for the round section of the front of the head which you have left bare until now.

28)  Apply ModPodge to the area where the face will be placed.

29)  Position the face on the wood body as shown in Diagram #8 above and press down until it is firmly in place.  Roll it with the small wallpaper roller until it is securely in place and adheres to the front side. 

30)  Gently sand the face paper piece along the round edges with the small nail files or emery boards until it is flush and smooth with the head wood. 

31) Apply a thin layer of the ModPodge to the scrapbook face paper piece on the front of the wood body.


32) Cut a piece of the 1/2” scalloped white lace trim to fit around the neck edge overlapping by 1/2” in the back (See Diagram #9).

33) Glue the lace trim around the neck edge overlapping 1/2” in the back with the hot glue and making sure the top edge of the lace trim covers the neck edge of the face graphic and is positioned just under the chin of the face graphic (See Diagram #9).


34) The lace trim around the neck should look similar to the pictures shown above.


35) Glue the 1” cream colored ribbon & bead embellishment in the center front of the body just under the neck edge and on top of the lace trim that you just glued around the neck with the hot glue See Diagram #10). 
 
36) For the hair you want to use the light brown alpaca handspun yarn and will be unwinding some of the yarn to frame the face, You will also be using the woven yarn to cover the sides, top and back of the head and creating a bun on the back of the head.

37) To frame the face cut several pieces of the yarn about 3/4” long and then separate the weave so the yarn is like roving.


38)  Apply hot glue to the wood side of the head on the bottom of the right side up to the right side of the face graphic and then apply one of your 3/4” pieces of separated yarn so it adheres to the head (See Diagram #11).

39)  Work your way up the head gluing the 3/4” pieces from the right hand side across the forehead to the left hand side making sure the sides and edges of the face graphic are covered (See Diagram #11).

40) Fluff the ends of the yarn roving so the hair looks natural and flyaway and only the face itself on the graphic is showing (See Diagram #11).


41) Now you want to cover the back, sides, and top of the head with rows of the yarn glued simultaneously one row after the other starting at the back bottom nape of the neck as shown in Diagram #12 and working your way from the right hand side up the back and side of the head to the top center back of the head making sure the whole area is firmly glued and covered (See Diagram #12).

42)  Cut a long piece of the yarn and hot glue it to the the back bottom nape of the neck as shown in Diagram #12 and while gluing as you go work your way from the right hand side up the back and side of the head to the top center back of the head making sure the whole area is firmly glued and covered (See Diagram #12).


43) After the face is framed and the back, sides and top of the head are covered with the yarn you want to glue more yarn to the back of the head to create the effect of a bun on the back of the head (See Diagram #13).

44) Cut another really long piece of the yarn and starting at the center back of the head start gluing and apply the yarn in a tight counter-clockwise direction until the whole back of the head is covered with a bun  See Diagram #13).

45) Finish gluing the bun at the top of the head (See Diagram #13).


46) Before you put the bonnet on Lacy you want to add the finishing embellishments to the front of the body.

47) Cut two Victorian graphic images out of the paper for the lower front of the body (See Diagram #14). For my Lacy this was a cluster of flowers and a butterfly.

48) Apply ModPodge to the back side of the flower cluster and press down until it is firmly in place (See Diagram #14).  Apply ModPodge to the back side of the blue butterfly overlapping the flower cluster  and press down until it is firmly in place (See Diagram #14).

49) Roll the flower cluster and butterfly paper embellishments with the small wallpaper roller until they are securely in place and adhere to the front side. 

50) Apply a thin layer of the ModPodge to the flower cluster and butterfly on the front of the wood body. 


51) Use the black stabilo pencil to shade the edges of the flower cluster and butterfly, as shown in Diagram #15 above and then blend the stabilo lines with the Tortillions. 

52) Make sure the blending around the tie is pleasing to the eye.  If need be add more shading with the black stabilo pencil and blend again.


53) Use the black puffy paint to add black dots to the center of the scalloped loops on the bottom edge of both sides of the vest making sure they are pleasant to the eye (See Diagram #16).  Let dry.

54) Use the metallic silver marker to draw a  silver line under the bottom edge of both sides of the vest (See Diagram #16).


55) You want to add a decorated hat to the top of Lacy’s head using the 4” bamboo hat.

56) Position the bamboo hat in the center of the wrong side (WS) of the 12” purple fabric.    

57) Using the bamboo hat as a guide cut a 7” purple fabric circle around the bamboo hat.  

58) Remove the hat and then apply a little hot glue to the top center of the bamboo hat (See Diagram #17). 


58) Turn the bamboo hat upside down in the center of the wrong side (WS) of the purple hat and hot glue it in place (See Diagram #18).


 59) Now you want to glue the purple fabric edges inside the hat pulling the fabric edges tightly against the brim edge of the hat and overlapping all along the edges.  

60)  Apply hot glue to the wrong side (WS) edge of the fabric and pulling the right side (RS) of the fabric tightly against the brim edge of the hat glue the edge of the wrong side (WS) of the fabric to the inside of the hat (See Diagram #19).


61) Continue gluing the wrong side (WS) of the fabric edges to the inside of the hat overlapping the fabric around the round brim of the hat creating folds in the fabric as you move along the brim edge (See Diagram #20).  

62) Continue in this manner until you reach your starting point making sure the fabric is tight against the brim edge of the hat and the fabric edges are all hot glued inside the hat (See Diagram #20).


63) Cut a piece of the 1/2” silk ribbon and flower trim to fit around the bottom of the hat cap and glue it in place with the hot glue (See Diagram #21). 


64) Glue the three paper flowers evenly around the hat on top of the 1/2” silk ribbon and flower trim with hot glue (See Diagram #22). 

65) Hot glue the center point of the 3/8" purple and white checkered decorative ribbon trim  to the center inside of the hat (See Diagram #22).

66) Apply hot glue all inside the cap of the hat and glue the hat to the top of Lacy's head (See Diagram #22).  


67) Tie the ribbon in a bow on the right side and then trim the excess ribbon ends (See Diagram #23).

68) Congratulations! Lacy is done.


I also created a free e-book for you showing how I made Lacy.  Enjoy!


To view and download my Lacy free E-Book please CLICK HERE. You'll be brought to Google Drive where you can view my free e-book. Then just download my free .pdf e-book by clicking on the down arrow in the top center.  

For more information on all my free e-patterns, e-printables and e-books please CLICK HERE.

Copyright © 2004 - 2023 - All Rights Reserved - Designed and Written By Linda Walsh


Please respect My Terms of Use:  All patterns, e-patterns, printables, e-printables, e-books, graphics, tutorials, how-to's, articles and other e-products © 2004-2023 Linda Walsh Originals-Designs by Linda Walsh. All rights reserved. Commercial selling or reselling by any means prohibited without the written consent of Linda Walsh.

Patterns, e-patterns, printables, e-printables, e-books, graphics, tutorials, how-to's, articles and other e-products are for personal use only. You may not modify, photocopy, download, upload, post, transmit, display, perform, publish, license, reprint, create derivative works from, mass duplicate, re-sell, digitize, and reproduce in any other form (print, digital or electric) or commercially apply, embed, share, Email, or redistribution in any other means. Use of any of the above is prohibited without the written permission of Linda Walsh.

However, you may link to my website(s)/blog(s) and the individual page(s)/blog post(s) (including 1 picture) but do not copy, reprint or duplicate my website(s)/blog(s) or individual page(s)/post(s ) without my permission.

Items made from Linda Walsh Originals E-Patterns are intended for personal use for fun or small scale personal and business profit as long as you credit us with the design. Large scale commercial use (i.e. mass production) of items made from Linda Walsh Originals E-Patterns are by permission only.

Please see my Terms and Conditions for additional information.

Copyright © 2004 - 2023 - All Rights Reserved - Written By Linda Walsh of Linda Walsh Originals and Linda's Blog. Linda is a doll maker and doll pattern designer.

Thursday, March 18, 2021

How I Made My Mixed Media Snow Fairies Art Dolls - Meet Pixie, Dixie, and Mixie


Back in 2014 I decided to take Julie Haymaker's "Let's Go For A Ride" class at Artful Gathering. The project called for making an adorable little mixed media shadow box scene with 3 pets sticking their heads out the window of a car that was driving over a hill. The class looked like it would be a lot of fun to take so I decided to take it.

A kit was available for purchase from Julie's Etsy shop "Bisbeebliss" so I ordered one as it's a lot easier to do that than run around to get supplies. The kit came with everything you needed to create the project including thread and needle. It was fabulous.

Well, in looking at Julie's kits for sale she had some unusual unfinished wood pieces for making several different types of mixed media dolls.  

Julie is a remarkable mixed media artist who has an eye for unusual art doll creations and her unfinished wood kits were available as a tool to help you with this. 

So, of course I bought a few.  If you know me you know that a few translates to "a lot of them."

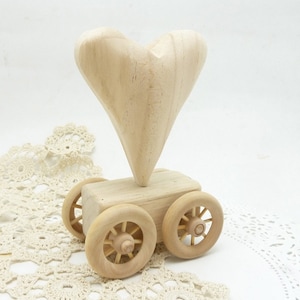
rolling  hand carved wooden heart on wheels ready to decorate.  

I've used a few over the years when the application seemed to fit something I wanted to create.  I used the heart and wood carriage above for my "Don Juan Romeo" mixed media art doll creation that I created this summer.

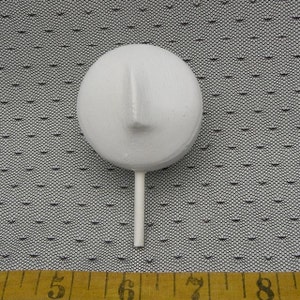
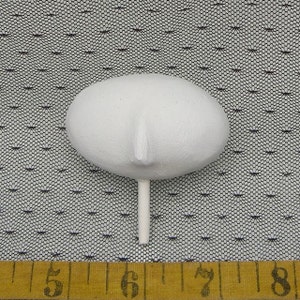
ready to paint plaster head 5.05 cm or 2 inches style 1  plaster ready to paint head style  2

I've been wanting to use the two plaster doll heads since I bought them and decided they would be the perfect application for some mixed media Christmas elves I wanted to make now.  In September of 2019 I decided to use them and made my "Mixed Media Christmas Elves."

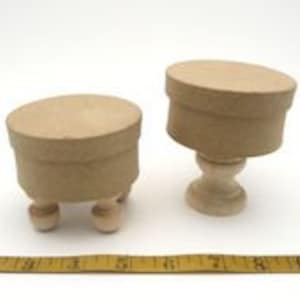
2 paper mache round boxes on feet and pedistal  

I used the two papier-mâché box stand above for the Fall season "Tinytopia Mixed Media Fairy Houses" I made back in 2015.

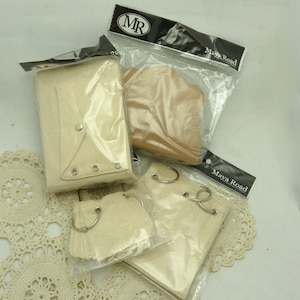
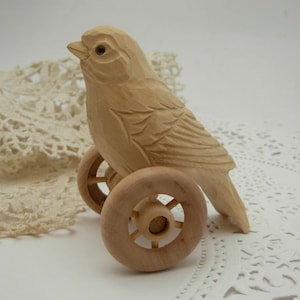
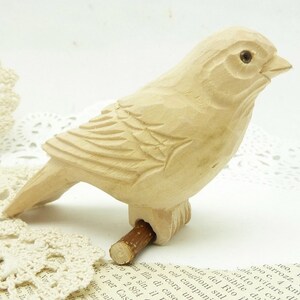
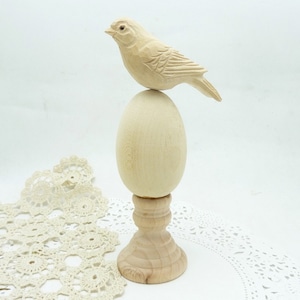
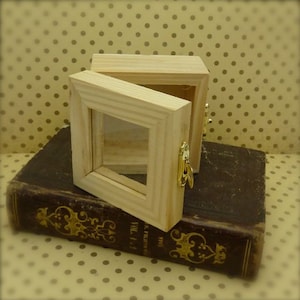
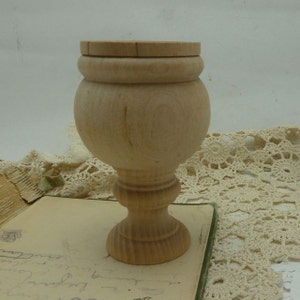
new 4 maya road journals 2 ring bound  canvas books canvas book with pockets  chipboard  add a page binder book  hand carved bird on wheels  hand carved wooden bird 3 1/2 "x 3 1/2"  x 2"  Hand carved wooden bird on egg pedestal.  tiny wooden shadow box  small  ready to decorate wooden urn  holds about 1/3 dry )cup It is 4 inches tall by 2 /12 inches wide  the bowl is 2 /14 tall by 2 /12 wide

I haven't used the unfinished wood pieces and kits shown above and I'm very happy to have them as I don't believe she sells them anymore. 

Handmade Doll Body - Ready to Decorate

I've been holding on to several of her 8” unfinished art doll kits for awhile and I decided to use three of them for some ideas I had in mind now.  Here's how I envisioned I would use the unfinished art doll kits: 

I had wanted to create some mixed media art doll faeries for awhile with a winter  snow theme and decided the unfinished paper, wood, and paper-clay art doll kits might be perfect for this.

Plus, I had some teal green metallic glitter sprayed grass reeds floral sprays that I had been saving for a few years.  This seemed like the perfect time to use them.

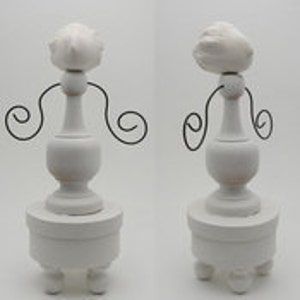
The 8” unfinished art doll kit was already painted white and was, basically, comprised of three sections: 


The head was made out of plaster with a pre-shaped head, nose, and hair with bun.  I figured I could paint the hair a combination of silver and white metallic paints to give it a shine and glow.  The face I could paint with light skin tone acrylic paints and then paint the face itself with acrylic or watercolor paints.  


The body was a wood finial that was painted white. The arms were formed from copper distressed wire and were perfect for what I had in mind for my winter snow faeries.  I figured I could sponge paint the bodies and apply snow and winter themed embellishments.


The base was a papier-mache box with lid that was painted white with wood beads that were also painted white and had been glued on the bottom of the papier-mache box for legs.  I figured I could sponge paint the top of the round box to match the wood finial body and  then collage the paper-mache box and lid and apply snow and winter themed embellishments as well.

I also wanted to apply some of the various fiber embellishments and trims I had that would fit right in with my snow and winter themed faeries.  

Several years ago I had bought some adorable and colorful teal blue glitter silk floral stems and have been wanting to use them ever since.  Finally, the right application came along.  I thought they would be perfect in the backs of the faeries to make it seem like the faeries were stepping out from amongst the reeds of a winter woodland forest.

I also wanted to create a wind blown snow and winter theme for my faeries and thought the teal green metallic glitter sprayed grass reeds floral sprays in the back of the doll would be perfect to create the wind blown effect.  

The art dolls themselves were about 8” tall and with the  teal green metallic glitter sprayed grass reeds floral sprays would be about 13” tall.

I thought they would end up being pixyish winter themed mixed media snow art doll fairies so I decided to call them Pixie, Dixie, and Mixie.  I decided to, basically,  make them all the same except but use different embellishments or scrapbook collage papers to showcase their individual personalities.
Once I had decided what I wanted to do it seemed like they would be fairly easy to finish.
 

I decided to start with their faces and painted them with a combination of acrylic paint and watercolor paints.  I used the acrylic paints for the eyes and mouth and used blue watercolor for the icy blue eye shadow effect that I wanted.  Pastels were used for blush on their cheeks.

As I wanted the snow faeries to be winter themed I decided to use modeling paste to create a snow texture to their hair (See Diagram #1).  So, I applied modeling paste to their hair (See Diagram #1).  Then I painted their hair with a combination of silver and white metallic paint (See Diagram #1).
 
After all the paints were thoroughly dried I applied clear gesso to seal their faces and heads (See Diagram #1).

Their arms were already fashioned out of wire and into a swirl pattern which was perfect for my winter snow theme and worked out well with the snow accents so when I was finished with the faeries I added Alene's True Snow accents to them as well as to their noses and throughout their bodies when each section was finished(See Diagram #2).  

The reason I decided to add snow accents to their wired metal arms was to create the effect of fallen snow.  

As the art doll kits already had unfinished wood finial bodies which were already painted white I decided to sponge paint them with winter metallic paint colors like light and dark teal blue, light blue and royal blue See Diagram #3).  

As I was sponge painting the wood finial bodies already I also sponge painted the papier-mache round boxes and lids that the wood finial bodies were glued to with the same pattern and colors as I wasn't going to add scrapbook paper there (See Diagram #3).  

After the sponge paints on the wood finial bodies and papier-mache round boxes were dried I sealed the sponge paints on both areas with clear gesso (See Diagram #3).

For awhile now I’ve had unfinished wood snowflakes and Christmas themed unfinished wood words waiting to be painted or embossed so I decided to use some of them as an embellishment for my snow faeries.  

I embossed one of the snowflakes and the word “Joy” with light teal blue metallic powder (See Diagram#4).  

For the 2nd snowflake I embossed it  with copper metallic powder (See Diagram #4).  

For the light teal blue snowflake and the “Joy” word I embellished it with metallic puffy white paint drops (See Diagram #4).  

For the copper snowflake I embellished it with dark teal blue metallic puffy paint drops and then let all three dry thoroughly before gluing them to the fronts of the wood finial bodies (See Diagram #4).

Before adding the embellished unfinished pieces to the front of the wood finial bodies I added three snowflake paper stickers to the center of the front of each of the wood finial bodies and three snowflake paper stickers to the center of the back of each of the wood finial bodies (See Diagram #4). 

I glued the snowflakes and “Joy” piece on top of the center of the paper sticker I had placed on the center of the wood bodies with hot glue (See Diagram #4).  

After that I created three bows out of a length if 1/4” sheer glittery ribbon and glued each to the center front of the waistline of each wood finial bodies just above the top of the paper snowflakes (See Diagram #4).


I cut three pieces of decorative fringe fiber to fit around the finial bodies just under the top lid and wrapped each around the finial bodies overlapping them in the back  and securing them with hot glue (See Diagram #5).

For the neck line under the heads and just above the top of the wood finial I bodies decided to wrap long lengths of medium teal blue fiber strands around and around the neck lines until I was happy with the look and secured the end pieces with hot glue in the back (See Diagram #5).


For the bottom lips of the wood finial bodies I cut three strips of decorative scrapbook papers or word phrase strips long enough to go around the bottom lips and meet in the back (See Diagram #6).  

I brushed modpodge on the back of the scrapbook strips and then pressed them against the bottom lips until they were secure and met evenly in the back (See Diagram #6).  

Then I rolled the strips with a small wallpaper roller until they were securely in place and adhered to the bottom lips (See Diagram #6).  

After rolling the pieces with a wallpaper roller I brushed modpodge on them to secure them to the bottom lips (See Diagram #6). 

I cut three long strips of decorative mixed media fibers to fit around the bottom of the wood finial bodies just above the bottom lip sections and wrapped them around the bottom several times then hot glued the ends in the back to secure them (See Diagram #6).


I was pleased with the way the wood finial bodies came out and after finishing the round boxes and covered lids added the snow accents.

Before finishing and embellishing the bottom of the snow faeries I measured the height of the papier-mache round boxes and lids and cut the three teal green metallic glitter sprayed grass reeds floral sprays so the bottom of the sprays would match the height of the papier-mache round boxes with covered tops (See Diagram #7).  

I cut a small hole in the top back of the lids of the papier-mache boxes and inserted the stem of each of the teal green metallic glitter sprayed grass reeds floral sprays until  they met the bottom of the papier-mache round boxes (See Diagram #7).  

Then I applied hot glue to the hole I had cut to secure the floral stem to the papier-mache round box top lid (See Diagram #7).


The wood finial pieces for their bodies were affixed to white painted papier-mâché round boxes with covered tops that were all painted white.  I had previously sponge painted the lid tops so I didn’t need to do anymore there (See Diagram #8).

I decided to use different scrapbook collage papers to decorate the round boxes and decided to decorate the bottoms of the snow faeries with snow and winter themed woodland scrapbook papers (See Diagram #8). 

For these purposes I needed a wide strip for the side of the round boxes and a thin strip for the side of the round lids (See Diagram #8).  

I did not have to worry about scrapbook papers for the top of the papier-mache round lids as I had already sponge painted the top of the papier-mache round boxes and lids when I had sponge painted the wood finial bodies (See Diagram #8).

For the narrow strip of the side of the round lids I cut three strips of decorative scrapbook papers or word phrase strips long enough to go around the side of the round lids and meet in the back (See Diagram #8).  

I brushed modpodge on the back of the scrapbook strips and then pressed them against the side of the round lids until they were secure and met evenly in the back (See Diagram #8).  

Then I rolled the strips with a small wallpaper roller until they were securely in place and adhered to the side of the round lids (See Diagram #8).  


Then I cut three strips of the winter woodland themed scrapbook paper long enough to go around the sides of the round boxes and meet in the back (See Diagram #9).  

I brushed modpodge on the back of the scrapbook strips and then pressed them against the sides of the round boxes until they were secure and met evenly in the back (See Diagram #9).  

Then I rolled the strips with a small wallpaper roller until they were securely in place and adhered to the sides of the round boxes (See Diagram #9).  

After rolling the strips around the sides of the round lids and rolling the strips around the sides of the round boxes with a wallpaper roller I brushed modpodge on them to secure each of them to the sides of the round lids and sides of the round boxes (See Diagram #9). 

I had decided to embellish the papier-mache round boxes with winter woodland themed stickers and scrapbook images (See Diagram #10).  

After deciding which sticker and scrapbook images to use I applied modpodge to the back of each and placed them where I wanted them on the sides of the round box (See Diagram #10).  

Once I was happy with their placement I brushed modpodge on them to seal them to the sides of the round box (See Diagram #10).


After all the stickers and scrapbook images were applied I added some fiber around the top and bottom of the round lid (See Diagram #11).  

I cut two strips of teal blue fibers for each of the lids to fit around the top of the lids and to meet in the back and then hot glued them to the top of the lid (See Diagram #11).  

I did the same with the teal blue fiber and bottom of the lids (See Diagram #11). 


To finish the bottom of the round box I added 1/2” glittery plastic trim to the bottoms of the round boxes (See Diagram #12).

I cut one strip of white glittery fiber for each of the round boxes to fit around the bottom of the round boxes and to meet in the back and then hot glued them to the bottom of the round boxes (Se Diagram #12).  

After all the embellishments were added I applied Alene's True Snow accents to the faerie dolls  starting with snow on their noses, on their wired arms and then to the rest of their bodies, as well as to the round boxes and lids (See Diagram #13).  

I added a lot of the snow as I wanted to create the effect of recently fallen snow (See Diagram #13).  

I was really pleased with the way all three of the mixed media winter snow faeries came out.  

They are cheery and will make a great winter season decorations.   

Now where should I put them........ 


I also created a free e-book for you showing how I made my mixed media snow faeries art dolls.

To view and download my free e-book please CLICK HERE. You'll be brought to Google Drive where you can view my free e-book. Then just download my free .pdf e-book by clicking on the down arrow in the top center.

For more information on all my free e-patterns, e-printables and e-books please CLICK HERE

Copyright © 2004 - 2023 - All Rights Reserved - Designed and Written By Linda Walsh

Please respect My Terms of Use:  All patterns, e-patterns, printables, e-printables, e-books, graphics, tutorials, how-to's, articles and other e-products © 2004-2023 Linda Walsh Originals-Designs by Linda Walsh. All rights reserved. Commercial selling or reselling by any means prohibited without the written consent of Linda Walsh.

Patterns, e-patterns, printables, e-printables, e-books, graphics, tutorials, how-to's, articles and other e-products are for personal use only. You may not modify, photocopy, download, upload, post, transmit, display, perform, publish, license, reprint, create derivative works from, mass duplicate, re-sell, digitize, and reproduce in any other form (print, digital or electric) or commercially apply, embed, share, Email, or redistribution in any other means. Use of any of the above is prohibited without the written permission of Linda Walsh.

However, you may link to my website(s)/blog(s) and the individual page(s)/blog post(s) (including 1 picture) but do not copy, reprint or duplicate my website(s)/blog(s) or individual page(s)/post(s ) without my permission.

Items made from Linda Walsh Originals E-Patterns are intended for personal use for fun or small scale personal and business profit as long as you credit us with the design. Large scale commercial use (i.e. mass production) of items made from Linda Walsh Originals E-Patterns are by permission only.

Please see my Terms and Conditions for additional information.

Copyright © 2004 - 2023 - All Rights Reserved - Written By Linda Walsh of Linda Walsh Originals and Linda's Blog. Linda is a doll maker and doll pattern designer.