Showing posts with label e-classes. Show all posts

Wednesday, October 07, 2020

The Beautiful Artwork of Hally Levesque's "The Spirit Woods" Exhibition


In the spring I saw a Facebook post from Hally Levesque about an exhibit she was having at a local Canadian art gallery where she would be exhibiting and selling some of her beautiful  "The Spirit Woods" art pieces. 

Lady of the Woods Tryptich by Hally Levesque

I was thrilled as Hally is an exceptional artist who creates art dolls, mixed media art, paper art, collage art and more.  Not only is she an exceptional art doll artist, but she is also an art teacher, storyteller, photographer and a bit of a history buff. 

Her online class video's are easy to follow and beautifully taught as well as being sprinkled with all sort of historical tidbits or stories, which I just love.

Hally Levesque -  Artful Gathering 2015 - Bonnets & Bows: A Regency Doll Project

I first encountered Hally after taking her "Bonnets & Bows: A Regency Doll Project" at Artful Gathering in the spring of 2015.  I, of course, was interested in this class as she was showing you how to make a paper-clay historical Regency period art doll.  

To me I had hit the jackpot: a Victorian like art doll with historical tidbits sprinkled throughout.  What's not to love.


Hally Levesque - Artful Gathering 2016 - Romantic Rosabella - A Ribbons & Roses Doll Project 


Hally Levesque - Artful Gathering 2016 Wee Winter Whimsies - Primitive Folk Art Dolls for the Holidays

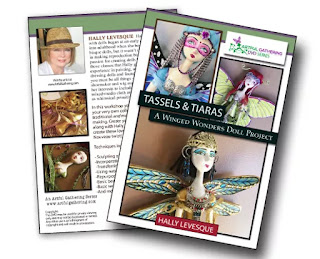
Hally Levesque - Artful Gathering 2017 Tassels & Tiaras: A Winged Wonders Doll Project

I loved her first class so much I ended up taking 3 more or her Artful Gathering online classes.  Each of those classes was just as good if not better than her Bonnets & Bows class.


As I already said, Hally is an exceptional artist as well as an exceptional teacher.  Luckily for all of you Hally's classes are available as video's on her Creative Works website here.   Her video's are well thought out, easy to follow, and entertaining.   If you love dolls and get a chance to take one of her classes or buy one of her video's you won't be disappointed.  

After taking her Romantic Rosabella class I learned that I had won the beautiful "Winter Roses" art doll that Hally Levesque was raffling off to one of the students from her Romantic Rosabella and Wee Winter Whimsies classes at Artful Gathering. 

I couldn't believe it! I never win anything - especially a gorgeous art doll made by an unbelievably talented and gifted art doll artist - Hally Levesque.


When I opened up her box I was just astonished.   She was even more beautiful than her pictures depicted.  

What I couldn't get over was her remarkable face. She was a totally handmade, hand sculpted, and hand painted art doll. The hand painted features on her face, which is only 1 3/4" long and 1 1/4" wide, were beautifully done and unbelievable. 

All I could say was "Wow!" She was utterly gorgeous and a true inspiration for what a beautiful art doll can look like.


So, you can imagine how thrilled I was with Hally's enchanting exhibit. I was happy for Hally, but also for everyone who could see some of her beautiful art pieces in person and be able to purchase some of them - which, of course, I did.

According to Hally on "The Spirit Woods" page of her Creative Works website; "The seed for this project was planted in 2018 when I was looking for something new and challenging to get the creative juices flowing.  I found my inspiration when I stumbled upon pictures on the Internet of some very unusual looking mushrooms.  I was struck by how they were both alien-like and yet oddly beautiful.  I began to play with the idea of incorporating the subject into my art. From there, the imagery spilled over into other areas.  I imagined an entire body of work devoted to the subject of nature spirits.  My fascination with moths also came into play and before I knew it, a narrative began to take form culminating in a journal with a series of accompanying art works."

Hally has four sections that you can click on and view on her  "The Spirit Woods" page regarding her creations: The Spirit Woods Journal, The Video, The Art Projects, and a Gallery Display.  If you love art and love learning about the inspiration behind Hally's exceptional works of art please do yourself a favor and click on the links on her  "The Spirit Woods" page.  

As mentioned before, Hally is a storyteller and historian who takes you into the inner world of her enchanting art pieces.  I guarantee you won't be disappointed. 

It was hard to choose which art pieces I wanted as they were all exceptional but purchasing all of them, which I wanted to do, was definitely out of the question.  

So, I settled on three of them: Lady of the Woods Tryptich,  Fungorium Agara Cut-out, and Mothology Collage Shadow Box.  

I waited until the exhibit was over to receive my art pieces and was so happy when they finally arrived.  

Once again, when I opened the box they took my breath away.  They were unbelievably beautiful, enchanting, and exceptional pieces of art.  I couldn't help but admire the amazing details on every square inch of her art pieces. 

I had been blown away with just seeing the pictures and knew they would be beautiful but was stunned seeing how beautiful and detailed they actually were in person. The intricate detail in each piece had to have taken her a long time to create.  I couldn't help but admire her astonishing works of art.

I asked Hally if it would be okay to post pictures of her astonishing works and she graciously agreed to let me.  I knew that all my Artful Gathering friends would be thrilled to see pictures of some of Hally's creations again and was hoping she would agree.

Here's what Hally said about her creations: "Truly, I create not solely for my own enjoyment. People ask me how it is that I can part with things that I devote so much time to making. For me the answer is simple. Art is for sharing and nothing gives me greater satisfaction than knowing that I have somehow contributed to the happiness of others through something that I love to do."

I, for one, can say that every time I look at my Hally Levesque creations they not only give me joy, but fill me with inspiration. Every time I look at them I see a new piece of detail that I hadn't noticed before.  They are enchanting, inspirational, and definitely fill me with happiness.  So, mission accomplished, Haley.

I hope you enjoy the pictures I took of Hally's three art pieces.  The pictures truly don't do her works of art justice, but I'm hoping they show you enough of the detail for you to see how truly beautiful they are.

Lady of the Woods Tryptich by Hally Levesque
18" x 16"
Paper, ink, acrylic paint, wire, varnish and plastic frame.

According to Hally; "I created the character of The Lady of the Woods based on the concept of a mother spirit - a guardian of all that exists in her woodland domain."


Fungorium Agara Cut-out by Hally Levesque
11 1/2" x 10"
Paper, ink, acrylic paint, wire and varnish.


Mothology Collage Shadow Box by Hally Levesque
17 3/4" x 11"x 4 1/2"
Paper, ink, marker, varnish, and plastic frame.


If you would like to learn more about Hally and her beautiful art pieces her Creative Doll Works website is here. 

And, if you ever get a chance to take one of Hally's online classes, buy one of her video's, or buy one of her art pieces do so.  You will not be disappointed.

Tuesday, August 20, 2019

I Had To Change Her Face


Back in July of 2014 I was taking my 5th class at Artful Gathering. The class was ART-S2-307 The Imaginarium: Anthologies of an Art Doll and was being taught by Mary Jane Chadbourne.   It was a delightful mixed media art doll class that I loved.

I'd been anxiously awaiting the start of this class as I have never created mixed media art dolls so it was going to be an adventure for me. And, adventure it was. I never realized how much fun mixed media was, how much work was involved in creating mixed media art dolls and all the different supplies you would need.  I know now and have been addicted to mixed media ever since.

For this class Mary Jane class Mary Jane's husband had created wood doll kits that you could buy from her Etsy shop.  I had decided to buy one of the art doll wood kits as it contained all the wood I would need to make the 3 different art dolls taught in the class.

The dolls pictured above were the three art dolls I made back in 2014. The one on the left took the longest amount of time to make as I couldn't decide on the different papers and fabrics I would use for her outfit and what other embellishments I was going to add. Her message was "to listen is to learn, and to understand is to inspire" so I named her "Compassion."

The doll in the middle was the 2nd doll I made. She had beautiful blue eyes so I decided to make her outfit a combination of darker blue papers and fabrics. Her message was "believe in possibilities" and "begin with yes" so I named her Melody.

The doll on the right was the 3rd doll I made.  She had a small body, but a large head. I had found a wonderful dark, whimsical graphic to use for the face but when looking at the finished doll back then I thought her face could have been a little smaller and the face was too dark for the rest of the doll.

I had decided that this doll would be a whimsical angel of sorts so I added a green and white checkered paper bow to her back to serve as wings. Her sides and backs I embossed with a flower design which gave it a three dimensional look.

I had decided to use the message "Trust Your Heart Song" and had found a whimsical green frog playing a violin that I wanted to incorporate in her design. As the frog was green I decided to make her outfit a combination of green, peach and black/white papers and fabrics. To this I added white outlining and black raised painted dots. I named her Ophelia.


Well years later, truth be told - I wasn't happy with her face back then and have been wanting to change her ever since.  So, when I was buying the wood doll kits for my Artful Gathering 2019 Session 2 "Beyond the Imaginarium: A Compendium of Holiday Merriment" Class taught by Mary Jane Chadbourne I decided to buy more of her The Imaginarium: Anthologies of an Art Doll wood kits.  I told her I just wanted to "play."


Well, after playing with my new doll kits I got inspired and decided to finally take the plunge and change Ophelia's face.  I couldn't remove the existing face as it would probably ruin the doll so I looked for a graphic I could glue over her existing face and found one I thought would work.


I was hesitant to replace her face as I didn't want to ruin the doll and was pleasantly pleased that it went as well as it did.  I think her new face suits her better and hope you would agree.

I think she still looks like an Ophelia so while I'm not keeping her original face I am going to keep her name.


Thursday, May 10, 2018

Who Doesn't Love Purses? I Know I Do! How About You?


My recent project got me to thinking about purses and totes. Now I wonder why that is?


I love making totes and have designed and made many of them for It's Raining Baby Showers collection, my Alpacas Rock collection, and my Custom Fabrics Designs collection.  They can be big, small, lined, unlined - it doesn't matter. They are just so versatile. You can never have enough of them and you can never run out of uses for them. 

I loved making them so much I decided to create a free e-pattern for the Halloween tote above here and a free e-book for the large flower tote above here.


As I mentioned in a previous post back in 2012 I decided to take my first online class with Pat Winter on Artful Gathering. The class was called Crazy Quilting 101 and I  LOVED every minute of the class. Pat was such a fantastic teacher. I only wish I had taken one of her classes years before. I made the crazy quilted purse shown in the picture above which I posted about this here.  

After taking this class I had visions of making several semi-formal and formal clutches - some for me and some as gifts.  I never had time until.......  Does this give you an idea of what my latest creations were? Come on? Really? You must have some idea?

In any event, my latest projects got me to thinking about purses, clutches, wallets, totes, etc. and all the wonderful tutorials I've found for my  Purse, Bag,Tote Tutorials, Pouch, Clutch, Wallet, Pocketbook Patterns, Video's & How-To's Pinterest board.  

I have close to 1,000 pins on this board.  All wonderful "freebies" for creating beautiful purses and totes.

I've been collecting these pins for several years now and have visions of making all of them.  For sure that is not going to happen.  Even for me that is a bit much.  Close to a 1,000 purses... really?  For sure I'd be in divorce court... lol. 

While I won't be making all of them I do have my eye on a few tutorials I'd like to try.  There's the craft organizer sewing bag tutorial by Torie Jayne here,  the boho bag tutorial by Gerry Krueger here,  the quilted suitcase tutorial by Ashley of "Mommy By Day Crafter By Night" tutorial here, the crocheted granny square purse by Lily of  "Sugar'n Cream" which I would need to learn how to crochet first here (it's on my list of to do's),  and the fold over bag tutorial by Anna Graham here.  

There's so many I want to try and make.  So, many little purse organizers, wallets, storage baskets, etc.  You get the idea.  More than I could possible make in a lifetime.  I'll just have to settle for a few.  Maybe a little more than a few..... lol.


There are so many wonderful tutorials out there for making all sorts of purses, totes, bags, pouches, clutches, wallets, pocketbooks, bags, etc.  I, of course, love them all and have collected close to 1,000 tutorials, patterns, and how-to's on my Purse, Bag,Tote Tutorials, Pouch, Clutch, Wallet, Pocketbook Patterns, Video's & How-To's Pinterest board.

If you love making purses, totes, clutches, wallets, pocketbooks, etc. then you're going to love my Purse, Bag & Tote Tutorials, Pouch, Clutch, Wallet, Case & Pocketbook Patterns, Video's & How-To's Pinterest board.

Have fun!

Wednesday, March 28, 2018

I Just Had To Tweak and Revise My Mixed Media Paper-clay Victorian Art Dolls


Back in September 2014 I decided to make some Victorian mixed media collage and paper-clay faced art dolls. So, combining my love of dolls with my decades long experience with sewing and crafting and utilizing everything I've learned in all the online classes I'd taken I decided that was the time to make those dolls. I tend to favor stump dolls, shelf sitters, and faceless dolls and knew these would be no exception.

I wanted to utilize some of the molds I had bought several years before when I was enthralled with goddess dolls. Given I never seem to have enough time for doing what I want to do right then and there my goddess dolls had sat on the back burner for several years.

Back then I decided to make some Victorian wooden dolls - some with paper-clay faces, some with paper-clay mannequin faces, some with paper faces. Their outfits were be a combination of fabric, lace, paper, creative embroidery embellishments, ribbon silk floral, beads, etc.

For their hair I utilized some of the alpaca yarn my sister, who is the owner of Rock Garden Alpacas Fiber, had given me. I had some alpaca yarn fiber from Cosmo, Zinnia, Sunflower, Ivy,and Masquerade. All was hand-spun, but some she had single plied and some she had Navajo plied.

Back in September 2014 when I was doing a little cleaning of my craft area I had found some 3/4" wood shelf sitter shapes that my husband had cut out for me several years before. I had intended to make a painted figure of some sort out of them and decided to create two witches with paper-clay faces.

I was happy with the way the shelf sitter witches turned out so I decided to make a bunch of templates of different shapes and sizes that my younger brother and husband could use for cutting the wood dolls that I wanted to make.

Since I never do anything in moderation I ended up with several templates - okay, make that lots of templates utilizing different lengths, widths, and depths of wood. It took us a long time to draw, cut and sand the wood pieces. By the time I was finished I had 41 dolls to make. I told you I never do anything in moderation!


After working on my dolls for what seemed like weeks on end I finally finished them and they are shown in the picture above.  At the time I was happy how most of them came out and unsatisfied with the way some had come out.

As with everything I do I always need to tweak them and sometimes totally revise them.  I can do this days, weeks, months, years and even decades after having created them.  My mixed media paper-clay art dolls were no exception.  For some reason I decided to take a look at them and ended up revising many of them and tweaking others a little.

Sometimes the reason for the revision or tweaking is because I had bought a new craft supply item, gotten some new graphic images, or learned a new technique that I wanted to try.  Such was the case with these dolls.

So, I spent all last week revising and tweaking them.  Not only was I really happy with the way they all came out, but hubby commented that he really liked the changes as well.  I think he was probably happy that they were done and the living room, which is where I've been crafting lately wasn't a total mess.

As any crafter knows, crafting is messy and it requires a lot of space and a lot of different supplies.  Since I'm very particular with regards to how my craft supplies are stored and organized I had containers all over the living room.  A totally organized mess in my mind.  Messy in his....haha.

I know that I've mentioned many times over the years how I craft all over the house.  In fact, there's probably more craft supplies and finished pieces in the house than anything else we might have.  I still think I need a bigger house, but hubby doesn't have the same frame of mind.  He wants to go smaller.  So, I utilize whatever space I have whether it's in the living room, dining room, family room, bedroom, garage or basement.  As is said I craft all over the house...haha.

I'm going to be blogging individually on some of the changes I made over the next few weeks and hope you stay tuned to see all the changes.  The finished dolls are in the picture at the beginning of this post and shown in the picture below.  I hope you like the revisions and tweaks I made.


Hopefully I won't revise them again. I wouldn't bet on that if I was you... haha.

Friday, February 23, 2018

"Winter Roses" Art Doll By Hally Levesque Featured In Winter Issue of Art Doll Quarterly


Last November I heard from Hally Levesque that the "Winter Roses" art doll I had won in the Hally Levesque "Romantic Rosebella" class at Artful Gathering last year was going to be featured in the winter issue of Art Doll Quarterly.

I didn't get a chance to buy a copy until recently and was thrilled to see that she was the first article and was being featured on page 6. In the article Hally describes what her design and creation process was in regards to making her and is a fascinating read.


Every time I look at her I can't believe how unbelievably beautiful she is and am thankful to Hally for creating such a remarkable art doll. I will cherish her forever.

I hope you all get a chance to read the article about 'Winter Roses" in the winter 2018 issue of Art Doll Quarterly .


Thursday, July 13, 2017

My Tassels & Tiaras: A Winged Wonders Doll Projects Artful Gathering Class - Butterfly Dolls


As you all know I love taking online arts & crafts classes. I literally could spend 24/7 just doing that.


I have been taking online classes at Artful Gathering since 2012 and have loved every one of the eleven classes I've taken.  Each year the selection gets better and better making it almost impossible to decide which class to take. So far I've taken crazy quilting, mixed media art dolls, needle felting, cloth art dolls and paper-clay art doll making classes.

I have to admit I'm a little partial to any classes being offered for doll making and have taken several of those.  Four have them have been taught by Hally Levesque who is an exceptional art doll artist and instructor who has a passion for historic, primitive, and mixed media art dolls.

Hally's classes are always filled with historical tidbits, multiple projects, and very detailed instructions on the making of each of the class projects.

The class I took in Session One this year was the 11th class I've taken at Artful Gathering and, once again, it didn't disappoint.  It was another of Hally's art doll classes and was for making 3 different kinds of 1900 - 1920 art deco or art nouveau tassel half art dolls.

Hally's classes are always filled with historical tidbits and this class was dedicated to some of the more famous women of the 1900's like Mata Hari, Lillian, Gish and Theda Vamp.

Like all the other classes I've taken my projects don't always end up looking like the finished class projects.  This class was no exception.

No matter how hard I try my dolls always seem to have a tiny Victorian slant to them. Even if they are supposed to be vamps.  What can I say - I love everything Victorian.  In this instance I gave them a Victorian type hairstyle versus and vamp hair style.

Since the class was about creating butterfly type art dolls I decided to look at real pictures of butterflies.  I saw so many beautiful pictures of butterflies with beautiful colors I couldn't decide which color I liked best so I decided to make 5 dolls instead of 3.  I know, I can never do anything in moderation.

I saw a beautiful picture of a multicolored blue dragonfly that I liked, a black and orange monarch butterfly, a blue and yellow tiger swallow butterfly, and a blue morpho teal butterfly.  One of the projects was for creating a Luna moth and I loved the lime green colors of the doll so I decided to make her as well.

I'm not just partial to everything Victorian, but when I paint I always end up sponge painting parts of it.  So, this time was no exception.  Their wings, bodices, and gloves were all sponge painted.  Here's my results:


My multi blue colored dragonfly.


My blue and yellow tiger swallow butterfly.


My black and orange monarch butterfly.


My blue morpho butterfly.


My luna moth.

Each of the dolls has a little bit of sentimentality attached to it with regards to their hair, clothes and accessories.  All have my mother's pierced earrings and most have a necklace or two of hers.

Many, many years ago my sister-in-law asked me if I could use some old lace and ric rac trims she had that she was going to throw away.  I, of course, hate to throw away sewing and craft supplies that could be useful so I said I'd take them figuring she had just a handful.  Well, a handful turned into a ton of trims which I put into two large containers which I had saved over the years.  I could never bring myself to throw them away. You never know when you're going to use something and the tassels would put many of them to use - which I did.

Each of the dolls hair is also from some of the beautiful hand dyed alpaca roving my sister gave me. She and my brother-in-law are alpaca farmers and the owners of Rock Garden Alpacas.  She sells her alpaca fiber products at her Rock Garden Alpacas Etsy store.  


The multi blue colored dragon fly is my mothers favorite royal blue color and has her gold and blue dangle pierced earrings.  Her beautiful blue and black hair is a some of my sister's hand dyed alpaca roving that I combined and twisted for a curly Victorian effect and her breastplate buttons are from an old business suit of mine.  Most of the tassel trims were from the ton of various blue colored ric rac and lace trims my sister-in-law gave me as well as other royal blue mixed media trim pieces and ribbons I had in my stash.


My sister had given me a picture of a monarch butterfly she had taken years ago. I liked the orange and black colors so I decided to make one of those.  Her black drop dangle pierced earrings came from my mother.  Her beautiful orange and black hair is a some of my sister's hand dyed alpaca roving that I combined and twisted for a curly Victorian effect and her breastplate buttons are from another old business suit of mine.   Some of the tassel trims were from the ton of ric rac and lace trims my sister-in-law gave me as well as other mixed media trim pieces I had in my stash.


The blue and yellow tiger swallow butterfly above also has my mother's gold dangle pierced earrings and one of her gold and pearl drop necklaces.  Her beautiful blue and yellow hair is a some of my sister's hand dyed alpaca roving that I combined and twisted for a curly Victorian effect.  Some of the blue and yellow tassel trims were from the ton of ric rac and lace trims my sister-in-law gave me as well as other mixed media trim pieces I had in my stash.


The blue morpho butterfly above also has my mother's pearl drop dangle pierced earrings and one of her white bead necklaces that I took apart. Her beautiful teal and blue/green hair is a some of my sister's hand dyed alpaca roving that I twisted for a curly Victorian effect.  Most of the teal and white tassel trims were from the ton of ric rac and lace trims my sister-in-law gave me as well as other teal and white mixed media trim pieces  and ribbons I had in my stash.


My mother had a white and teal drop costume jewelry necklace that I loved and wanted to use for this project and thought it would be a good addition to my luna moth. The luna moth above also has my mother's silver dangle pierced earrings.  Her beautiful lime green hair is a some of my sister's hand dyed alpaca roving that I twisted for a curly Victorian effect. Most of the tassel trims were from the ton of ric rac and lace trims my sister-in-law gave me as well as other lime green mixed media trim pieces I had in my stash.

I had a lot fun making these dolls.  It took me a long time to gather all the supplies and accessories I would need for them and also took a long time to put all the extra supplies away.  If you're a crafter you know what I mean by this.  I had craft containers organized by type of supply all over my living room and the extra supplies I didn't use had to, of course, be returned to their container.  So, as you can imagine, it took awhile.

Despite the fact that my hand still shakes when I try to paint the faces I was pleased, overall, with the way my dolls came out.

Once again, Hally's class was exceptional. She's an amazing doll artist and provides all the detailed instructions in her videos that you need to make one of her dolls.  Her video's are well thought out, easy to follow, and entertaining.   If you love dolls and get a chance to take one of her classes you won't be disappointed. I certainly haven't been.

If you'd like to learn more about Hally and her beautiful art dolls please visit her Creative  Doll Works website.