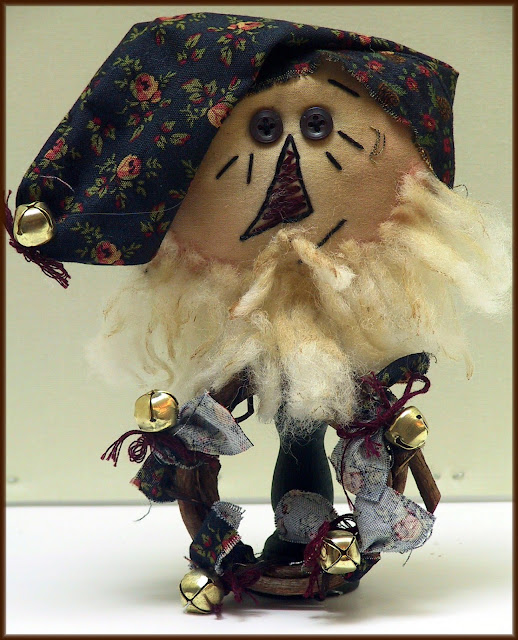
If you're a crafter like I am sometimes you have good intentions and start something only to be distracted by a supply you found, which results in you starting another project, which results in lots of "UnFinished Objects."
For crafters these are known as UFO's and most of us have multitudes of these waiting to be finished.

Such was the case with some of the supplies I bought from Alphastamps.net a couple of years ago - 2"cube Kraft boxes. I thought they might make cute paper ornaments for my Christmas tree.
I imagined cheerful cubes with Christmas scrapbook paper and Christmas sticker embellishments, so I bought six. They’ve been waiting to be created for several years now.
Back then I thought I'd create cube ornaments that I could decoupage with winter, Christmas, and woodland themed images to create adorable present ornaments.
Finally, this past year seemed to be the right time to finish this project.

I had a lot of fun making them. They were so quick and easy to do I thought you might like to know how I made mine.
Supplies Needed:
2" Paper Cube Kraft Boxes from Alphastamps.net
Scrapbook Papers - Winter Woodland Theme
Adhesive Stickers - Winter Woodland Theme
Chipboard Die Cut Stickers - Woodland Theme
Adhesive For Chipboard Images (Depending on the thickness of the chipboard you can use Avery paper glue roll on sticks, Alene’s Tacky Glue, hot glue sticks, double sided tapes, ModPodge, etc.)
Mod Podge - Matte
Brushes
Golden Light Molding Paste
Toothpicks
Cylinder Shaped Stretch Ribbon - Red, Green, Blue, and White (36" for Each Cube)
Scotch Tape
Acrylic Paint - White Metallic
Instructions:
1) Assemble the cardboard cube and apply scotch tape to hold the top lid closed.
2) Decide which scrapbook papers, stickers, and chipboard diecut stickers you want to use for each of the six sides for each of the cubes and set them aside.
3) For each cube cut six 2” by 2” squares of the scrapbook paper you have chosen for the first cube and make sure they will fit the six sides of your cube.
4) Brush ModPodge on the first side of your first cube and on the back side of the 2” by 2” scrapbook paper you have chosen for this side.
5) Press the back side of the scrapbook paper to the cube side and make sure it adheres.
6) Do the same for the remaining five 2” by 2” scrapbook squares you have chosen for this cube and adhere them to their respective side.
7) Brush ModPodge on the outside of the front side of each scrapbook square on the six sides of your cube.
8) Apply the adhesive stickers you want to use to each side and make sure it adheres.
9) Apply glue to the back of the chipboard diecut stickers you want to use and adhere it to the cube side you have chosen. Make sure it adheres firmly.

10) Once you are happy with the scrapbook paper, adhesive stickers, and chipboard diecut stickers you want on each of the sides lightly brush ModPodge over everything to seal it and then let it dry.

11) You are going to use the Golden Light Molding Paste along all sides of the cube to hold the scrapbook paper edges securely. Using a toothpick apply some of the Golden Light Molding Paste along all four sides of the top of the cube and let it dry completely (See Diagram #1).
12) Once you are sure the top has dried completely turn the cube over and apply Golden Light Molding Paste along all four sides of the bottom of the cube and let it dry completely.
13) Once you are sure the bottom has dried completely apply Golden Light Molding Paste to the four remaining sides of the middle of the cube and let dry completely.
14) Paint the white metallic paints over the dried molding paste along the edges making sure you don’t get paint on the scrapbook papers.
15) Once the metallic paint is dry apply another light layer of the ModPodge on the scrapbook papers and along the edges where you applied the molding paste.
16) Cut a 36” long piece of the ribbon and fold it in half so you have two 18” long sides.

17) Form a 4” long loop and tie a knot so each side is left with 14” See Diagram #2).

18) Position the knot in the center of the top of the cube and then tie the two sides around the cube like you would when adding ribbon to all sides of a gift box (see Diagram #3).
19) Slide the two ends of the ribbon under the knot that is at the center of the top of the cube and then tie them tightly in another knot and then in a bow.

Congratulations! Your Christmas Ornament Cube Decorations are done.
Hang them on your Christmas tree.


And, here's a close-up of one side of the other six cube ornaments I made.

I have to tell you they looked great on my tree.
I also created a free e-book for you showing how I made my Christmas Cube Ornaments.

To view and download my free e-book please CLICK HERE. You'll be brought to Google Drive where you can view my free e-book. Then just download my free .pdf e-book by clicking on the down arrow in the top center.
For more information on all my free e-patterns, e-printables and e-books please CLICK HERE.
Please respect My Terms of Use: All patterns, e-patterns, printables, e-printables, e-books, graphics, tutorials, how-to's, articles and other e-products © 2004-2023 Linda Walsh Originals-Designs by Linda Walsh. All rights reserved. Commercial selling or reselling by any means prohibited without the written consent of Linda Walsh.
Patterns, e-patterns, printables, e-printables, e-books, graphics, tutorials, how-to's, articles and other e-products are for personal use only. You may not modify, photocopy, download, upload, post, transmit, display, perform, publish, license, reprint, create derivative works from, mass duplicate, re-sell, digitize, and reproduce in any other form (print, digital or electric) or commercially apply, embed, share, Email, or redistribution in any other means. Use of any of the above is prohibited without the written permission of Linda Walsh.
Patterns, e-patterns, printables, e-printables, e-books, graphics, tutorials, how-to's, articles and other e-products are for personal use only. You may not modify, photocopy, download, upload, post, transmit, display, perform, publish, license, reprint, create derivative works from, mass duplicate, re-sell, digitize, and reproduce in any other form (print, digital or electric) or commercially apply, embed, share, Email, or redistribution in any other means. Use of any of the above is prohibited without the written permission of Linda Walsh.
However, you may link to my website(s)/blog(s) and the individual page(s)/blog post(s) (including 1 picture) but do not copy, reprint or duplicate my website(s)/blog(s) or individual page(s)/post(s ) without my permission.
Items made from Linda Walsh Originals E-Patterns and E-Books are intended for personal use for fun or small scale personal and business profit as long as you credit us with the design. Large scale commercial use (i.e. mass production) of items made from Linda Walsh Originals E-Patterns are by permission only.
Please see my Terms and Conditions for additional information.
Copyright © 2004 - 2023 - All Rights Reserved - Written By Linda Walsh of Linda Walsh Originals and Linda's Blog. Linda is a doll maker and doll pattern designer.