Showing posts with label craft kits. Show all posts

Thursday, May 21, 2020

I've Got To Try Custom On Demand Paint By Numbers Kits


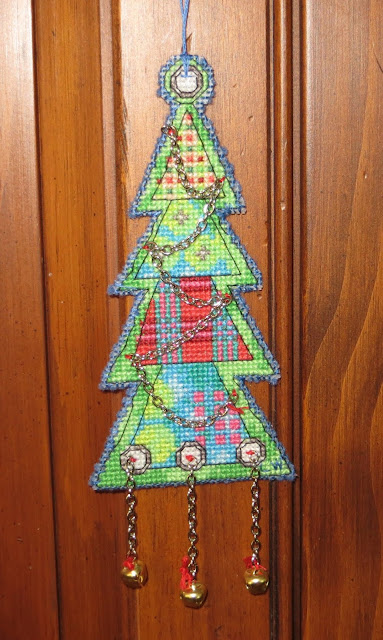
It's definitely not time for Christmas decorations crafting yet, so why am I showing the Christmas ornaments in the collage above?

Well, something I saw the other day brought me back to over fifty-five years ago and something I used to love to do.  It was called "paint by number" and I think I created my first masterpiece, if you can call it that, when I was 8 or so.  I think it was a kit from Craft Works.

I don't remember what the picture was - probably an animal or landscape.  What I do remember was I loved it even though I wasn't very good at it.  Of course, my parents thought it was great or so they said.

I'm sure, like all parents, they were trying to encourage me to continue trying.  "If at first you don't succeed, try try again! Right?"

So, what did I see that stirred this memory?  Well, it was an ad for a paint by number website that sells paint by number kits.

But, what really intrigued me was they offered an on demand paint by number kit.  Basically, you upload or send them one of your favorite pictures and they create a kit for you which includes the acrylic paints, numbered linen canvas, and brushes to create your paint by number picture.  How fun would that be?

If I can remember correctly, which for a senior citizen is questionable at best, I can remember attempting many, many paint by numbers kits over the years.   Some were on canvas, some on black velvet, and some on wood like the Christmas ornaments shown in the picture at the beginning of this post.  I think I completed those in the late 1960's or early 1970's.  As you can see I still wasn't very good at it, but I kept trying.

Some kits were easy and some were very difficult.  To be honest I'd have to admit I gave up on some of them.  They were definitely way beyond my skill level but, at least I tried them.  I didn't think I could do some of the them, but, you never know, I could have pleasantly surprised myself.

Well, given by love of history and research, of course, I had to find out more about the origins of paint by number and recent resurgence.  Here's what I found out:

I went to Wikipedia first - https://en.wikipedia.org/wiki/Paint_by_number

According to Wikipedia.com: Paint by number or painting by numbers are kits having a board on which light markings to indicate areas to paint, and each area has a number and a corresponding numbered paint to use. The kits come with little compartmentalized boxes where the numbered color pigments are stored. The users are encouraged to wash the paintbrush every time a new numbered color is being used. The kits were invented, developed and marketed in 1950 by Max S. Klein, an engineer and owner of the Palmer Paint Company of Detroit, Michigan, and Dan Robbins, a commercial artist.

Also, according to Wikipedia:

The first patent for the paint by number technique was filed in 1923 and in 1951 the Palmer Show Card Paint Company asked Dan Robbins to help them create the CraftMaster paint by number kits.  They subsequently sold 12 million kits.

In the 1960's the first paint by number images of Mars came out and in 1993 Jacquelyn Schiffman, following the death of her father, Max Klein, donated the Palmer Paint Co. paint by number archives to the Smithsonian Museum of American History.

Paint By Numbers Museum

In 2008 a private collector decided to create a museum of the largest archive of paint by number works called, the Paint By Numbers Museum.

Also, according to Wikipedia:  In May 2011, Dan Robbins and Palmer Paint Products, Inc., together developed and brought to market a new 60th-anniversary paint by number set.[7] This collectors' set was created in memory of the survivors and those who had lost their lives on September 11, 2001, and depicts the Twin Towers standing in spirit across the Manhattan skyline.

Since then it seems paint by number has become quite the rage for reducing stress and relaxation therapy.  There are classes everywhere, arts & crafts websites and museums selling historic art paint by numbers kits, and clubs on social media dedicated to this.

YouTube currently has hundreds of paint by number video's from how-to's to just watching someone complete their paint by number.  I haven't watched any of them yet.  I might find the how-to's interesting if they offered any tips for mixed media techniques but I'm not sure I could just watch someone complete a typical paint by number for hours.

I always find it amusing that the past always seems to become the present and something from decades ago is all the rage now.  I often wonder what our ancestors would think of all of this.  Hopefully, they'd be amused, too.

As far as I'm concerned the more the merrier.  I'd like to try a paint by number of a Monet landscape some time but am really intrigued by the print on demand paint by number kit as I can use a favorite photograph of my own or design of my own.

So, of course, I also had to do a little research to see where on demand paint by number kits were being created and sold.  And, to my surprise there were quite a few websites, which are as follows:

Artsool.com - https://www.artsool.com/products/personality-photo-customized-diy-painting-by-numbers

Canvasbynumbers.com - https://canvasbynumbers.com/products/custom-paint-by-numbers-kit

Canvastly.com - https://www.canvastly.com/products/custom-print-paint-by-numbers

Craft-ease.com - https://www.craft-ease.com/products/craft-ease-custom-paint-by-numbers

Masterpiecebynumbers.com - https://usa.masterpiecebynumbers.com/collections/custom-painting

Mypaintbynumbers.com - https://mypaintbynumbers.com/products/custom-paint-by-number-kit

Mypaintlab - https://www.paint-by-numbers.store/customization

Paintillo - https://paintillio.com/

Paintnumbers.shop - https://paintnumbers.shop/products/custom-paint-by-number-kits-for-adults?gclid=EAIaIQobChMI5Nvrp5HF6QIV4oNaBR07ngZYEAMYAiAAEgL-x_D_BwE

Paintingscart.com - https://paintingscart.com/products/custom-diy-paint-by-number-with-your-own-photo/

Uniquepaintbynumbers.com - https://uniquepaintbynumbers.com/products/paint-your-own-photo?variant=31921547346008


There is even something that is similar to paint by number but a combination of painting and coloring by number.   Canvasondemand.com - https://www.canvasondemand.com/collections/coloring-canvas/

The good thing about paint by number, which I think is why it appeals to so many people, is you don't have to be an artist to try it.  After all, like my parents told me - if at first you don't succeed try try again.  With all the paint by number kits available now you'll be honing your skills for a very long time.


Saturday, August 24, 2019

My Dimensions "Jingle Bell Ornaments" Cross-Stitch Kit


Now I know this won't come as any surprise to any of you but I was immediately drawn to the "joy" ornament in the "Jingle Bell Ornaments" kit by Dimensions.  As you know, I just can't resist any ornament with my Mom's name one it.  But, when I looked at the "Jingle Bell Ornaments" kit by Dimensions further I thought how pretty they were and how wonderful they would look on my pencil Christmas tree.

They looked pretty simple and easy to me.  Based on previous experience I knew they would take a while to do due to the black highlighting and due to the embellishments so I was prepared for that.


The black floss highlighting for each ornament transforms them from a pretty ornament to a beautiful ornament.  The highlighting really makes them stand-out and is well worth the extra time it takes to finish each ornament.  It's quite amazing to see them in person.  What adds to the length of time is the black highlighting is done one stitch at a time.

The "Jingle Bell Ornaments" ornament kit contained the presorted thread, #14 plastic canvas, linked chain, jingle bells, needle and instructions.  The pattern uses full counted cross-stitch and outline stitching for emphasis and depth.

I have worked with the #14 plastic canvas before without a problem. Generally, it is flexible enough to just hold it in your hands but also rigid enough to allow you to cross-stitch it without any problem. However, I found with this kit and the size of the ornaments, in particular, that the 14-count plastic canvas was just too big to hold in my hands and cross-stitch at the same time.  I had to cut the canvas.


The chart was 13 3/4" by 10 1/4" and had five ornaments of different sizes. The intent was to cross-stitch the plastic canvas from the left to the right.   However, I don't like doing that as you have to cut your threads when you cut the ornaments out at the end and then you have to glue the loose ends to the back of the canvas.  So, I decided to cut the plastic canvas into five pieces beforehand as it would make it easier to cross-stitch each of the ornaments and there would be no messy and time consuming gluing of the loose thread ends.

Unlike the previous ornaments I had done which were the same size each of these ornaments was a different size.  So, I had to count along the plastic canvas and mark where the ornament sides were before I could cut the plastic canvas.

The pattern came with starting, stitching and finishing instructions as well as a sample of the stitches required and a color chart with color coded symbols.  The symbols on the keys and chart were basically easy to read and follow.

As was the case with previous Dimensions kits the thread sorter was poorly designed. The embroidery threads were glued to two foam backed strips of cardboard that had a picture of the color of the thread and it's number. In order to get to the individual threads you had to separate threads from the foam back. Very quickly the threads separated from their section and then you no longer knew what the thread number was to tie to your symbols & legends.

Instead of designing my own thread sorter this time I decided to punch a whole at the top of each color on the thread sorter and cut one strand of 6 threads for that color as needed, tying the extra cut threads to the hole I had punched above that color.  That way I wouldn't have a problem identifying my threads with the chart.   Just below the hole I added the respective color coded cross-stitch symbol. This kit could be much improved if a different thread sorter with respective #'s and color coded symbols was provided.

Short of changing the thread sorter all together to make things even easier for the user the color symbol should at the very least have been shown on the thread sorter strip of cardboard as well. That way you would only need to use the thread sorter strip of cardboard to follow your chart.


The instructions called for leaving certain sections of the plastic canvas bare in the areas where the hanger would be places or where you were to insert the chain links.  I don't like leaving any area of the plastic canvas bare as I think it makes the ornament look unfinished so I decided to cross-stitch those sections with 2 strands of the white floss. 

Instead of following the directions for finishing these ornaments with the hangers, jingle bells, and chain links, which I found very confusing, I opted instead to tack the jingle bells and chain links to the front of the ornaments with the floss and to finish the backs with felt.


Once I had finished cross-stitching my ornaments I cut the plastic canvas close to the sides of the ornaments according to the finishing instructions.  I don't like leaving the ornaments with the back threads showing so I always opt to finish the back of my ornaments with felt.  This time I decided to use blue felt.

I rubbed Glue Stic on the back of my ornaments and then glued a rectangle piece of blue felt to the back.  Once the felt was glued on I cut the blue felt in the same shape as the ornament and then stitched the plastic canvas to the blue felt along the sides of each ornament with two strands of blue embroidery floss. Instead of following the instructions for creating cording  I created a hanger for the top of each ornament that didn't have a chain hanger with two strands of the blue embroidery floss.


I was happy with the way my "Jingle Bell Ornaments" came out and know they're going to look wonderful on my pencil tree.


Friday, June 14, 2019

My "Snowman and Friends" Dimensions Gold Petites Collection Cross-Stitch Picture


It seems a little crazy at the start of the summer to be posting about a winter cross-stitch picture I just finished.  You might wonder why I didn't post this in the winter.   Well, there's a really good reason for that.  I started this back on the Fall of 2018 and finally just finished it in June.  Everyone who cross-stitches knows that WIP sometimes take months or years to complete....lol.


I was looking for more cross-stitch winter seasonal pictures to display during the winter season and was drawn to the picture in the Dimensions Gold Collection Petites "Snowman & Friends" picture when I saw it.  So, I decided to buy the kit and add it to my other winter cross-stitch decorations on my fireplace mantle.

Like the other Dimensions Gold Collection Petites kits I had bought the kit included the pattern, pre-sorted cotton thread, 18 count white cotton Aida, needle and instructions.

The "Snowman & Friends" pattern uses full counted cross-stitch, french knots and outline stitching for emphasis and depth and this detailing really makes the picture stand out. It also varies the number of threads used with the various stitches to add to the depth emphasis. The design of this cross-stitch gives the finished picture a 3 dimensional aspect with the cross stitch, french knots and outlining being used for artistic effect.


Unlike other cross-stitch pictures I have done this one left large areas of the picture unfinished and just showing the white Aida cloth, like the picture shown above.  It also did not square the picture to the border.


However, I don't like leaving large sections of the cross-stitch picture unfinished so I opted to finish mine, as shown in the picture above.

Unlike other cross-stitch pictures I've completed the jagged edges to the unfinished areas and border required me to improvise and fill in the cross-stitch picture so I had a 5" by 7" rectangle border to my picture.  So,  I utilized the extra floss from the kit and added the colors and images that I envisioned the picture would have if it had been completely finished.


Not only did I decide to totally finish the picture around the edges but also decided to embellish it in a few other areas of the white snow to create more of a 3-dimensional effect.  I used 3-strands of the white floss and created several areas of french knots to create the effect of snow piles.

I also added more blue back stitching in the snow areas to highlight the depth of the snow piles and did the same in sections of the evergreen tree.

For the areas around the border that I filled in and for the large sections of white snow I used 2 strands of the respective floss color I was using in a half cross-stitch pattern.


I decided to use an 9" round embroidery frame to stitch this embroidery.  The white Aida wasn't big enough to fit into the frame so I sewed 4 muslin strips to the four sides of the Aida to keep the Aida tight and stretched so I could easily cross-stitch this design.

The pattern came with starting and working order instructions as well as samples of the various stitches required and instructions for creating them, color coded keys (with code #'s, lengths, color names, and cross-stitch symbols) and a chart with color coded symbols. The colors and symbols on the keys and chart were easy to read and follow.

While I was very pleased with the end results of this design there are some things in the kit and in the instructions that can be improved upon.

Unlike the problem I had with the size and readability of some of the other cross-stitch charts in the kits I had bought this color chart was large enough and easy to follow.

As was the case with previous Dimensions kits the thread sorter was poorly designed. The embroidery threads were glued to foam backed strips of cardboard that had a picture of the color of the thread and it's number. In order to get to the threads you had to separate the foam back from the cardboard strip. Very quickly the threads separated from their section and then you no longer knew what the thread number was to tie to your symbols & legends.

As I have done with other cross-stitch kits I've completed I had to design my own thread color sorter and symbol key. I took a piece of thin cardboard and cut a long rectangular piece out to use as a thread sorter. I then punched holes in my cardboard strip in which to tie each of the different colors. Just below the hole I wrote the DMC floss # and just above the hole I added the respective color coded cross-stitch symbol. I then inserted the floss threads that went with that # and symbol through the hole and tied them in a loose knot. This kit could be much improved if different thread sorter with respective #'s and color coded symbols was provided.

Short of changing the thread sorter all together to make things even easier for the user the color symbol should at the very least have been shown on the thread sorter strip of cardboard as well. That way you would only need to use the thread sorter strip of cardboard to follow your chart.

The pattern included instructions for finishing the piece. I didn't need these as I knew what type of picture frame I was going to use, the  mat I was going to use and the way in which I wanted to finish the picture.

I tend to favor adhesive mounting boards for the cross-stitch pictures I'm inserting into a finished picture frame. I had decided to use an 8" by 10" wood frame I had bought that had a white and gold double depth mat with a 5" by 7" opening.   Since the frame I was using didn't have enough depth to the inside of the frame I knew I wouldn't be able to use a 1/4" foam adhesive mounting board for this picture. 


I also wouldn't be able to mount this on an 8" by 10" adhesive board either as I didn't have enough depth to insert my finished mounted cross-stitch picture and then insert the back of the picture frame.  There just wasn't enough depth to then secure the back of the frame with the metal clips.

So, I opted instead to adhere my cross-stitch to a 5" by 7" Pres-On self-stick thin adhesive mounting board and secure my picture around the 5" by 7" mounting board.  This would allow for just enough depth along the side in which to secure the back of the frame with the metal clips.

When I had finished securing my cross-stitch around the 5" by 7" board I centered the picture within the white and gold mat and then secured it to the back of the white mat with masking tape.

When the picture was finished I was very happy with the way it turned out. It would be perfect for the winter season for my fireplace mantle.  I hope you like it too.

Monday, December 10, 2018

"Stained Glass" Ornaments Kit by Design Works Crafts


When I first looked at the "Stained Glass" ornaments kit by Design Works Crafts I thought how pretty and how wonderful they would look on my pencil Christmas tree. They looked pretty simple and easy to me.  Turns out looks can be deceptive.   It took me much longer than I first thought to finish the six ornaments in this kit.


What I didn't know before I bought the kit was that there was a lot of black floss highlighting for each ornament that transformed them from a pretty ornament to a beautiful ornament.  The highlighting really makes them stand-out and is well worth the extra time it takes to finish each ornament.  It's quite amazing to see them in person.  What added to the length of time was the black highlighting is done one stitch at a time.

The "Stained Glass" ornament kit contained the color cotton floss, #14 plastic canvas, needle and instructions.  The pattern uses full counted cross-stitch and outline stitching for emphasis and depth.


This is the first time I have worked with the #14 plastic canvas and I have to tell you it was wonderful.  It was flexible enough to just hold it in your hands but also rigid enough to allow you to cross-stitch it without any problem.


The chart was 11 1/2" by 17" and had four of the ornaments vertically aligned in a row along the top of the chart with two of the ornaments horizontally laid in a row along the bottom.  The intent was to cross-stitch the plastic canvas in the same manner.  However, I decided to cut the plastic canvas into six pieces beforehand as it would make it easier to cross-stitch each of the ornaments.


The pattern came with starting, stitching and finishing instructions as well as a sample of the two stitches required and a black and white chart with black and white coded symbols.  The symbols on the keys and chart were basically easy to read and follow but, for some reason, I kept confusing two of the triangle symbols every time I looked at the black and white chart.  If the black and white chart were just a little bigger or were actually color coded I think this could have been avoided.


I did have a few problems with the embroidery floss contained within the kit.  Unfortunately there wasn't enough black, light red, and green embroidery floss contained within the kit so I had to use some from my stash.

Also, the floss color key chart had the number of floss strands included within the kit for each color floss but 8 of colors were different than the actual numbers of floss strands contained within the kit.  For all 8 of these colors there was more floss strands than the key indicated.


I had no problem cross-stitching the "Stained Glass" ornaments and then cutting the plastic canvas close to the sides of the ornaments according to the finishing instructions.  I didn't like leaving the ornaments with the back threads showing so I decided to finish the back of my ornaments with white felt.

I rubbed Glue Stic on the back of my ornaments and then glued a rectangle piece of white felt to the back.  Once the felt was glued on I cut the white felt in the same shape as the ornament and then stitched the plastic canvas to the white felt along the sides of each ornament with two strands of white embroidery floss. I created a hanger for the top of each ornament with two strands of the white embroidery floss.


After I was done with all the ornaments I hung them on my pencil tree.  They all look beautiful there.


I was thrilled with the way my "Stained Glass" ornaments turned out and hope you like them too.


Friday, December 07, 2018

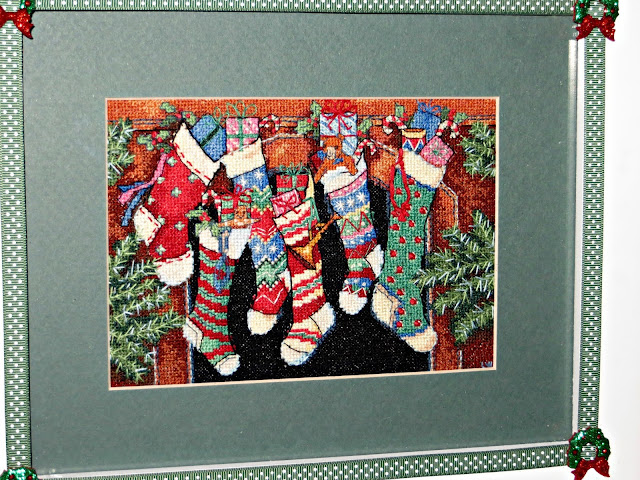
My "The Stockings Were Hung..." Cross-Stitch Picture


I don't think I've ever found a cross-stitch kit that I haven't loved - especially those regarding the Christmas holiday season.  I was drawn to the colorful fireplace stocking display picture in the Dimensions Gold Collection "The Stockings Were Hung...." the minute I saw it.  So, I decided to buy the kit and add it to my other Christmas cross-stitch decorations on my fireplace mantle.

Like the other Dimensions Gold Collection Petites kits I had bought the kit included the pattern, pre-sorted cotton thread, 18 count white cotton Aida, needle and instructions.

The "The Stockings Were Hung..." pattern uses full counted cross-stitch, french knots and outline stitching for emphasis and depth and this detailing really makes the picture stand out. It also varies the number of threads used with the various stitches to add to the depth emphasis. The design of this cross-stitch gives the finished picture a 3 dimensional aspect with the cross stitch, french knots and outlining being used for artistic effect.


The pattern came with starting and working order instructions as well as samples of the various stitches required and instructions for creating them, color coded keys (with code #'s, lengths, color names, and cross-stitch symbols) and a chart with color coded symbols. The colors and symbols on the keys and chart were easy to read and follow.


While I was very pleased with the end results of this design there are some things in the kit and in the instructions that can be improved upon.

Unlike the problem I had with the size and readability of some of the other cross-stitch charts in the kits I had bought this color chart was large enough and easy to follow.

As was the case with previous Dimensions kits the thread sorter was poorly designed. The embroidery threads were glued to two foam backed 6" by 1 1/4" strips of cardboard that had a picture of the color of the thread and it's number. In order to get to the threads you had to separate the foam back from the cardboard strip. Very quickly the threads separated from their section and then you no longer knew what the thread number was to tie to your symbols & legends.

As I have done with other cross-stitch kits I've completed I had to design my own thread color sorter and symbol key. I took a piece of thin cardboard and cut a long rectangular piece out to use as a thread sorter. I then punched holes in my cardboard strip in which to tie each of the different colors. Just below the hole I wrote the DMC floss # and just above the hole I added the respective color coded cross-stitch symbol. I then inserted the floss threads that went with that # and symbol through the hole and tied them in a loose knot. This kit could be much improved if different thread sorter with respective #'s and color coded symbols was provided.

Short of changing the thread sorter all together to make things even easier for the user the color symbol should at the very least have been shown on the thread sorter strip of cardboard as well. That way you would only need to use the thread sorter strip of cardboard to follow your chart.

I decided to use an 9" round embroidery frame to stitch this embroidery.  The white Aida wasn't big enough to fit into the frame so I sewed 4 muslin strips to the four sides of the Aida to keep the Aida tight and stretched so I could easily cross-stitch this design.

The kit did not include enough of the dark green #16880 embroidery floss.  I ran out before the pine needles were finished and had to use some of the embroidery floss I had from my stash.  I almost ran out of the rust #12338 embroidery floss, too, but was able to finish the area of the picture utilizing this color without having to dig into my stash.

The key split the strands of several of the colors into 1 strand for the highlighting.  I opted for using two strands of the highlighting colors for the pine needles, outside of the stockings, and fireplace sides as I thought they would make the picture stand out even more in the frame I was using.


The pattern included instructions for finishing the piece. I didn't need these as I knew what type of picture frame I was going to use, the  mat I was going to use and the way in which I wanted to finish the picture.

I tend to favor 1/4" foam backed adhesive mounting boards for the cross-stitch pictures I'm inserting into a finished picture frame. I had decided to use a 8" by 10" frame I had bought that had a white double depth mat with a 5" by 7" opening. I had already decided to remove the double depth mat and adhere the cross-stitch to a 1/4" foam backed 5" by 7" adhesive mounting board.  If I tried to use the double depth mat I wouldn't have been able to close the back of the frame as it wouldn't allow the cross-stitch picture on the 1/4" foam backed adhesive mounting board to be inserted into the slot on the back of the frame. So, instead, I opted to utilize a single 8" by 10" mat with a 5" by 7" opening which would provide enough room to insert the picture backing into the slots and allow for securing it to the frame.

I had chosen a white frame with green matting to finish it which I think really brought out the beautiful colors of the fireplace stockings scene.

I centered my cross-stitch picture on the 5" by 7" adhesive foam board and trimmed the excess white Aida cloth by 1/4" to 1/2" around.  The trimming allowed for me to tape the sides of the Aida cloth with masking tape to the back of the mat board I was using while providing enough room for the double folded corners to fit within the depth of the frame.

You can also finish the back of the cross-stitch by taping the center of each side with masking tape to the cardboard and then sewing four mitered corners into the Aida cloth so the picture is taunt to the cardboard.

Last year I had bought some decorative adhesive ribbons and hadn't had a chance to use them as of yet.  When looking at the white frame and the colorful stockings picture I thought one of the tapes I had bought would be perfect to decorate the four sides of this frame and really add to the holiday cheeriness of this picture.  So I cut four strips of the tape and adhered them to the frame.

I had also bought some mixed media miniature Christmas wreath ornaments last year and decided to utilize them at the four corners of the tape.  They came with adhesive backing so they were easy to adhere to the corners.

This picture took longer than usual to stitch as there were a lot of color changes within the stockings themselves and a lot of highlighting stitches, but was well worth the extra time it took to create it.

When the picture was finished I was very happy with the way it turned out. It would be perfect for the Christmas holiday season.  I hope you like it too.


Friday, November 09, 2018

My "Hanging Around" Mill Hill #MH14-1306 Cross-Stitch Picture


As you know I love to cross-stitch and I love cross-stitching kits with the word "Joy" in them due to the fact it was my beloved mother's name.    So, when I saw the "Hanging Around" kit I knew I would buy it and make it.

The Hanging Around #MH14-1306  pattern uses full cross-stitch and straight stitch highlighting as well as beads of various sizes for emphasis and depth. The Mill Hill patterns usually call for certain areas of the perforated paper to be left untouched like the background or border. In this case they were leaving sections of the brown perforated paper border untouched.

In embroidering the cross-stitch I decided to once again utilize the rectangular wood frame jig that my darling husband built for me that I could tape the edges of my perforated paper to. The wood frame jig is a rectangular embroidery hoop of sorts, but without bending the perforated  paper. He had made it out of 1/2" x 1" pine wood strips with an adjustable center strip that I used for this 5.25 x 5.25 square design.

I had learned from previous mistakes that I needed to draw diagonal lines to locate the exact center of the perforated paper as in previous perforated paper cross-stitch picture I have done the picture was slightly off center by a few holes which caused a problem with inserting the needles in the holes along one of the edges of my frame. So, I lightly drew a diagonal line across each corner with a pencil to get the center point of the perforated paper.

A lot of the cross-stitch 5.25" by 5.25" pictures I have made were finished in small 6 1/2" by 6 1/2" shadowbox frames with 5" by 5" openings that I had gotten at Michaels when they went on sale one year.  I used up all the shadowbox frames I had gotten that year and have been looking for them ever since and haven't found them again.

So, I decided to buy some 8" by 8" hand painted wood frames that Mill Hill created for their cross-stitch pictures.  This frame is bare bones.  There's no glass or plastic cover and there's nothing on the back to hold the picture into the frame.  They do, however, provide a thin 6" by 6" cardboard back and wood dowel for inserting in the holes in the back to allow for the frame to stand on it's own.  Of course, if you're going to hang this on the wall you'd just add a picture hanger to the back.

The directions did not include any instruction for finishing the back.  I decided to finish mine with 1/4" thick self sticking art needle-craft mounting foam.  I used an 8" by 10" by Pres-On sheet that I cut 6" by 6"with an X-acto knife to fit my picture.  Since the depth of the back of the frame for inserting the picture is 1/4" deep the 1/4" foam was a perfect fit for inserting it as well as the cardboard backing that came with the frame.

The pattern called for a red colored wooden frame. I  tested it with a red frame and a green frame and decided to go with the red wood frame.

After adhering my cross-stitch picture to the 6" by 6" adhesive foam board that I bought I inserted it into the back of the frame and then inserted the 6" by 6" cardboard that came with the frame over it.  I taped the back of the cardboard with masking tape to hold it.

The wood frame is 8" by 8" so to totally finish the back I cut a piece of thick decorative paper 8" by 8" to entirely cover the back.  I rubbed purple color disappearing glue stick all over the back and then pasted my 8" by 8" decorative paper sheet on the back.  I signed by name and dated it and was done with finishing the back.  I used a pencil to stab the decorative paper I had glued to the back so I could insert the dowel into it so the picture would stand on it's own.


The pattern also called for the border of the perforated paper to be left untouched like the picture shown above. However, I don't like seeing the perforated sections of the paper for the border as I think it makes the cross-stitch picture look unfinished and opted instead to finish the border with white embroidery floss sewn as a half cross-stitch using two strands of the floss.

The pattern had a green decorative line border around the picture with the area between the border and the frame left untouched and showing the brown perforated paper.  I decided to finish this with fours strands of the white DMC embroidery floss sewn in a half cross-stitch.


Sometimes you make mistakes while cross-stitching which, when caught quickly, can be ripped out and re-done.  I have that happen many, many times, as I'm sure you all have as well.  This time I made a mistake with the tree ornament beads and confused two of the symbols.  Instead of using the grasshopper beads I used the rainbow beads in error.  The rainbow beads were supposed to be used in the Santa boots.  I didn't want to rip out all the rainbow beads I used on the tree and decided to leave them alone and put some of my own black seed beads on the boots instead.  They both look fine so all was well.

The pattern only called for outlining parts of the tree the ornaments were hanging on.  I thought the ornaments could use some outline highlighting to really make them stand.  So I added the following:

1)  Two strands of blue floss sewn as a back-stitch along along the sides of the blue square package ornament and blue light.
2) Two strands of gold floss sewn as a back-stitch along along the sides gold and purple ornament and gold light.
3) Two strands of dark green floss sewn as a back-stitch along the sides of the tree ornament trees to add depth and dimension.
4) Two strands of the red floss sewn as a back-stitch along along the sides of the Santa suit.


While the end results of this design were wonderful some things in the kit and in the instructions could be improved upon so I'd like to offer the following constructive suggestions:

The cross-stitch chart was in black and white as was the floss color code and symbol key. Both were easy to read and very clear. While I had no problem with the chart and keys I did have a problem with the way the DMC floss was presented. All of the floss was tied together in one big knot so you had to separate the floss pieces yourself, sort them, and try to interpret which color belonged to which floss # and symbol key on the color chart.

If you only have a few colors to deal with this isn't a problem. However, if you have several different colors to choose from that are close in color then interpreting the chart can be tricky. You may assign the wrong color to the wrong symbol if the colors are too closely aligned. The key code chart should have contained the number of strands that were included in the kit so you would know how many strands you had for the different floss colors.

As I have done with other cross-stitch kits I've completed I had to design my own thread color sorter and symbol key. I took a piece of thin cardboard and cut a 1" x 12" long rectangular piece out to use as a thread sorter. I then punched holes in my cardboard strip in which to tie each of the different colors. Just above the hole I wrote the DMC floss # and just below the hole I added the respective cross-stitch symbol. I then inserted the floss threads that went with that # and symbol through the hole and tied them in a loose knot. This kit could be much improved if a thread sorter with respective #'s and symbols was provided.

The beads are so very easy to lose so I'm always happy to see that more than enough beads have been included within the kits that I've bought.  I usually pour the beads into a small cardboard box that I can easily use to obtain them.  However, the box is lightweight and, inevitably, I end up spilling the beads all over the place.  This time I finally solved that problem with refrigerator magnets.

I have a small rectangular metal board that I use in my lap for holding the cross-stitch picture while I'm working on it.  Small magnet strips hold the paper picture in place to the metal board.  I usually put my little cardboard box on that in my lap while doing the beading and thought I could use some small refrigerator magnets to hold the box to the metal board so I couldn't inadvertently spill the beads.  Worked like a charm.  Problem solved.  Yippee!

The beads were contained within two small ziploc bags which was fine. The chart had footnote symbols to help distinguish which beads were within which bag.

My results with the totally finished background, border and frame is shown below:


Despite the relatively small issues I had encountered with the kit I was happy with the way my "Hanging Around"  picture turned out.  It's going to look great with my other cross-stitch pictures at Christmas.

Tuesday, October 30, 2018

My "Book Seller" Mill Hill #MH14-2305 Winter Cross-Stitch Kit


Of all the cross-stitch pictures I have done I don't have a lot of winter seasonal pictures.  I wanted to change that for my winter season decorations on my fireplace mantels.  So, when I saw the Book Seller Mill Hill #MH14-2305 cross-stitch I knew I would buy it.  Not only does it suit my winter home decorating needs but it's about books and a bookstore, which I also love.

The Book Seller Mill Hill #MH14-2305 pattern uses full cross-stitch and straight stitch highlighting as well as beads of various sizes for emphasis and depth. The Mill Hill patterns usually call for certain areas of the perforated paper to be left untouched like the background or border. In this case they were leaving sections of the brown perforated paper border untouched.

In embroidering the cross-stitch I decided to once again utilize the rectangular wood frame jig that my darling husband built for me that I could tape the edges of my perforated paper to. The wood frame jig is a rectangular embroidery hoop of sorts, but without bending the perforated  paper. He had made it out of 1/2" x 1" pine wood strips with an adjustable center strip that I used for this 5.25 x 5.25 square design.

I had learned from previous mistakes that I needed to draw diagonal lines to locate the exact center of the perforated paper as in previous perforated paper cross-stitch picture I have done the picture was slightly off center by a few holes which caused a problem with inserting the needles in the holes along one of the edges of my frame. So, I lightly drew a diagonal line across each corner with a pencil to get the center point of the perforated paper.

A lot of the cross-stitch 5.25" by 5.25" pictures I have made were finished in small 6 1/2" by 6 1/2" shadowbox frames with 5" by 5" openings that I had gotten at Michaels when they went on sale one year.  I used up all the shadowbox frames I had gotten previously and have been looking for them ever since and hadn't been able to find that size again.

I did, however, find some 7" x 7" by 1 1/2" shadow  box frames with a 5 1/2" x 5 1/2" opening at Michaels last year and bought a few white ones and black ones when they were on sale.  I was hoping to use one of the white ones with this project.

The directions did not include any instruction for finishing the back.  I decided to finish mine with thin adhesive press-board paper.  I used an 8" by 10" Pres-On sheet that I cut 6" by 6"with kitchen scissors to fit my picture.  The shadow box came with a padded velvet sheet glued to the rigid back of the shadow box frame which was about 1/4" thick.  My cross-stitch picture glued to the thin adhesive press-board paper was about 1/8" thick so I knew this would be a good fit once I removed the black velvet padding fabric that had been glued to the rigid back of the shadowbox.

After adhering my cross-stitch picture to the 6" by 6" thin adhesive press-board paper I inserted it into the back of the frame and then inserted the 6" by 6" rigid back that came with the frame over it. The shadow box frame came with 8 metal clips to hold the rigid back inside the frame which I secured.  The press-board fit perfectly and was the right depth for the shadow box frame.

The pattern called for a green colored wooden frame and for the border of the perforated paper to be left untouched like the picture shown below:


I don't like seeing the perforated sections of the paper within the picture and for the border as I think it makes the cross-stitch picture look unfinished and opted instead to finish the inside of the picture and border with ecru colored DMC embroidery floss sewn as a half cross-stitch using 2 strands of the floss.

I also decided to add a border line around the picture for emphasis using 2 strands of the green floss sewn in a back stitch.


The pattern called for some outlining.  Given I was putting this in a shadowbox I thought certain sections of the picture would benefit from some additional outlining so I decided to add more definition as follows:

1)  The pattern did not call for certain sides of some of the windows to be outlined.  I opted to outline all sides of all the windows (inside and outside) instead using two strands of the green floss.
2)  The pattern did not call for any outlining around the house or Victorian dormer.   I opted to back-stitch outline around all sides of the house and Victorian dormer using two strands of the dark green floss.
3)  The pattern did not call for any outlining on the book seller sign.  I opted to use two strands of the green floss and back-stitch outline along all of the inside and outside of the sign.
4)  The pattern did not call for any outlining on book seller sign.  I opted to use two strands of the brown floss and back-stitch outlined along all sides of the tree and branches.
5)  The pattern did not call for any of the roof's to be outlined.  I opted to outline all the roof's instead using two strands of the green floss.
6)  The pattern did not call for any outlining definition around the bark trees and branches.  I thought they needed more emphasis so I opted to use two strands of the brown floss and back-stitch outlined the sides of all the bark trees and branches.
7)  The pattern did not call for any outlining definition around the evergreen tree.  I thought the evergreen tree needed more emphasis so I opted to use two strands of the green floss and back-stitch outlined several sections of the evergreen tree branches.
8)  The pattern did not call for any outlining definition around decorative tree containers.  I opted to use two strands of the blue floss and back-stitch outlined around the containers.


While the end results of this design were wonderful some things in the kit and in the instructions could be improved upon so I'd like to offer the following constructive suggestions:

The cross-stitch chart was in black and white as was the floss color code and symbol key. Both were easy to read and very clear. While I had no problem with the chart and keys I did have a problem with the way the DMC floss was presented. All of the floss was tied together in one big knot so you had to separate the floss pieces yourself, sort them, and try to interpret which color belonged to which floss # and symbol key on the color chart.

If you only have a few colors to deal with this isn't a problem. However, if you have several different colors to choose from that are close in color then interpreting the chart can be tricky. You may assign the wrong color to the wrong symbol if the colors are too closely aligned. The key code chart should have contained the number of strands that were included in the kit so I would know how many strands I had for the different floss colors.

As I have done with other cross-stitch kits I've completed I had to design my own thread color sorter and symbol key. I took a piece of thin cardboard and cut a 1" x 9" long rectangular piece out to use as a thread sorter. I then punched holes in my cardboard strip in which to tie each of the different colors. Just above the hole I wrote the DMC floss # and just below the hole I added the respective cross-stitch symbol. I then inserted the floss threads that went with that # and symbol through the hole and tied them in a loose knot. This kit could be much improved if a thread sorter with respective #'s and symbols was provided.

The beads were contained within three small Ziploc bags which was fine. The chart had footnote symbols to help distinguish which beads were within which bag.

My results with the totally finished background, border and frame is shown below:


Despite the relatively small issues I had encountered with the kit I was happy with the way my "Book Seller" cross-stitch picture turned out.

As always, my comments are meant to be constructive to enable future purchasers to benefit from my experience and to enhance their ability to create a wonderful little cross-stitch design.

Sunday, October 28, 2018

My Snow Days - Mill Hill Cross-stitch Kit


Given that I hate snow you might be wondering why I'm cross-stitching a snow picture.  Well, the simple answer is I needed to for my winter decorations that I display on my fireplace mantels over the various seasons.  I have a ton of  Christmas and now Spring & Summer cross-stitch  pictures, but not a lot of winter ones.  So, when I saw the little "doggie" button that was included in this kit I knew I would buy it and make it.

The Snow Day #MH14-9302 pattern uses full cross-stitch and straight stitch highlighting as well as beads of various sizes for emphasis and depth. The Mill Hill patterns usually call for certain areas of the perforated paper to be left untouched like the background or border. In this case they were leaving sections of the brown perforated paper border untouched.

In embroidering the cross-stitch I decided to once again utilize the rectangular wood frame jig that my darling husband built for me that I could tape the edges of my perforated paper to. The wood frame jig is a rectangular embroidery hoop of sorts, but without bending the perforated  paper. He had made it out of 1/2" x 1" pine wood strips with an adjustable center strip that I used for this 5.25 x 5.25 square design.

I had learned from previous mistakes that I needed to draw diagonal lines to locate the exact center of the perforated paper as in previous perforated paper cross-stitch picture I have done the picture was slightly off center by a few holes which caused a problem with inserting the needles in the holes along one of the edges of my frame. So, I lightly drew a diagonal line across each corner with a pencil to get the center point of the perforated paper.

A lot of the cross-stitch 5.25" by 5.25" pictures I have made were finished in small 6 1/2" by 6 1/2" shadowbox frames with 5" by 5" openings that I had gotten at Michaels when they went on sale one year.  I used up all the shadowbox frames I had gotten that year and have been looking for them ever since and haven't found them again.

So, I decided to buy some 8" by 8" hand painted wood frames that Mill Hill created for their cross-stitch pictures.  This frame is bare bones.  There's no glass or plastic cover and there's nothing on the back to hold the picture into the frame.  They do, however, provide a thin 6" by 6" cardboard back and wood dowel for inserting in the holes in the back to allow for the frame to stand on it's own.  Of course, if you're going to hang this on the wall you'd just add a picture hanger to the back.

The directions did not include any instruction for finishing the back.  I decided to finish mine with 1/4" thick self sticking art needle-craft mounting foam.  I used an 8" by 10" by Pres-On sheet that I cut 6" by 6"with an X-acto knife to fit my picture.  Since the depth of the back of the frame for inserting the picture is 1/4" deep the 1/4" foam was a perfect fit for inserting it as well as the cardboard backing that came with the frame.

The pattern called for a teal green colored wooden frame. I  opted to use a blue winter theme painted wooden Mill Hill frame as I though it complimented the snow picture much better than the teal green colored frame.

After adhering my cross-stitch picture to the 6" by 6" adhesive foam board that I bought I inserted it into the back of the frame and then inserted the 6" by 6" cardboard that came with the frame over it.  I taped the back of the cardboard with masking tape to hold it.

The wood frame is 8" by 8" so to totally finish the back I cut a piece of thick decorative paper 8" by 8" to entirely cover the back.  I rubbed purple color disappearing glue stick all over the back and then pasted my 8" by 8" decorative paper sheet on the back.  I signed by name and dated it and was done with finishing the back.  I used a pencil to stab the decorative paper I had glued to the back so I could insert the dowel into it so the picture would stand on it's own.


The pattern also called for the border of the perforated paper to be left untouched like the picture shown above. However, I don't like seeing the perforated sections of the paper for the border as I think it makes the cross-stitch picture look unfinished and opted instead to finish the border with dark green colored  DMC #895 embroidery floss sewn as a half cross-stitch using four strands of the floss.

I also didn't like all the unfinished areas of the perforated paper within the design itself, as shown in the picture above, and opted instead to fill all those areas in with a complementary floss that matched the design sewn as a cross-stitch using 3 strands of the respective floss.

I filled the sky in with a light blue colored floss, the tree areas with the applicable green colored floss, and the snow areas with either the white or ecru colored floss.


The pattern only called for outlining the fringe on the scarf of the little girl on the right.  I thought several areas of the picture could use some outline highlighting to really make it stand.  So I added the following:

1)  Two strands of dark gray floss sewn as a back-stitch along along the sides of the house, roof, chimneys, porch, and windows.
2) Two strands of dark gray floss sewn as a back-stitch along along the sides and inside of the garage.
3) Two strands of dark green floss sewn as a back-stitch within each of the trees to add depth and dimension to them.
4) Two strands of light gray floss sewn as a back-stitch along along the sides of the snowman's body and head.
5) Two strands of dark brown floss sewn as a back-stitch along along the sides of the faces of the three children.
6) Two strands of dark brown floss sewn as a back-stitch along along the sides of the long driveway.
7) Two strands of dark brown floss sewn as a back-stitch along along the sides of the red and white scarf and the fringe.


While the end results of this design were wonderful some things in the kit and in the instructions could be improved upon so I'd like to offer the following constructive suggestions:

The cross-stitch chart was in black and white as was the floss color code and symbol key. Both were easy to read and very clear. While I had no problem with the chart and keys I did have a problem with the way the DMC floss was presented. All of the floss was tied together in one big knot so you had to separate the floss pieces yourself, sort them, and try to interpret which color belonged to which floss # and symbol key on the color chart.

If you only have a few colors to deal with this isn't a problem. However, if you have several different colors to choose from that are close in color then interpreting the chart can be tricky. You may assign the wrong color to the wrong symbol if the colors are too closely aligned. The key code chart should have contained the number of strands that were included in the kit so you would know how many strands you had for the different floss colors.

As I have done with other cross-stitch kits I've completed I had to design my own thread color sorter and symbol key. I took a piece of thin cardboard and cut a 1" x 12" long rectangular piece out to use as a thread sorter. I then punched holes in my cardboard strip in which to tie each of the different colors. Just above the hole I wrote the DMC floss # and just below the hole I added the respective cross-stitch symbol. I then inserted the floss threads that went with that # and symbol through the hole and tied them in a loose knot. This kit could be much improved if a thread sorter with respective #'s and symbols was provided.

The beads are so very easy to lose so I'm always happy to see that more than enough beads have been included within the kits that I've bought.  I usually pour the beads into a small cardboard box that I can easily use to obtain them.  However, the box is lightweight and, inevitably, I end up spilling the beads all over the place.  Luckily, that didn't happen this time, which is fortunate, as there wasn't enough of the green beads or black beads contained within my kit.  I ran out of them and had to punt.  Luckily I had similar beads within my stash.

The beads were contained within three small Ziploc bags which was fine. The chart had footnote symbols to help distinguish which beads were within which bag.

My results with the totally finished background, border and frame is shown below:


Despite the relatively small issues I had encountered with the kit I was happy with the way my "Snow Day" turned out.  It's going to look great on my mantle this winter.

Tuesday, October 02, 2018

My "Christmas Wishes" Dimensions Gold Collection Cross-Stitch Picture


Like a lot of cross-stitch kits I see I fell in love with the "Christmas Wishes" Dimensions cross-stitch picture the minute I saw it.  It was just too cute to resist.  I keep telling myself that.  In reality I don't think I've ever found a cross-stitch kit that I haven't loved.....haha  "Christmas Wishes"  was just delightful so I knew I'd buy it and add it to my other winter season cross-stitch decorations on my fireplace mantle.

Like the other Dimensions Gold Collection Petites kits I had bought the kit included the pattern, pre-sorted cotton thread, 18 count white cotton Aida, needle and instructions.

The "Christmas Wishes" pattern uses full counted cross-stitch, half cross-stitch, french knots and outline stitching for emphasis and depth and this detailing really makes the picture stand out. It also varies the number of threads used with the various stitches to add to the depth emphasis. The design of this cross-stitch gives the finished picture a 3 dimensional aspect with the half cross stitch, french knots and outlining being used for artistic effect.


The pattern came with starting and working order instructions as well as samples of the various stitches required, color coded keys (with code #'s, lengths, color names, and cross-stitch symbols) and a chart with color coded symbols. The colors and symbols on the keys and chart were easy to read and follow. The pattern did not include instructions for finishing the piece.


While I was very pleased with the end results of this design there are some things in the kit and in the instructions that can be improved upon.

Unlike the problem I had with the size and readability of some of the other cross-stitch charts in the kits I had bought this color chart was large enough and easy to follow.

As was the case with previous Dimensions kits the thread sorter was poorly designed. The embroidery threads were glued to two foam backed 6" by 1 1/4" strips of cardboard that had a picture of the color of the thread and it's number. In order to get to the threads you had to separate the foam back from the cardboard strip. Very quickly the threads separated from their section and then you no longer knew what the thread number was to tie to your symbols & legends.

As I have done with other cross-stitch kits I've completed I had to design my own thread color sorter and symbol key. I took a piece of thin cardboard and cut a long rectangular piece out to use as a thread sorter. I then punched holes in my cardboard strip in which to tie each of the different colors. Just below the hole I wrote the DMC floss # and just above the hole I added the respective color coded cross-stitch symbol. I then inserted the floss threads that went with that # and symbol through the hole and tied them in a loose knot. This kit could be much improved if different thread sorter with respective #'s and color coded symbols was provided.

Short of changing the thread sorter all together to make things even easier for the user the color symbol should at the very least have been shown on the thread sorter strip of cardboard as well. That way you would only need to use the thread sorter strip of cardboard to follow your chart.

I decided to use an 8" by 8" Q-Snap embroidery frame to stitch this embroidery.  The white Aida wasn't big enough to fit into the frame so I sewed 4 muslin strips to the four sides of the Aida to keep the Aida tight and stretched so I could easily cross-stitch this design.

The key split the strands of two of the colors into 1 strand sewn in a half cross-stitch.  I opted for using two strands of the color for the half-cross stitch.

The key also called for 1 strand of various colored floss to be used for back-stitch highlighting of various sections of the picture.  I prefer to use 2 strands of the colored floss to highlight my pictures as I think they look better this way and really emphasis the 3-dimensional aspect of the design.


The pattern did not include instructions for finishing the piece which should have been included for a beginner cross-stitch user. This was not a problem for me as I knew what type of picture frame I was going to use, the  mat I was going to use and the way in which I wanted to finish the picture.

I tend to favor 1/4" foam backed adhesive mounting boards for the cross-stitch pictures I'm inserting into a finished picture frame. I originally was going to use a 1/4" foam backed 8" by 10" adhesive mounting board but discovered that this would be too thick for the picture frame backing I was using and wouldn't allow the backing piece to be inserted into the slot on the back of the frame and allow for securing it to the frame. So, instead, I opted to mount my picture on a 5" by 7" slim foam backed adhesive mounting board which would provide enough room to insert the picture backing into the slots and allow for securing it to the frame.

I had chosen a white frame with blue matting to finish it which I think really brought out the beautiful colors of the little girl and snow globe scene.

I centered my cross-stitch picture on the 5" by 7" adhesive foam board and trimmed the excess white Aida cloth by 1/4" to 1/2" around.  The trimming allowed for me to tape the sides of the Aida cloth with masking tape to the back of the mat board I was using while providing enough room for the double folded corners to fit within the depth of the frame.

You can also finish the back of the cross-stitch by taping the center of each side with masking tape to the cardboard and then sewing four mitered corners into the Aida cloth so the picture is taunt to the cardboard.

Last year I had bought some decorative Washi tapes and hadn't had a chance to use them as of yet.  When looking at the white shadowbox frame and the cheery "Christmas Wishes" picture I thought one of the tapes I had bought would be perfect to decorate the four sides of this frame and really add to the cheeriness of this picture.  So I cut four strips of the tape and adhered them to the frame.

I had also bought some mixed media mistletoe ornaments last year and decided to utilize them at the four corners of the tape.  They came with adhesive backing so they were easy to adhere to the corners.

Despite the problems I encountered I was very happy with the way my Dimensions "Christmas Wishes" picture turned out. I hope you like it too.

Wednesday, September 19, 2018

My Sunday Night Mill Hill Winter Holiday Cross-Stitch Ornament


It's the beginning of the Fall and my thoughts always turn to the upcoming holiday season and crafts I'd like to make to add to my already overflowing seasonal and holiday home decorations collection.  I like to think you can never have enough decorations, but that might be wishful thinking.  In reality you definitely can have to many and I am slowly approaching that.   I'll just have to swap them out from year to year.....haha

I tend to be drawn to cross-stitch kits that feature the word "Joy", which was my mother's name, or churches, especially those that remind me of the one my mother attended for so many years.  My mother loved to sing and sang in the church choir for several decades. So, when I saw the "Sunday Night" Mill Hill #MH18-1834 kit, which looks exactly like the church my mother attended,  I knew I would buy it.

The "Sunday  Night" ornament kit contained the presorted thread, 14 count perforated paper, needles (stitching and beading), beads and instructions.  It also included a magnet and instructions for adhering the magnet to the back of the ornament.  The pattern uses full counted cross-stitch, beads and outline stitching for emphasis and depth.


The pattern came with starting, stitching and 2 different back finishing instructions as well as samples of the various stitches required, beading instructions and color code chart (with code #'s, color names, and cross-stitch symbols) and a black and white chart with black and white coded symbols.  The colors and symbols on the keys and chart were easy to read and follow.

I had no problem cross-stitching the church ornament and then cutting the perforated paper close to the sides. This kit did come with instructions for finishing the back of the ornaments, as well as using the ornament for other uses.

I like to finish my ornaments with a felt backing.  I don't usually whip-stitch around the edges but decided to do so this time as I thought it would give the blue sky a more finished look.   So, I trimmed the edges, glued the felt to the back and then whip-stitched around the edges with 4 strands of the blue floss.


Instead of adding a floss hanger according to the instructions I opted to sew two strands of floss to the top of the ornament, securing the edge of the ornament with an additional stitch and then tying the ends at the top in a large knot.

I was very happy with the way my "Sunday Night" church turned out and decided to hang it along the side of a picture I have of my mother.  It looks beautiful there.