Saturday, December 31, 2011

More Christmas Gifts - Arctic Circles Santa Cross-Stitch Kit Nunavut Santa From Mill Hill


In pondering what kind of Christmas gifts I wanted to give this year I once again settled on some cross-stitch. Surprise! Surprise!  I definitely wanted much smaller projects than the two massive counted cross-stitch pictures I had completed in the past year as time was of the essence.

The massive cross-stitch pictures I had completed took hundreds of hours to complete and I couldn't spend a lot of time on any one gift so I settled on several smaller cross-stitch projects. I really didn't want anything bigger than a 6 x 6 type picture or project. Something that might take 15 to 20 hours or so.

As usual, I found several kits I liked. So, I bought a few. Actually, given my nature I bought quite a few. You know me - I can never do anything in moderation. Plus, with Christmas gifts I never really know if I'm going to give a particular cross-stitch to someone until it's completed. I needed a few to choose from - or so I told hubby!

This time I bought a few traditional counted cross-stitch kits and a few patterns that utilized perforated paper.

If your remember, the 1st counted cross-stitch perforated paper pattern that I had tried was a Spirit of Quilting Angel Ornament from Brooke's Books Publishing. It was an angel counted cross-stitch ornament design by Brooke Nolan. As I was going to be giving these as Christmas gifts I was glad I had already learned a few tricks to working with perforated paper from my previous project.

The first perforated paper counted cross-stitch kit I chose to work on was "Nunavut Santa - Arctic Circle Santa's - Cross Stitch Kit."

The pattern and kit came with DMC floss, antique brown perforated paper, beads, needles, and a chart with instructions. The Nunavut Santa was to be a 3.75"w x 4.75"h ornament when completed. The pattern suggested finishing the back of the ornament with craft paper or felt - both of which would be glued to the back. Instead of creating this as an ornament I wanted to create a small picture that I could insert into a 5" x 7" frame when completed.

Given my previous experience with perforated paper I knew that you couldn't put it into an embroidery hoop or square frame. The paper was stiff but, not stiff enough to be working on and holding at the same time. In other words, you couldn't just hold it in your hand and cross-stitch at the same time.

The last time I had worked with perforated paper my darling husband had come up with a wonderful solution and had built me a rectangular wood frame jig that I could tape the edges of my perforated paper to. It was a rectangular embroidery hoop of sorts, but without bending the paper. He made it out of 1/2" x 1" pine wood strips. It also has an adjustable center strip that I could use for the smaller counted cross-strip projects I would be doing using perforated paper. It was perfectly suited for this kit.

My past experience with cross-stitch and perforated paper had taught me that it can tear so you have to be careful with it. Especially when threading the ends of the thread or in the size of the needle you are using. So, before I began I covered the back of the perforated paper with masking tape

Also, based upon my previous experience with perforated paper I decided that I also needed to draw diagonal lines across each corner to get the center point of the perforated paper.

The pattern came with a black and white cross-stitch chart and black and white color code chart with symbols for the floss and beads. I had no problem reading and following the different black and white symbols.

While the end results of this design were wonderful some things in the kit and in the instructions could be improved upon. I'd like to offer the following constructive suggestions:

The cross-stitch chart was in black and white as was the floss color code and symbol key. Both were easy to read and very clear. While I had no problem with the chart and keys I did have a problem with the way the DMC floss was presented. All of the floss was tied together in one big knot so you had to separate the floss pieces yourself, sort them, and try to interpret which color belonged to which floss # and symbol key on the color chart. If you only have a few colors to deal with this isn't a problem. However, if you have several different colors of say gray to choose from that are close in color then interpreting the chart can be tricky. You may assign the wrong color to the wrong symbol if the colors are too closely aligned.

The beads were all combined in a bag so you had to sort the beads and then determine which beads belonged to which symbol. This is fine if the beads are easily distinguishable from one another. When there are several colored beads similar in nature trying to decide which is which can be very annoying. They should have put the beads in separate bags and marked them with their respective color number and symbol.

As I have done with other cross-stitch kits I've completed I had to design my own thread color sorter and symbol key. I took a piece of thin cardboard and cut a 1" x 9" long rectangular piece out to use as a thread sorter. I then punched holes in my cardboard strip in which to tie each of the different colors. Just above the hole I wrote the DMC floss # and just below the hole I added the respective cross-stitch symbol. I then inserted the floss threads that went with that # and symbol through the hole and tied them in a loose knot. This kit could be much improved if a thread sorter with respective #'s and symbols was provided.

I love using beads in cross-stitch designs as I think they really enhance the designs, as was the case with this kit. However, I had a tough time trying to thread the really tiny needle that came in this kit for beading purposes. I know the head of the needle has to fit through the tiny bead openings, but these needles were really, really difficult to thread and trying to do so was not only frustrating, but time consuming. Plus, these tiny needles tend to easily pierce your skin so using them was not only a challenge, but downright painful at times.

The pattern called for certain areas of the perforated paper to be left untouched as the background like the picture shown below:


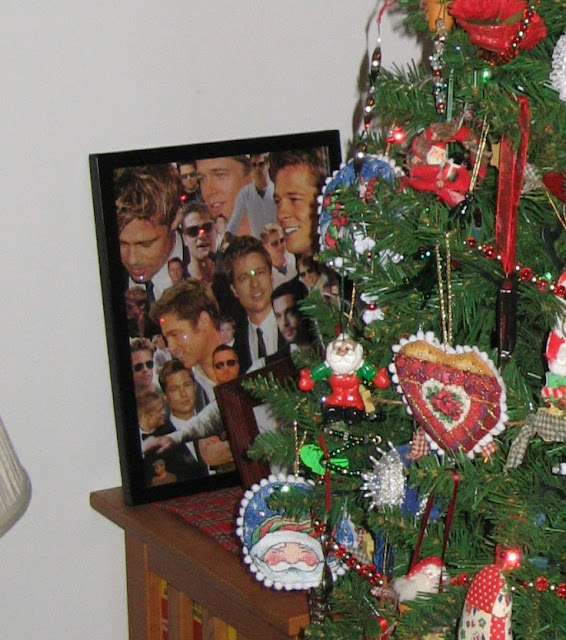
I do not like any of the perforated paper sections to remain untouched as I think it takes away from the beauty of the creation so I opted instead to cross-stitch all the untouched areas with a non-obtrusive background color. My completed Santa came out as follows:


It took me 14 1/2 hours (excluding the framing) to complete the Santa. That was a far cry from 250+ hours and 315+ hours of my previous two massive cross-stitch projects.

I had decided that I wanted to enclose my Santa in a 5" x 7" frame with a double layered mat and background paper. I could not use a foam board as it was too deep for my frame despite the double thickness of the mat. I covered the back of the Santa with another layer of wide masking tape to secure all the threads and then cut it out of the perforated paper. I then glued the back of the Santa to my background paper and inserted it into my frame.

I was pleased with the way my Nunavut Santa - Arctic Circle Santa's - Cross Stitch Kit came out and even happier when I gave it to my brother. He absolutely loved it. The smile on his face was all I needed to see.

Thursday, December 29, 2011

She's A TRAITOR! Off With Her Head!


It was the Monday after Christmas and hubby and I had gone out to buy Christmas paper and ribbons at 50% off as we were running out and would need some next year. We figured - why pay full price next year when we could buy them at 50% off after the holidays? So, we decided to go out for breakfast and then hit the stores.

We were gone about two hours and were having a wonderful time. Unbeknownst to us and while we were gone it seems there was a rally which turned into a near riot going on outside our house. Something had gotten the "dollies" all riled up.

We knew there was a problem the closer and closer we got to the house. There was loud chanting going on. Almost as if someone were using a megaphone. Both hubby and I looked at each other at the same time and said, "When did the "dollies" get a megaphone?" And what were they saying?

As we turned into the driveway we heard loud voices all in unison chanting: "She's A TRAITOR!"

"She's A TRAITOR!"

"She's A TRAITOR!"

Hubby and I just looked at each other wondering what was going on.

Then we heard, "She betrayed us!"

"She's deceived us all these years!"

"She's a hypocrite!"

"She's a scamp!"

"And, look at that dog. Who does he think he is?"


With that last remark I knew what was going on. The "dollies" had discovered Molly and Coconut, the American Girl doll and dog that hubby had given me for Christmas. And, they were not happy about it. Not happy at all.

Then I heard, "How dare she bring a manufactured doll into this house. This is a house of handmade dolls - albeit all handmade by Linda. There is no place here for an American Girl doll. No matter how popular they may be."

"We cannot allow this. SHE CANNOT LIVE HERE. Linda will just have to find another place for her to live."


The "dollies" were all out on the lawn - like some sort of rally. There were thousands of them. Chanting and sputtering under their breath. Prancing and shaking their heads. Hands were balled up in fists and they were shouting, "Off with her head!" "Off with her head!" YIKES!!!!

As we got nearer to the garage we noticed there was a podium and someone was standing at it with a megaphone. It was Doris Marie - my savior. Surely Doris Marie wasn't saying "Off With Her Head!"

I couldn't help but wonder. Whose head were they talking about. Mine or Molly's!!!!

Hopefully not mine. But, I didn't want them to lop off Molly's either. She was just too damn cute!

Then we heard Doris say, "Now, now, settle down everyone. You know Linda loves dolls - all sorts of dolls. And, to be fair, she does have other dolls that she did not create. She's not only a doll maker, but a doll collector. So, of course she's going to get other dolls. Isn't she?"

It was Doris Marie talking.  Thank goodness. She continued, "She just got this doll on Sunday and hasn't had a chance to talk to us yet - let alone introduce her new doll to us. Let's give her a chance to explain. Shall we?"

"Come on now," Doris said. "She always gives us a chance to explain.  We should do the same - shouldn't we?"

The "dollies" all trusted Doris Marie and usually agreed to what she was saying. This time was no different. They all settled down and started back to "The Dollie Storage Room." As they did we heard a little grumbling, as follows:

"Okay!"

"Alright! If we have to - but, I still don't like it!"

"She can explain - but it better be good!"

"Alright!"

"Gee-wiz. Okay!"

"Alright, Doris Marie, but it better be a good one."

With that last remark I knew I had some pretty BIG explaining to do as to why hubby had bought me an American Girl doll and doggie companion for Christmas.


Tuesday, December 27, 2011

I Can't Stop Pinning! I LOVE Pinterest!


I know I'm always telling you that I need help.

Well, this time I definitely need help!

You see - I have become a "pinning" addict.

Now, if you're wondering what "pinning" is I have to tell you that it's not a new craft that I just learned.

It's a very, very addictive, popular, fast growing internet activity - a "visual" pin-board. One which seems to have control over me the last few months as I just cannot stop "pinning."

If you're wondering what in the world has grabbed a hold of me it's a website called "Pinterest" (http://pinterest.com).

What exactly does this website do?

Well, according to their Facebook page: "Pinterest is an online pinboard to organize and share your inspirations! Pin your favorite images and videos from anywhere. Discover new things hand-picked by people who share your interests."

According to their About page: "Pinterest is a Virtual Pinboard. Pinterest lets you organize and share all the beautiful things you find on the web. People use pinboards to plan their weddings, decorate their homes, and organize their favorite recipes. Best of all, you can browse pinboards created by other people. Browsing pinboards is a fun way to discover new things and get inspiration from people who share your interests. To get started, request an invite."

Their mission statement is: "Our goal is to connect everyone in the world through the 'things' they find interesting. We think that a favorite book, toy, or recipe can reveal a common link between two people. With millions of new pins added every week, Pinterest is connecting people all over the world based on shared tastes and interests."

So far I have created 51 boards with 2202 pins and, if you know me, I'm sure you know there will be plenty more before I'm done.

I've created different boards for all sorts of things I like, such as: some of my handmade Victorian dolls (of course), my cross-stitch projects that I'm very proud of, patterns and tutorials from "The Best Free Craft Articles" that I love, some of my e-patterns, creative embroidery I'd love to try (if I had a few spare moments), my favorite art doll artists, my favorite mixed media artists, my favorite doll pattern designers, my favorite teddy bear artists, my favorite needle & wool felt designers, doll and craft classes I'd love to take, my favorite "softies" designers, Victorian fashions and Godey's fashion plates I love, my favorite prim and folk-art designers, doll houses and miniatures, crazy quilt designers I love, beautiful art quilts, amazing art, cross-stitch and punch needle designers I love, some of the best blogs from "Top Blogs By Crafters", some of my patterns and e-patterns, quilt things I'd like to make, craft books worth reading that I've reviewed on the "Book Review Corner", felt things I love and would like to create, fun paper crafts, mixed media, items I wish I could paint, sewing ideas and notions, etc.

I find myself drawn to my boards each and every time I sit down at my computer.  There's just something inspiring in looking at all the astonishing creations from my favorite artists and designers.  I find myself drooling at times at their amazing creativity and the talent there is among the artists and crafters on line.

Pinterest.com touts that it's all about the "visual" and I have to tell you that the "visual"  has captured me and it certainly inspires my creativity - not that I can create anything as astonishing as some of the creations on my boards.

So, why would I spend so much time on this?

Well, with everything I've done above I've been able to not only promote myself, but to promote some of the amazing artist and crafters on the web, and to help promote some of the artists and crafters who are members of or who have contributed free content to some of my blogs/websites.  Also, I get to organize all the things that interest me and which I love in nice, neat boards.

For a small business crafter "pinning" is a win-win. It's a fabulous way to present a visual image to a vast audience whose distribution capabilities are endless.

Members of Pinterest can follow all your boards, follow some of your boards, re-pin something they liked of yours to their boards, or "like" your pin. So something you pin can have a cascading effect and end up on countless pinboards.

And, here's the best part, and why it's a win-win for a small crafter - items pinned from the web carry the URL of the website they were pinned from. So, if someone clicks on a picture of something on one of your boards the URL connected to that image is the webpage where the image was found.

This is accomplished by adding a "Pin It" button to the bookmarks bar of your browser. That way when you're browsing the web and you find things that you like or that are of interest to you can just click the "Pin It" button on your browser and then add the image to one of your pin boards.

You can further promote your products by adding a “Pin It” button to your the product pages of your website. If you have a selling blog you can add a "Pin It" button to each of your blog product posts. This will allow blog readers or customers to pin the products of yours that they like to their boards.

You can also add a "Follow Me on Pinterest" button to the home page of your website or sidebar of your blog. Mine is in the upper right hand corner of my blog and is also shown below:


Follow Me on Pinterest


If you choose to follow other members boards or some of their boards then you can browse through the latest pins of the members you follow, go to their pages and browse through all their boards, browse through "everything" on "Pinterest" by category, browse the most popular pins, videos, or gifts.

Like just about everything on the web Pinterest is not without it's own fair share of controversy.  Some things have been corrected already and some still need to be changed.  Some concern copyright issues, the ability to change the URL's of the pins, and so on.  There are a lot of posts out there that have been written about Pinterest over the last few months.  If you Google Pinterest I'm sure they'll pop-up and you can read them for yourselves.

My take on all this is I believe in crediting artists and designers with their creations.  All my pins include the artists name and/or business name and the URL is always to the website where I found the pin.  Uusually this is the artist or crafters blog or website.  If I'm re-pinning from someone else's board I always click through to the website attached to the pin.  If I want to re-pin this item I will add the artists name and/or business to my re-pin and make sure the URL is to the website where the item was found.

If an artist or designer has a board of their own creations and has uploaded pictures of their creations then I always add the URL from their Pinterest board to their item on my board.  Right now if you upload images yourself the URL is blank and Pinterest shows as "Uploaded by User" on your board.  Pinterest needs to change this to provide the URL for the board it was uploaded to so everyone can click through to the actual user who uploaded that item.

What's really great about Pinterest for me is that it's quiet. In that I mean that I can go to Pinterest and browse at my leisure. Unlike Facebook, their is no date or time stamp.  There is no pressure to comment on friends posts or activities. No one knows if its been a few days, a few hours, or even a few minutes since I've visited or not. I can pin away at my leisure, make a comment on something I like if I want to, re-pin something for further reference, or just browse through beautiful eye candy. It's a simple website that is extremely easy to use and I hope it stays that way as it gains in popularity.

If you're thinking you can just set-up boards to promote yourself - well, you'd be missing the main point of "Pinterest" which is to share the things you love and in doing so share a bit about yourself. According to them: Pinterest is designed to curate and share things you love. If there is a photo or project you’re proud of, pin away! However, try not to use Pinterest purely as a tool for self-promotion.

Pinterest is a great tool for small business crafters because it allows you to quickly show the things you've created that you're the proudest of and allows potential blog readers or customers to see what interests you.  That way they get to know more about you, your likes, and your passions.

Plus, if you add the "Pin It" button to your product pages then anyone who likes your product can "Pin It" to one of their boards and if others like it they can re-pin it.  Talk about a great way to easily promote your products.

Right now if you want to become a member of Pinterest you have to request an invite by clicking the link on their home page or ask an existing member to invite you.

If you become a member, don't be surprised if you can't stop pinning either!


My Christmas Craft Project With Noodles


It doesn't get much better for a Grandma then getting to spend a delightful weekend with one's grandchild - especially when working on a craft project together.

I know that I've mentioned many times before that when I was a young girl around the holidays my Mom and Dad would encourage us to create something new. Sometimes they helped us with the holiday projects and sometimes they didn't.

So, in talking to my grandson, Noodles, about what we would do when he came over one weekend in November we decided that making something together would be fun. We decided to make a Christmas present that he could give to his grandmother, Mimi.

His original idea was a plaque with the words Grandmother on it. We decided that when he got here we would go down to Michaels or AC Moore and buy the supplies we would need to make the Christmas plaque.

Usually it's Noodles and Nana shopping together, but this time Grampy decided to join us as we had decided to go out to eat afterwards.

So, off we went to Michaels. While Grampy was looking at picture frames Noodles and I went to the unfinished wood area. We looked at the unfinished wood plaques, but he wasn't really happy with them or their size. In looking around he first spotted an unfinished miniature train and thought maybe we could add a snowman or something.

Then he spotted an unfinished log cabin and came up with an idea for some sort of a winter scene. We talked about that and decided we could use the ends of the logs for affixing decorations and maybe add a tree or a Santa. I thought the woodland scene would be nice, so off we went to the paint aisle.

Given that it was a log cabin he decided that we should probably paint it brown. So, we bought a medium shade brown paint. Then off to the Christmas decorations section we went.

The first item he found in the miniature house section was a miniature tree under glass. He thought that would make a great addition but we didn't have a base for the house that it could sit on. So, we decided that we should add an unfinished piece of wood that we could use for a base. However, I thought the tree under glass, while pretty, was a little too big for our scene. So we settled on four miniature trees.

Then he found the miniature lights and thought they would be perfect for our scene. I agreed so we added those to our cart.

We continued walking around the Christmas section finding colorful stickers we could add for decorations and small hanging type ornaments. We found a few items we thought we might use for making some sort of a garland and he found some Christmas ribbons that he liked. Eventually we were joined by Grampy who added a few sticker suggestions of his own.

While we were looking at the bright and cheery Christmas decorations Noodles decided that painting the log cabin white would really make the Christmas decorations stand out. So, we decided to exchange the brown paint for white paint.

While Grampy went to stand in the long cash register line Noodles and I went back to get the white paint and to get an unfinished base. We settled on an oval base.

It was really cold and windy when we put the supplies in the car. It actually looked like it wanted to snow which just added more charm to what was already a delightful shopping trip.

After the supplies were loaded in the car off to dinner we went. At dinner Noodles and I had decided that we would take step-by-step pictures as we went along so I made a mental note to remember to get my camera.

I had decided that it might be best to paint the unfinished base and log cabin downstairs in the basement so off to the basement we went. After spreading the plastic underneath, getting the brushes, and getting the containers for the paint I set to painting the base while Noodles painted the log cabin. We ended up putting two coats of white paint on each and a light coat of satin finish acrylic.

Just as we finished the satin finish Noodles remembered we hadn't taken a picture. Ooops..... Nana's bad!  So, I made a mental note that I wouldn't forget the camera in the morning which is when we had decided we would decorate the house.

Before we went to bed we glued the bottom of the log cabin to the wood base.

The next morning I woke Noodles up at 6:30 A.M. to start our project. We had agreed ahead of time that we would get an early start so we could finish before he had to go home. He happily got out of bed at 6:30 A.M. and came downstairs ready to begin.

So we did.......


Before we began decorating the house Noodles reminded me to take pictures.

Here's what the log cabin and base looked like painted and glued together.


Next, we tested the lights. At first only three came on. Then when we straightened out the string of lights they all came on. Noodles was delighted. However, when we wrapped the lights around the top of the house they, of course, stopped working. We were back to just three lights. We tried this several times until Nana just gave up. Oh, well. It was a nice idea.


Next we glued on the miniature trees - two on each side.


We had bought a foam Santa kit and thought the Santa might be cute coming out of the chimney. So we glued him together and then glued the finished Santa to the top of the chimney.


Next we glued the foam snowman together and then glued him to the right hand side of the log cabin just behind the trees.


We had bought three miniature unfinished wood dolls that we thought we could put in the windows, but when I tried to see how they would look I quickly realized there was no way we were going to be able to glue them inside. The doorway and windows were just too small.

So, we decided to glue paper wooden soldiers that we had bought in front of the windows instead. Plus, Noodles wanted the mistletoe over the door so we glued it just above.


We had bought a bunch of miniature presents, gingerbread men, and stocking stickers that we wanted to affix to the ends of the logs so we did that next.

We wanted to make sure all four sides were decorated so we added stickers to the top of each of the sides and to the back of the log cabin.  We had also bought red and gold alphabet stickers so we decided to add the words, "North Pole" to the top of the back of the roof.

As we had an extra miniature soldier sticker we had decided to glue him in the middle of the back of the log cabin.

After that Noodles had found a blue and white adhesive backed "Let It Snow" felt saying that he wanted to put on the front roof so we glued that next.

We glued ribbons around the chimney and glued a Christmas bead sticker and snowflakes to the back roof.  

Then we took the ribbons and Noodles suggested that we twist them around each other like they do every year with the garland for their tree so we twisted and knotted the two skinny ribbons together to form garland which we then glued and strung around the log cabin under the roof.


Next we glued some poly-fil to the roof, on Santa's hat,  and around the base of the house to create the effect of snow.

Following that we glued white, green and red glitter pompoms on top of the poly-fil snow and around the log cabin.


Here's the results of all four sides:

The left side.


The back.


The right side.


And, finally, the front.


Both Noodles and I were really pleased with our creation. It was bright, cheery, and definitely a wonderful Christmas decoration. I thought our creation looked like a white North Pole gingerbread house and Noodles quickly agreed. We both felt that his Grandmother would LOVE it.

He decided that instead of giving it to Mimi at Christmas that he would give it to her early so she could enjoy it during the holiday season. I thought that was an excellent idea.

Noodles and I had such a good time with our craft project that we decided we'd do something next year.

What and who it's for is a surprise.

For now that will be Noodles and Nana's secret.


Friday, December 23, 2011

In Remembrance


For Mom, Bud, Kim, John, Helen, Phil, Mary, and Chip:


Eternal Light

Those we love must someday pass beyond our present sight... 
Must leave us and the world we know without their radiant light. 
But we know that like a candle their lovely light will surely shine 
to brighten up another place more perfect... more divine. 
And in the realm of Heaven where they shine so warm and bright. 
Our loved ones live forevermore in God's eternal light.


Candle graphic courtesy of http://www.wpclipart.com


Merry Christmas

I thought I would share four of my all time favorite Christmas songs.


Merry Christmas to one and all. 


Let there be peace on earth.

David Phelps - O Holy Night


Sugarland - Oh Come, Oh Come Emmanuel


Saturday, December 10, 2011

Christmas Decorations From My Older Brother and Sister-In-Law and Brad Pitt?


Every once in awhile my older brother, you know - "the "Irish" twin, can surprise me.  It doesn't happen very often.  Usually he's teasing me which is something he's done since I was born.  In fact, my Linda's Blog is filled with references to him and my younger brothers. 

Well, one Christmas he had my name in our family grab and gave me the adorable wolf shown in the picture above.  I just LOVED it and every Christmas since then it's had it's place in our Christmas decorations.  It used to reside on the living room mantle when I was decorating that mantle for Christmas.  Since I'm no longer decorating that mantle for Christmas it now resides in our sunroom. 


Now the picture above has something from my sister-in-law who has a wicked sense of humor.  No she did not give me the tree.  Look closely to the left hand side of the picture and you'll see something that has nothing to do with Christmas, but has to do with Brad Pitt.  Do you see it? 

Well, if you didn't see it look at the picture below and you'll see a collage of Brad Pitt pictures.  This was a present one year from my sister-in-law. 

Now you might be wondering why she would give me a collage of Brad Pitt pictures?  Well, you see, I just LOVE Brad Pitt and love all his movies.  I have since I first saw him in Thelma and Louise.  There's just something about his dimples and face on the big screen that I can't resist.  So, one year when our family grab was something you had to make my sister-in-law made me a Brad Pitt collage.  I just LOVE it and, of course, it stays out all year prominently displayed in a place near my sewing machine so I can look at it all the time.  I can never get enough of Brad. 


Another time my sister-in-law gave me another picture.  This time it was a wonderful floral picture that she had also made and which is shown in the picture below.  It was a fern leaf that she had made into a tree picture.  I just LOVE it and it, too, has it's place amongst our annual Christmas decorations display. 


My sister-in-law also gave me the stacking Santa's in the picture below.  They, too, have their place in our annual Christmas decorations each and every year.  Right now the stacking Santa's are in the corner of our sunroom. 


Last year my sister-in-law gave me the snowman plate that is hanging on the wall in our kitchen.  I think it looks great there and each and every year from now on that's where it will be displayed. 


I hope you have enjoyed seeing some of the Christmas decorations from my older brother and sister-in-law who is married to him.  She gets a LOT of teasing from him now.  Poor thing! 

Thursday, December 01, 2011

The Giving Of Christmas Cards - A Wonderful Tradition!


One of my favorite things about the Christmas season is the wonderful tradition of giving and receiving Christmas Cards. I love Christmas Cards, especially if they are handmade or contain a handwritten note or letter.

Why? Because they are just such a joy to give and to receive. A way to wish your friends and family a happy holiday season, tell them what's happening in your life, and catch up on what is happening in their lives.

Sadly, however, Christmas Cards with personalized notes are becoming a long lost tradition. People just don't want or haven't the time anymore to write you a note. Sadly, some people don't even have the time to send you a card. I hope that doesn't happen as it could be the end of a beautiful tradition.

In this fast paced, no time for anything world traditions are important. Some Christmas Cards contain computerized notes informing everyone of what is happening with them and their families. In a computerized world this was bound to happen. This is fine. At least you can still keep in touch. And, it sure saves time for the sender.

In fact, I have to admit that this year will be the first year that I will be sending computerized notes. I usually spend a week handwriting all my cards, but this year, I just do not have the time. So, I will just have to enclose my computerized letter. I hope nobody minds.

However, there is something happening which is just wonderful and could become a lovely tradition all unto itself. The paper industry, scrapbook, and create your own cards industry is booming. It seems like everyone is into making your own cards. If you do this you can't send out as many as you do with boxed cards, but how delightful it would be to receive them.

This year I thought it would be nice to create all my Christmas cards myself. I found some Christmas card kits where the card has a sewn with material image and message contained within. I loved it and decided I'd join the millions of scrapbook enthusiasts who are making their own cards. I'm not a scrapbooker, but just love looking at all the products they have nowadays for card makers and scrapbookers. Unfortunately, this too will have to wait until next year. I just don't have the time. And, I'm not happy about that. However......

So, why do I love sending and receiving Christmas Cards? Because I love catching up with what is going on whether it's a handwritten note or a computerized letter. I cherish all the Christmas Cards that I have ever received with handwritten notes or computerized letters. For some of my friends this is the only correspondence that we have every year and it provides a way for us to stay in touch.

In fact, I have never thrown a Christmas Card with a handwritten note or computerized letter away. All of them are in my memory books (albeit I'm on Volume #32 now, but...). For someone like me who is getting older my memory books provide a means of looking back and remembering. The Christmas Cards provide the timeframe.

I know my family would be astonished by this, too. I have kept every single Birthday card, Valentine's Day card, Anniversary card, Christmas card, etc. that I have ever received from anyone since I was about 7 years old. It's so nice to be able to go back and look at the cards I received and what was said by my beautiful Step-Daughter, Grandmothers, Grandfather, Old Family Friends, and my Father, all of whom are no longer with us. Re-reading them always brings back such warm and cherished memories for me. I know, call me an old softie. I admit it.

I have to admit that some of my FAVORITE and most beautiful Christmas Cards that I have received have been from my niece. You see, she makes every single Christmas Card by hand. They are all elaborate, artistic creations she has designed and I cherish everyone of them.

Last year the card became a three dimensional ornament. Another year it contained a phrase from a John Lennon song. They are always beautiful, have exquisite detail and I love to receive them. I have spread pictures of them throughout this article so you can enjoy them too. She's probably going to kill me for doing this, but I'm such a proud Aunt. My niece is so talented I just had to show all of you. She can throttle me later.

So, since, we're coming into the Christmas Card giving season I thought it would be a nice idea to take a look at this Christmas tradition. Where did the tradition of giving Christmas Cards begin?

Well (surprise, surprise), it began in Victorian England in 1843, the same year that Charles Dickens wrote "A Christmas Carol." John C. Horsley is actually credited with this, but it was actually at the suggestion of his friend, Sir Henry Cole, that the first Christmas Card was created and published.

It seems that Sir Henry Cole was caught in the mad holiday rush (sound familiar) and was unable to send the traditional written Christmas message to his friends and associates. Instead he sent them an illustrated holiday greeting. The card was divided into three panels and was designed by his friend John C. Horsley. The main illustration showed the three elders at a party raising wine glasses in a toast the side panels showed two Yuletide traditions - feeding the hungry and clothing the needy. The message inside 150 years later is still the most popular greeting of all: "A Merry Christmas and a Happy New Year to you." Henry Cole's cards caused quite a stir. Back then you could send letters for just a penny each (can you imagine 1 penny!)

In the 1860's greeting card companies began appearing all over England. In 1846 Christmas Cards started in America, but didn't really take off until 1920 when advances in printing technology added to the popularity of Christmas Cards. That's also when the color red started being associated with Christmas.
Christmas Card giving is such a wonderful and lovely tradition. Sending warm holiday greetings is such a beautiful way to say


"A Very Merry Christmas and a Happy New Year To You!"


Copyright © 2006 - 2023 - All Rights Reserved - Written By Linda Walsh.  Linda is a doll maker and doll pattern designer.

Monday, November 28, 2011

20 Years Later and Still As Good As New!


While everyone was out fighting the Black Friday crowds I was in crafting heaven - pleasantly sprucing up the artificial Christmas wreath decorations for the front of our house.

And, I have to say, I was actually reveling in the fact that after 20 years my artificial wreaths are still as good as new. I thought to myself, "Now that's a GOOD BUY."

I dare say most of the items purchased on Black Friday would not be as good as new 20 years from now.

The first few years that we lived in our house hubby and I would go out on Black Friday and buy fresh evergreen wreaths and fresh evergreen garland to decorate the front of our house for the holidays. The fresh greens always smelled great and looked beautiful but, they weren't cheap. I was always amazed at how expensive fresh greens were.

When we first started decorating the outside of the house we decided to not only decorate the house, but to decorate the three blue spruce trees that we have at the front of our house. Back then the blue spruce trees were small enough so we could decorate them. We used three blue flood lights and shone them up through the blue spruce creating a wonderful snowy effect.

We put small electric candles in the windows, hung fresh garland around our front door and lamp post, and hung four fresh evergreen wreaths with red bows on the front of the house.

We also added two large grapevine deer that my brother and I had found on a shopping trip to Sturbridge one year to the front yard. We quickly learned that we should stake them into the ground so the wind wouldn't blow them over.

White flood lights were used to light up the front of the house and when everything was on the house just looked so festive. We both loved it, but it was a lot of work to get it looking the way it did.

While we loved the fresh evergreen wreathes we both thought that the wreaths could be a little bigger as they really couldn't be seen from the street. However, we both knew that the cost of buying fresh evergreen wreaths the size we needed was just too expensive.

So, one year we decided to buy four very large artificial wreaths and decorate them with pine-cones, red tie berries, and small multi-colored glass bulbs. So, off to Michaels I went to buy the largest artificial evergreen wreaths I could find. Fortunately they had four 3-feet to 4-foot wreaths that I knew would be perfect. I bought four of the large wreaths and bought four smaller artificial wreaths that I had in mind to use elsewhere.

I also bought red tie berries, some multi-colored glass bulbs, wide red with gold trim wired velvet ribbon, and some other silk floral greenery I thought might be nice. I had in mind to create a pine-cone cluster on each side of the wreath but didn't need to buy any pine-cones as I had plenty of my own that I had collected myself and dried. I had already spray painted some of the pine-cones silver, some gold, and some with clear acrylic to preserve them.

When I brought the wreaths home I decided to decorate them right away. I made four large bows with multiple loops out of the red and gold trimmed wide wired ribbon and fastened one to the top center of each wreath. I added pine-cone clusters to the sides and bottom of each wreath and adorned these with the red tie berries. The small multi-colored glass bulbs were added throughout the wreath for decorative affect. The wreaths looked wonderful and I loved them and thought they would be a really good addition to our Christmas decorations.

We put these wreaths out for many, many years along with the blue flood lights, window candles, white flood lights and grapevine deer. It was always a LOT of work, but the end result was always so pretty to look at.

While the wreaths themselves looked beautiful every year and could definitely be seen from the street we both thought that, despite the flood lights, the decorations on them could only be appreciated when viewed up close. However, we weren't about to make a change so they would just have to do.

As the years went on the outdoor Christmas decorations started to change. We stopped lighting up the blue spruce trees as they just got too big. Eventually we stopped using flood lights to light up the house as it was just too much work. One year we stopped using the candles in the windows. And, several years ago my sister took the grapevine deer to her house as we weren't using them anymore and she thought they'd look great on her farm.

When we put the artificial wreaths away last year we realized that the years of being outside had finally taken their toll on the red berries and small multi-colored glass bulbs. Many of the red tie berries had corroded and many of the glass bulbs had broken. The pine-cones I had collected from the yard looked as good as new as did the artificial wreaths.


We decided that we would need to spruce them up before we could put them out next year. So, this year, we purchased several boxes of large multi-colored plastic bulbs that were 3" - 4" around, and some beaded swirly silver and red accents for the sides of each wreath. I thought they would add some wonderful color to the pine-cone clusters that were still on the wreath. We wanted large bulbs as we definitely wanted them to be seen from the street. And, we wanted them to be plastic so they would last.

It took several hours to update the decorations on the wreaths. By the time I was finished my hands and lower arms were not too happy with me and ready to go on strike. My hands were covered with tiny wire cuts from working with the artificial evergreen wreaths, wired floral, and plastic bulbs. However, when I was done both hubby and I were really pleased with the results. My hands might not have been - I was.

So, we took our newly decorated wreaths outside and put them up. We were thrilled with the results. The wreaths looked great and the 3" - 4" bulbs could definitely be seen from the street.

Twenty years ago I had bought the four artificial wreaths from Michaels for $20.00 or so each. It cost another $20 or so for the red tie berries and small multi-colored glass bulbs for a total of $100.00 or so for the 4 decorated wreaths. If you divide the cost of the wreaths ($100.00) by the length of time they lasted (twenty years) that translates into an annual cost of $5.00 a year for the wreaths to decorate the outside of our house. That's a GREAT buy. I dare say we would have spent a LOT more than that for the fresh evergreen wreaths. We probably would have had to mortgage the house by now!


Twenty years later and the pine-cones and artificial wreaths were still as good as new. I didn't need to replace them. Hopefully, we'll get twenty years out of the new decorations. My guess is in twenty years we'll have to replace the plastic decorations, but the pine-cones and artificial wreaths will still be as good as new.

Now that's a good buy.

Friday, November 25, 2011

Maybe We Should Call It - Gobble, Gobble, Gobble Day?


Thanksgiving Day is upon us and today our thoughts will turn to giving thanks, family, traditions, and celebrating. 

I prefer to call today - gobble, gobble, gobble day. 

Why? 

Because today we'll all be feasting until our stomachs are bulging (at least some of us will). I think we should call it calories, gobble, gobble day! Don't you? 

Thanksgiving Day is a huge holiday in the United States. 

Families and friends get together and give thanks for all our blessings. 

We have football games, and the Macy's Thanksgiving Day parade. 

And, the day after Thanksgiving marks the beginning of the Christmas shopping season (black Friday) which is, generally, the busiest shopping day of the year. 

We've been celebrating gobble, gobble, gobble day for a long time. 

We've been eating and shopping, then eating, eating and eating. 

And, finally, gaining weight. 

Are we sure we should be giving thanks for this? LOL LOL 

So, why do we do this? 

Well, we seem to think Thanksgiving was a day of observance for the Pilgrims. A day for them and us to give thanks for all we have and all we enjoy. 

But, the Pilgrims never held customary Thanksgiving Days in the fall. 

In fact, the Pilgrims only had one feast in 1621, after their very first harvest and this was NEVER repeated. 

The pilgrims were deeply religious people. A day of thanksgiving to them was a day for prayers and fasting. It was nothing like we have today. 

However, when we think of Thanksgiving we think of the one Harvest Feast that the Pilgrims did have with 90 people, including their Indian friends. 

So, of course their is a history to how did we got the Thanksgiving Day as we now know it? And, since I just love history, I thought I'd share it with all of you. 

The Pilgrims had landed December 11, 1620 and lost many of their group during the cold, harsh winter. Their first harvest in the fall was bountiful so they celebrated the harvest with the Indians who had helped them survive and the feast lasted three days. 

So, how did it turn into a national tradition? 

Well, that didn't happen until 169 years later when George Washington proclaimed a National Day of Thanksgiving in 1789. 

As is usually the case, some people wanted it, some (like Thomas Jefferson) did not. So, between 1789 and 1863 Thanksgiving was dependent upon whether the President proclaimed it as a National Day or not. 

During the Civil War Sarah Hale, a magazine editor, urged President Abraham Lincoln to reinstate Thanksgiving Day. 

In 1863 President Lincoln proclaimed the last Thursday in November as a National Day of Thanksgiving.

However, it was still dependent upon the President, however, to proclaim the day as a National Day every year. Every President since Lincoln proclaimed Thanksgiving Day as the 4th Thursday in November.

Seventy-six years later in 1939 Franklin Roosevelt, however, proclaimed Thanksgiving to be the 3rd Thursday in November to lengthen the holiday shopping season. He did this in 1940 and 1941, too. Doing so, however, upset many people. 

So, we have President Roosevelt to thank for linking SHOPPING to Thanksgiving. 

It wasn't until 1941 that congress declared Thanksgiving as a National Holiday. 

However, they changed it back to the 4th Thursday in November. 

Why the 4th? Who knows. Political pandering, probably. Payback for something? Who knows. We're talking about politicians here. 

In any event, Thanksgiving has remained the 4th Thursday in November and is inexplicably linked with shopping, parades, football games, feasting (and gorging, perhaps), Pepto Brismol (definitely after the gorging), and the winter dieting frenzy. 

After all when you eat, shop, eat, eat, and eat you're going to gain weight. 

So, Happy Thanksgiving to all. 

When you sit down for your feast today just remember these words "Gobble, gobble, gobble.

Oh, how we love to Gobble. 

Eat, eat, and eat! 

Oh, what a wonderful treat! 

Gobble, gobble, gobble. 

Oh, how we love to eat! 

Diet, diet, diet! 

Oh, NO I will NOT try it!" 

Happy Thanksgiving! Gobble, Gobble, Gobble! 

Pilgrims and turkeys are usually associated with Thanksgiving and are also a favorite of doll makers and doll patterns designers alike.