Showing posts with label paper dolls. Show all posts

Saturday, June 24, 2023

My Mixed Media Slow Stitching Pictures - Beach House Scene and English Cottage Kits


On my beach scene mixed media slow stitching picture adventure I mentioned that I was looking for beach or spring flower kits.

Even though I am a seasoned crafter I was new to slow stitching so I thought a kit with a picture of the finished item would be helpful.

Tuesday, June 20, 2023

My "Float Along Quietly" Mixed Media Slow Stitching Collage Picture

As you all know over the years I have bought a lot of craft related items and tend to prefer craft kits as I just don't have a lot of time to peruse fabric or craft stores.  That's what makes shopping on the internet a problem for me.  I can't just buy one kit.  I have to buy more than enough figuring I'm saving time in the long run.  

If you remember some of my stories about making dolls and crafts that I always made things in a factory line way.  I'd design a whole bunch of items, cut all the wood for all of them, sand all of them, put the kits together for all of them and then save them in contains for future assembling.

I also wanted to try every single craft there was and have been endeavoring to do this for the past sixty+ years.  The problem is with numerous kits for each craft you want to try you end up with a LOT of containers filled with items waiting to be made....LOL

So, when I read about "Slow Stitching" I couldn't just buy one kit.  I bought MANY of them.

I was particularly interested in ocean and summer themed kits and found several kits that I liked on Etsy.  I should clarify that - I found "many that I liked.....LOL

Monday, June 19, 2023

My "Surprises In The Mail" Package For My Sister


Yesterday I published a post on my Linda's Blog entitled "My "Take Me To The Ocean" Mixed Media Slow Stitching Applique Collage Wall Art Picture." about the new slow stitching picture I had created recently from a slow stitching kit I had bought.

In that post I mentioned that I had enough fabric from that kit to also make a "surprise packages in the mail" for my sister. However, I didn't have enough embellishments so I had to improvise and add some from my stash.

Sunday, June 18, 2023

My "Take Me To The Ocean" Mixed Media Slow Stitching Applique Collage Wall Art Picture

A couple of months ago I saw a Facebook group "Slow Stitching For The Soul" that intrigued me. So, of course, I had to do a little research.

The group which was started by Bev Ramsbotham - Textile Artist, based in Retford intrigued me because it was a group of no judgement on right or wrong ways to sew something - just creativity.  The idea was to relax and spend time hand stitching in different media to achieve a hand made piece of textile art.  

According to Bev, it was meant for members to "soothe their soul or just have some fun and not worry about 'perfection' or criticism from others, and be pleasantly surprised at what they create."

Given how much I love history and research I decided to find out a little more about "Slow Stitching."

According to "The Craft of Oz" Slow Stitching is: "Slow stitching is a relatively new concept that incorporates old hand stitching traditions. It's a craft where ancient practices and creativity collide. Unlike stitching that is used to mend or make a garment, slow stitching is the act of using needle and thread to create art; just as you would paint, draw or sculpt out of clay. I like to think of it as hand stitching with a creative purpose."

Given my curiosity I wondered when this movement started and who started it.  Well, according to my Google search it was started in 2015 by Mark Lipinksi, an internationally known quilting artist.

So, I thought to myself, "where have I been for the last eight years...." LOL

Monday, November 01, 2021

My New Mixed Media Paper Doll Witch and Frankenstein


I had so much fun with creating my mixed media paper doll for the ""BUBBLE, BUBBLE, TOIL AND TROUBLE.... LET’S GET BUSY ON THE DOUBLE" swap I decided to make another mixed media paper doll for myself.

Now, if you know me, you have to know that "moderation" in creating is not in my vocabulary. When I'm  creating I usually create several different items or more than I really should.  This time I restrained myself and created just one additional Halloween mixed media paper doll.

I wonder if this is the new me - nah....... lol 

It's just a singular aboration..... lol


However, the paper doll I created entered up being both a witch and a Frankenstein so you could say I created two more mixed media paper dolls....lol

I wanted this design to be a sceptical witch and friendly Frankenstein standing in front of a witch's brewing pot.  Even though the Frankenstein was friendly I decided to have him hold two bloody heads ready to go in the pot.

Given the width of this creation I decided it would be easier to not make this duo with articulated arms and legs. All of the layers would be fixed.  

Given how much I love mixed media, I decided this duo would have several embellishments, paper flowers, several different types of fibers, ribbons, chipboard stickers, paper graphic images and various scrapbook papers.


I already had an idea for my witch and Frankenstein "paper dollie's" faces. 

As you know my biggest weakness when it comes to my dolls are painting and drawing the faces.  I can't seem to keep my hands from shaking when I have to paint tiny little details, like the face of a paper doll would be.  So, I decided to use two graphic image faces I had designed years ago for one of my witch e-patterns and one of my Frankenstein e-patterns.

I already had the graphic design faces in my computer so I would be able to easily re-size them to fit my "paper dollie" heads. 


I also decided to use one of my own ghost digital images, as well as several of the  heads that I created for one of my ghost e-patterns years ago. I figured they would be a cute addition to the witch's brewing pot that for this design.  After all - what's a witch's brewing pot without a few heads....lol 

With all those ideas in mind I set about to design the two bodies and the front and back of their costumes.  

I wasn't as concerned with the back of this duo as I wanted them to hang on the wall in my farmer's porch bathroom for the Halloween holiday season.  Since no one was going to see the back I decided to just finish their backs with the same scrapbook papers I would be using on the front of their outfits.

I'm still thinking about a name for this scary duo but I'm working on it.  For now they are hanging on the wall in the bathroom.

I hope you like the way they turned out.


Copyright © 2004 - 2023 - All Rights Reserved - Designed and Written By Linda Walsh

My Mixed Media Witch For The Bell, Book and Cauldron Halloween Paper Doll Swap


I had so much fun with creating my first mixed media paper doll for the "Life Is A Cabaret" swap organized by Hally Levesque for the Progressive Paper Doll Party Facebook group that I decided to participate in the "Bell, Book and Cauldron Halloween Paper Doll Swap." 

The theme for this paper doll swap was "BUBBLE, BUBBLE, TOIL AND TROUBLE.... LET’S GET BUSY ON THE DOUBLE." For this swap we needed to make one paper doll and add a boo-licious recipe to it.

According to Hally: "It may be a traditional or creepy conjured up recipe, as long as it is part of the paper doll creation. (Example) ... a witch, stirring her brew plus a written recipe... just as long as the recipe is part of the doll or its presentation."

No matter what kind of doll I make they always have an opinion on what they should be and my "paper dollie" decided while being a witch she was going to be a nice witch. 

Here's what she told me: "She loves the Halloween season and having fun, but doesn’t like to scare anyone. She’d much rather have a conversation with them or teach them how to fly around on a broomstick." 

"She doesn’t like to create nasty brews but doesn’t mind creating jello brains. You might think that “jello brains” would be scary but she can assure you they are not. They’re “jello” after all."

"However, she does have a reputation to maintain and does need to be somewhat scary for that to remain intact so her solution is to create a visually scary dish but something that wouldn’t hurt a fly." 

I had no choice but to accede to her wishes.


So, I thought about what I wanted to do and decided to go with an articulated witch paper doll with moveable arms and legs. 


For the recipe I decided to have her hold a recipe book in her right hand.


She had to be mainly paper but could include some embellishments so, given how much I love mixed media, I decided she would have several embellishments, paper flowers, a creative embroidery trim, lace, several different types of fibers, paper graphic images and various scrapbook papers.


I decided to use two of my own ghost digital images, as well as several of the "brain" jello images and a scary eyeball image from one of the Halloween scrapbook paper sheets I had bought. 


I already had an idea for my "paper dollie's" face.  My biggest weakness when it comes to my dolls are painting and drawing the faces.  I can't seem to keep my hands from shaking when I have to paint tiny little details, like the face of a paper doll would be.  So, I decided to use a graphic face I had designed years ago for one of my witch e-patterns and my Spoonflower fabric designs.

I already had the graphic design face in my computer so I would be able to easily re-size it to fit my "paper dollie's" head. 

With all those ideas in mind I set about to design the body, moveable legs, moveable arms, and the front and back of her costume.  

I decided the easiest thing for me to do for the back was add a long cape so the back would be finished but nothing would interfere with her moveable legs and arms.

After finishing my paper dolI stood back to take a look at her and decided for my second "paper dollie" she had turned out okay.  

I had decided to name her "Brainna" and she was pleased with that. Phew..... lol

After taking pictures of her I packaged her up for her recipient.

I hope you like "Brainna."  I like her and, luckily, she likes herself, too.....lol


Copyright © 2004 - 2023 - All Rights Reserved - Designed and Written By Linda Walsh

Thursday, September 09, 2021

More Mixed Media House Pictures For The Holiday Season


You had to know when you saw my previous Linda's Blog post about my new mixed media house pictures for the spring and summer that there would be more.  


If you thought that you would be right.  

After all when have I ever been able to stop at just two new creations...... lol

After  creating my spring and summer mixed media house pictures I decidd to create three for the Christmas and winter holiday season.  Here, too, I would be utilizing chipboard houses but the embellishments would be a little different.

Shown in the picture above is one of the mixed media winter house pictures I created.  For this picture I used an 8" by 8" artboard that was sponge painted in winter colors.  The embellishments I added included a chipboard house, a chipboard deer piece, chipboard window and door pieces, chipboard icicle pieces, and chipboard candy canes.  

Plus, I added 3-dimensional snow, scrapbook paper images, victorian children images, mixed media fibers, metallic snowflakes, plastic tubed ribbons, and chipboard winter sayings. I also drew curtains in the windows using metallic pens.


Pictured above is a close-up of the upper right hand corner.

Pictured above is a close-up of the lower right hand corner.

Pictured above is a close-up of the lower left hand corner.


Pictured above is a close-up of the upper left hand corner.

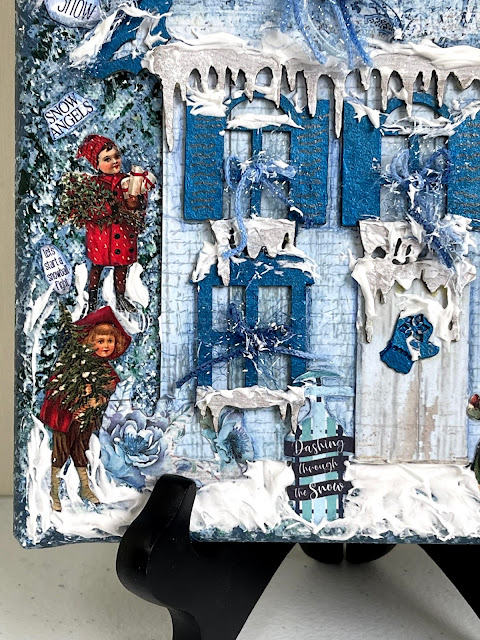
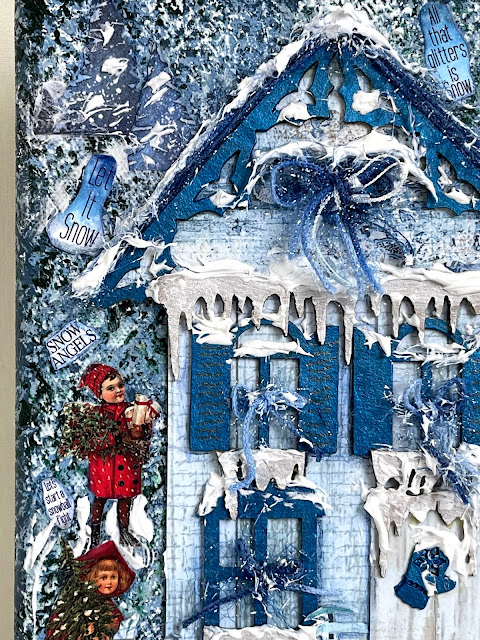
Shown in the picture above is another one of the mixed media winter house pictures I created.  For this picture I also used an 8" by 8" artboard that was sponge painted in winter blue colors.  The embellishments I added included a chipboard house, chipboard window and door pieces, and chipboard icicle pieces.  

Plus, I added 3-dimensional snow, scrapbook winter paper images, scrapbook winter scene images, victorian children images, several mixed media fibers, scrapbook paper winter sayings and a snowman with a fiber scarf. I also embellished the winter scene using metallic pens and stabilo pencils.


Pictured above is a close-up of the upper right hand corner.


Pictured above is a close-up of the lower right hand corner.


Pictured above is a close-up of the lower left hand corner.


Pictured above is a close-up of the upper left hand corner.


And, there is a Christmas mixed media house picture.  Surprise! Surprise! ..lol

For the Christmas picture I also used an 8" by 8" artboard that was sponge painted in Christmas and winter colors.  The embellishments I added included a small chipboard house, a chipboard sleigh, and two chipboard reindeer.  Scrapbook images were used for the window panes and curtains.

Embellishmenst included  3-dimensional snow, scrapbook Christmas paper images, scrapbook Christmas sayings, victorian children images, several mixed media fibers, scrapbook paper tree images, metallic bows, a ceramic Christmas tree and mistletoe. I also embellished the Christmas scene using metallic pens and stabilo pencils.


Pictured above is a close-up of the upper right hand corner.


Pictured above is a close-up of the lower right hand corner.


Pictured above is a close-up of the lower left hand corner.


Pictured above is a close-up of the upper left hand corner.

I was pleased with how my mixed media winter and Christmas house pictures turned out and hope you liked them, too.

Copyright © 2004 - 2023 - All Rights Reserved - Designed and Written By Linda Walsh

Tuesday, September 07, 2021

My Summer and Spring Mixed Media House Pictures


I know that I've mentioned over the years that my husband and I live in a house of dolls and houses.

You know about my passion for dolls but might not know that I love houses and house pictures as well.  

Over the years I have definitely created all sorts of dolls.  For the houses and house pictures I started by buying pictures I liked for our house starting 33 years ago.  After putting up all the pictures my husband and I realized most of the pictures we had selected were of houses or clusters of houses.  Too funny!


So, it seems, I'm also attracted to house art.... lol

Well,  over the years I've bought a few house sculptures - mainly ones that look like the house we live in but, from time to time, some a little different.  And, of course, when it came to craft kits I bought or crafts I wanted to make they featured houses, too.


For example, I bought a creative embroidery kit featuring a quilt shoppe - Embroidered Quilt Shoppe Kit by Chickadee Hollow Designs, which I reviewed here.  The picture above is the quilt shoppe I made and framed.


I also bought four punchneedle kits featuring homes which I finished with handmade pine wood shadowboxes and reviewed  as shown in the pictures above.

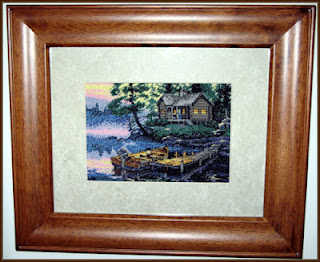
And, of course, there were pictures of houses that I had cross-stitched from cross-stitch kits I had bought and reviewed.


There were 20 cross-stitch kits that I purchased featuring houses and which I finished with store bought frames or where I made pine wood shadowboxes of my own.  I reviewed all of the kits so if you're interested in my reviews please click on the link below each picture.


 Of course, I didn't just make houses from craft kits I had bought.  Some were created based on craft classes I may have taken like the Tinytopia & The Magic of Little Things class I had taken and which was taught byMary Jane Chadbourne.  

In her class I created mixed media houses, some of which were rows of paper or wood houses, some were tiny house pictures made of paper or wood, one was a cluster of winter wood houses, one a cluster of fall wooden houses and several were fairy cottage houses made of wood and paper, all of which are shown in the picture above.

Since I've been in love with mixed media craft creations for several years now I, of course, made some house designs of my own.


There was my My New Handmade Mixed Media Wood Christmas Houses which were made out of pine wood blocks my brother had cut for me and which are shown in the picture above.  


Then there were my New Mixed Media Christmas Decorations - Adorable Gingerbread Houses which were made from chipboard paper house kits I had bought from Alphastamps.net which are shown in the picture above.  All were embellished with chipboard paper doors and other scrapbook paper images, some of which were my own designs.


There was the My New Miniature Mixed Media Gingerbread House Christmas Ornaments which were made from chipboard paper  house kits I had bought from Alphastamps.net which are shown in the picture above.  All were embellished with chipboard paper doors and other scrapbook paper images, some of which were my own designs.


So, what does all this have to do with my summer and spring mixed media house pictures shown at the beginning of this post and in the pictures above?  

Well, out of all the house crafts I had made over the years I didn't really have too many for the spring and summer season as I tend to favor fall and Christmas craft decorations.  Hmmm.... wonder why that is?

So, since I was in a mixed media picture creating mode I decided I should create a summer seaside house collage picture and a spring flower garden house collage picture.


My summer seaside house collage picture was created using an 8" by 8" art board which I sponge painted, paper house andchipboard paper accessory pieces I had bought from Alphastamps.net.  The collage picture contained various embellishments like paper flowers, paper reeds and various summer and beach scrapbook paper images. 

Included were other chipboard pieces like seahorses, anchors, starfish, shells, roof decorative embellishments, and more.


Pictured above is a close-up of the upper right hand corner.


Pictured above is a close-up of the lower right hand corner.


Pictured above is a close-up of the lower left hand corner. 


Pictured above is a close-up of the upper left hand corner.

I had decided ahead of time that I didn't want to hang this picture on the wall.  Instead I finished the back and placed it in a wooden stand.  It currently is sitting on my family room fireplace mantel and I love it. 


For the spring flower garden cottage picture I wanted something a little smaller so I chose to put this chipboard house that I had bought on a 5" by 7" art board.  

After sponge painting the art board I added chipboard embellishments like a water fountain, a birdhouse, birds, butterflies, and leaves.  I also added paper flower embellishments, silk florals, and various scrapbook paper images.  


Pictured above is a close-up of the upper right hand corner. 


Pictured above is a close-up of the lower right hand corner. 


Pictured above is a close-up of the lower left hand corner. 


Pictured above is a close-up of the upper left hand corner. 

I was happy with the way my spring cottage picture turned out and, like the seaside cottage picture, decided not to hang it on the wall but finish the back and add it to a small metal picture stand.  Then I placed it on the opposite side of my family room fireplace mantle.

I was really happy with the way my two pictures turned out and hope you like them too.

Copyright © 2004 - 2023 - All Rights Reserved - Designed and Written By Linda Walsh