Wednesday, September 30, 2015

Gotta Love Mixed Media and My Mixed Media Tutorials, Video's, Patterns and How-To's Pinterest Board


To say I like and enjoy mixed media would be an understatement.  I LOVE and ADORE mixed media and have since I took the ART-S2-307 The Imaginarium: Anthologies of an Art Doll with Mary Jane Chadbourne class at Artful Gathering last year.  The class taught us how to make a mixed media doll.


I can hear you all saying, ah ha!  No wonder.  It's no big surprise you like mixed media because it's about creating dolls.  Au contraire!  You can make mixed media dolls, and that's mainly what I like doing, but you can create just about anything you want.


There are absolutely no limits on the types of creations you can make and the elements used to make them.  It's quite amazing. It's a very BIG spectrum.


After Mary Jane's class last year I went a little wild with mixed media and created a whole bunch of dolls, shelf sitters, holiday and seasonal decorations and just plain fun items.


Of course, this year's Artful Gathering classes didn't curb my enthusiasm.  They enhanced it.  It's almost like a veil has been lifted on my creativity and the thoughts and ideas are just bursting forth.


Of course, I want to do everything.  Learn everything I can and make everything I can.  That I know is impossible if not for a lack of time, but lack of space in my house.  Poor hubby.  I don't know how he tolerates my creativity.

No matter where my creativity takes me in mixed media I know I want to try as much as I can.  When K do I hope all my mixed media Pinterest board provides me with plenty of inspiration.


I fell in love with mixed media art dolls this past summer and want to learn everything I can about mixed media art. Here's a few video's and tutorials or how-to's that may help me in the endeavor.


My Christmas Collage Cross-Stitch Picture - Mill Hill Buttons & Beads Cross-Stitch


I enjoyed stitching my Autumn Wreath so much I decided to create another cross-stitch picture with wood frame to add to my collection. This time it had a Christmas theme and this time it would be inserted into a wooden frame that I had bought versus the shadowbox picture frames that I have previously used.

The Christmas Collage - Cross Stitch Kit pattern uses full counted cross-stitch and half stitch as well as beads of various sizes for emphasis and depth. The pattern also calls for certain areas of the perforated paper to be left untouched as the background. In this case they were leaving sections of the green perforated paper background untouched.

I decided to frame my finished cross-stitch picture in a  Matte Green with Red Bow 6 x 6 Solid Color Mill Hill GBFRFA8 Wooden Frame, which is shown in the picture above.  It's a 6" x 6" hand painted green wooden frame with a bow and without glass.  Unlike the shadowbox frames more of the perforated paper would be seen surrounding the cross-stitch picture.

The pattern called for a red frame and certain areas of the perforated paper to be left untouched as the background like the picture shown below:


However, I don't like seeing the different perforated sections in the background and since a lot more of it would be exposed with this frame I opted instead to finish all of the background with a light green DMC embroidery floss color sewn as a half cross-stitch using two strands of the floss.

I had decided to square the edges of my picture and also decided to add as many rows of the green floss around all the edges to make sure the perforated paper would not be visible once my cross stitch picture was inserted into the wooden frame.  Plus, I had decided I liked the green frame with the bow instead of a red one as I wanted the really bright colors of the cross-stitch to stand out more.

I also decided to once again utilize the rectangular wood frame jig that my darling husband built for me that I could tape the edges of my perforated paper to. The wood frame jig is a rectangular embroidery hoop of sorts, but without bending the perforated paper. He had made it out of 1/2" x 1" pine wood strips with an adjustable center strip that I used for this 5 x 5 square design.

I had learned from previous mistakes that I needed to draw diagonal lines to locate the exact center of the perforated paper and also drew diagonal lines across each corner of the pattern to get the center point as well.


While the end results of this design were wonderful some things in the kit and in the instructions could be improved upon so I'd like to offer the following constructive suggestions:

The cross-stitch chart was in black and white as was the floss color code and symbol key. Both were easy to read and very clear. While I had no problem with the chart and keys I did have a problem with the way the DMC floss was presented. All of the floss was tied together in one big knot so you had to separate the floss pieces yourself, sort them, and try to interpret which color belonged to which floss # and symbol key on the color chart. If you only have a few colors to deal with this isn't a problem. However, if you have several different colors to choose from that are close in color then interpreting the chart can be tricky. You may assign the wrong color to the wrong symbol if the colors are too closely aligned.

As I have done with other cross-stitch kits I've completed I had to design my own thread color sorter and symbol key. I took a piece of thin cardboard and cut a 1" x 9" long rectangular piece out to use as a thread sorter. I then punched 12 holes in my cardboard strip in which to tie each of the different colors. Just above the hole I wrote the DMC floss # and just below the hole I added the respective cross-stitch symbol. I then inserted the floss threads that went with that # and symbol through the hole and tied them in a loose knot. This kit could be much improved if a thread sorter with respective #'s and symbols was provided.

The beads were contained within three small Ziploc bags which was fine. However, when several different beads of similar color or size are included within the bags it can be very difficult to distinguish between the colors or between the petite and regular size beads.  The chart had symbols and footnotes to try to help distinguish which beads were within which bag.  However, labeling the Ziploc bags as to which bead number they contained would have made this a lot simpler and would enhance this kit and allow you to easily tie the bead # to the symbol number on the charts.

Also, I dump all the beads from one bag in a tray and insert my needle into the center of the bead I need in the tray as I go along.  In this case the petite periwinkle bead and petite green velvet bead were contained within the same bag and it was very difficult to distinguish between them as you went along. The solution was to separate all the beads within the bag but this would have taken way too much time.  It would have been better if these two beads were not included in the same bag.

The kit included a star button that was supposed to be sewn inside the large gold star.  However, the button was glued to a small piece of cardboard which did not easily come off and the glue used had hardened and extended over the sides of the button.  I couldn't even cut it with scissors it was so hard. The button was cheap and I didn't like it so I opted not to use it.

The wooden frame came with a 6" x 6" cardboard mounting board for the picture but had no back so I I decided to cut a 6" x 6" white foam board as filler for the back. I also cut a piece of heavy decorative paper and taped it to the back of the picture with double sided tape to finish the back of the frame.  The frame could be hung as a picture or stand with an enclosed dowel peg used as an easel and I opted for the latter.

My results with the totally finished background, square edges, and green frame is shown below:


Despite the relatively small issues I had encountered with the kit I was happy with the way my Christmas Collage turned out.

It took me 34 hours to complete this picture including the framing. As always, my comments are meant to be constructive to enable future purchasers to benefit from my experience and to enhance their ability to create a wonderful little cross-stitch design.

My Latest Cross-Stitch Project - Autumn Wreath Cross-Stitch Shadow Box Picture


Since Fall is my favorite season for crafting I decided to create another shadowbox cross-stitch picture with a Fall wreath to add to my collection.

Like the other Mill Hill - Buttons & Beads Series patterns I had bought the Autumn Wreath kit included the pattern, embroidery thread, brown perforated paper, beads, button, 2 needles and instructions.

The Autumn Wreath Cross Stitch Kit pattern uses full counted cross-stitch and straight stitching as well as beads and buttons for emphasis and depth. The pattern also calls for certain areas of the perforated paper to be left untouched as the background. In this case they were leaving sections of the brown perforated paper background untouched.

I, once again, decided to frame my finished cross-stitch picture in a 5" by 5" white shadow box frame that is 1 1/2" deep and can stand on it's own or with its back picture stand (like the picture above) as I've been really happy with the way all my other cross-stitch shadowbox pictures have come out.


I also decided to once again utilize the rectangular wood frame jig that my darling husband built for me that I could tape the edges of my perforated paper to. The wood frame jig is a rectangular embroidery hoop of sorts, but without bending the perforated paper. He had made it out of 1/2" x 1" pine wood strips with an adjustable center strip that I used for this 5 x 5 square design.

I had learned from previous mistakes that I needed to draw diagonal lines to locate the exact center of the perforated paper as in the last perforated paper cross-stitch picture I had done was slightly off center by a few holes which caused a problem with inserting the needles in the holes along one of the edges of my frame. So, I drew a diagonal line across each corner to get the center point of the perforated paper.  I also drew diagonal lines across each corner of the pattern to get the center point as well.

I had also run into a slight problem with one of the perforated paper cross-stitch pictures I had previously created with the beads along the edge causing a problem when framing so this time I also drew squares on the perforated paper to show me where the 5" x 5" square was. Plus, I knew I wanted to square my picture so I needed to know where to end my stitching or where to add additional columns and rows of stitching..


While the end results of this design were wonderful some things in the kit and in the instructions could be improved upon so I'd like to offer the following constructive suggestions:

The cross-stitch chart was in black and white as was the floss color code and symbol key. Both were easy to read and very clear. While I had no problem with the chart and keys I did have a problem with the way the DMC floss was presented. All of the floss was tied together in one big knot so you had to separate the floss pieces yourself, sort them, and try to interpret which color belonged to which floss # and symbol key on the color chart. If you only have a few colors to deal with this isn't a problem. However, if you have several different colors to choose from that are close in color then interpreting the chart can be tricky. You may assign the wrong color to the wrong symbol if the colors are too closely aligned.

As I have done with other cross-stitch kits I've completed I had to design my own thread color sorter and symbol key. I took a piece of thin cardboard and cut a 1" x 9" long rectangular piece out to use as a thread sorter. I then punched 14 holes in my cardboard strip in which to tie each of the different colors. Just above the hole I wrote the DMC floss # and just below the hole I added the respective cross-stitch symbol. I then inserted the floss threads that went with that # and symbol through the hole and tied them in a loose knot. This kit could be much improved if a thread sorter with respective #'s and symbols was provided.

The beads were contained within three small ziploc bags which was fine. However, when several different beads of similar color or size are included within the bags it can be very difficult to distinguish between the colors or between the petite and regular size beads. Labeling the ziploc bags as to which bead number they contained would enhance this kit and allow you to tie the bead # to the symbol number on the charts.

The pattern called for certain areas of the perforated paper to be left untouched as the background like the picture shown below:


However, I don't like seeing the different perforated sections in the background and opted instead to finish all of the background with an ecru DMC embroidery floss color sewn as a cross stitch using two strands of the floss. I had decided to square the edges of my picture and also decided to add two rows of the ecru floss around all the edges to make sure the perforated paper would not be visible once my cross stitch picture was framed in its' shadowbox.

I knew from measuring the perforated paper that the leaf button in the top right hand corner would have to be moved down for the shadowbox I was putting my cross-stitch picture in.

Instead of mounting my picture on foam as I had done with my previous cross-stitch pictures I opted instead to mount my Autumn Wreath on cardboard.

My results with the totally finished background, square edges, and hard chipboard is shown below:


Despite the relatively small issues I had encountered with the kit I was happy with the way my Autumn Wreath Cross Stitch Kit shadowbox picture turned out.

It took me 40 hours to complete this picture including the framing. The additional length of time it took to finish this cross-stitch picture versus others of similar size was due to using a cross-stitch for the ecru background versus using a half cross-stitch which takes less time.  As always, my comments are meant to be constructive to enable future purchasers to benefit from my experience and to enhance their ability to create a wonderful little cross-stitch design.

Tuesday, September 29, 2015

Gotta Love Wool Felt and My Wool Felt Tutorials, Video's, Patterns and How-To's Pinterest Board


I've been crafting with wool felt for as long as I can remember. Years ago I started making animals and fell in love with shabby felt. It was just so versatile. You never had to worry about the seams fraying and the fabric could be easily shaped for whatever animal configuration you were trying to make.  I loved it.


Since then I've used shaggy felt and wool felt to make all sorts or felt items.  Whether it's penny rug creations.....


wool felt Victorian dress ornaments, ....


alpaca mini quilts, ornaments, and mug rugs.....


or a whole family of wool felt dolls - I love creating with wool felt.

Since I love wool felt so much I decided to create a Pinterest board for storing all the free wool felt tutorials and patterns I've found on the web. Some I hope to try soon. Others will be waiting for me when I finally have time. Maybe a decade from now given how I never have time. Not to worry my Pinterest board will be ready whenever I am.... Enjoy.


I just love crafting with wool felt, watching felt craft video's and reading tutorials or how-to's. Here's a few I'd like to watch or read.

If you love my Wool Felt Tutorials, Video's, Patterns and How-To's board please follow my board by clicking on the link above.

Sunday, September 27, 2015

Who Wouldn't Love A Pair Of Wooden Scissors and My Woodcrafts Tutorials Pinterest Board


I've posted many times about the wonderful wooden creations my brother has made for me or given to me as gifts over the years. Each and every woodcraft he has made has been even better than the one before it.  You see, he is an amazing woodworker.

Christmas presents from my brother, and from many members of the family for that matter, are usually handmade. One year my brother had something in mind that he wanted to make that he thought I'd really, really love.

He had found a pattern for wooden scissors that he wanted to make. Now, mind you, these wooden scissors were not the kind you could hold in your hands. Au contraire! These scissors were 3 feet long and were meant as a decoration. He knew they'd be the perfect gift for me.

Well, since my sister is also a crafter he also thought that a pair of scissors would be perfect for her, too. Unfortunately, for him, timing wasn't going to be in his favor.

You see, my sister and brother-in-law came early for Christmas that year and my brother ended up giving my sister her wooden scissors early. Of course, he also gave my brother-in-law, who is a hunter, a rifle. Well, not a usable rifle. This one was wooden and 6 feet long. It was enormous and also meant as a decoration and, of course, my sister and brother-in-law loved it.

Getting back to the story. My brother didn't want my sister to spoil my wooden scissors surprise so he swore her to secrecy. Of course, she promised not to give it away and, of course, she accidentally did. I didn't want to spoil my younger brother's surprise so I didn't let on that I knew one of his presents was scissors. I hadn't seen them, but knew they were big.

In any event, when we had our Christmas get together I had to admit that my sister had somewhat given it away. Of course, my brother had to call her and chew her out - the brotherly love kind of chewing out that is. It didn't really matter that my sister had kind of given the surprise away. What mattered was my brother had lovingly made these for me (and my sister) because he knew we'd love them. And, we both do.

My sister has hers hanging up in her loft which is her craft area. As I've mentioned before in some of my posts my craft area is kind of - ALL OVER THE HOUSE! I had wanted to hang my scissors above the window where my sewing machine is, but they wouldn't fit. They were TOO BIG! So, hubby thought they'd look nice on the wall to the left of my sewing station - so we hung them there.

Every time I look at them I laugh. They are just so adorable - and BIG! I hope someone doesn't mistake them for real scissors! NAH! They wouldn't really work - or would they? What do you think?

Over the years I've been the recipient of many of my brothers wonderful woodcrafts.  Several times I've seen something I wanted and have asked him to make it for me.  He always does and the creations are always amazing.


I love woodcraft's and love working in my brother's workshop. If you would love to learn woodcraft's, too perhaps these tutorials, video's and how-to's will be helpful.

If you love our Woodcrafts Tutorials & Woodworking Tutorials, Video's, Patterns and How-To's board please follow my board by clicking on the link above.

Saturday, September 26, 2015

There's Nothing Like Big Scary Dolls For Halloween!


Second to my love of Fall crafting is Halloween crafting.   I don't know why I like making witches, goblins, Frankenstein's, ghosts, mummies, and Dracula's, but I do. That's surprising as if I really saw a monster I'd probably have a heart attack.

I see them in my dreams from time to time, but it's only a dream so no worry.  I do know, however that I cannot watch scary movies. They're just too scary and definitiely give me nightmares.  Go figure!

But, I do like to create monsters and the bigger the better.

So, I thought I'd show you pictures of some of my favorite BIG Halloween dolls and wood crafts that I made to decorate my house during the holiday season.


First, there is "You're Scary? You've Got To Be Kidding, Frankenstein!" I named him this way due to the expression on his face and his general "lack" of scariness. He couldn't scare a mouse let alone a human. But, every Halloween I put him in my hall with his own spotlight focused right on him for all the trick or treater's to see when they come trick or treating.

He stands 48" tall and is one of the BIGGEST dolls that I have ever made. He was made based on a Tattered Treasures design.


He has a 3/4" thick pine wood body, painted green Frankenstein shaped head with bolts sticking out of the sides. He's wearing hubby's old shirt and his wood legs are painted to look like plaid trousers. He has 4x4 cubes for his massive feet and a solid wood base. His vest is painted wood.

He also has a splattering of red blood everywhere and is adorned with raffia bows and tattered cloth. And, of course, he has the Frankenstein surgery scars everywhere. Maybe the red blood might scare some children, but his face surely wouldn't.


My next scary or should I say non-scary Halloween doll is a Frankenstein that thinks that he is being pledged to a fraternity. He's not, but he thinks he is.

I'm not sure what is going on inside his head, but he thinks he's a college student not a Frankenstein. I'm not sure how he gets around campus with his feet the way they are. One facing one direction and the other facing another direction. He definitely can't climb stairs.

He's a 39" Frankenstein made based on a Tenderberry Stitches Design that I named "Pledge Me Frank!"


His body is made of wood and his head is made of cloth. His face is embroidered and he has black bead eyes and curly black hair. Wooden pegs hang out the sides of his head.

Frank is wearing one of my husband's old black sweatshirts and is wearing some of my grandson's old jeans. His thick wool socks were my brothers. That is, until they got holes in them and then became mine. He has the words "My Heart Belongs To You Witchie Poo!" embroidered on the front of his sweatshirt and is carrying a Halloween banner.

There actually is a cute story about Frank. I had decided to take him with me just as a decoration to a local craft show that I was doing at my mother's church one Fall. I had him positioned just outside my table and a little girl about 4 or 5 years old walked by him. He was about her height.

Well, she became fascinated by him and came back a couple of times and just stared and stared at him. She seemed to be fascinated by his feet.

So, I decided to ask her a question. I walked over to her and said, "Do you think there's something wrong with his feet?" She looked at me and shook her head "yes" and then looked at her mother and said, "Mom, can I have my feet like that!"

Well, her mother, my mother (who was helping me at the fair) and I all laughed at the same time. Her mother replied, "I don't think so, honey!"


Another one of my favorite BIG Halloween dolls is a 39" mummy that is based on a Tenderberry Stitches design and which I named, "Mummy - Where's My Mummy?" He doesn't reside in our house during the Halloween season, but with my twin grandsons.

Their mother absolutely loved him the minute she saw him and wanted him for a Halloween decoration for the front landing of their house. So, of course, I gave him to her.

She also went home with hundreds of other handmade dolls and wood crafts that day. So much so that they wouldn't all fit in her car. That's another story and one we had a really good laugh over. Suffice to say I just love it when someone loves my handmade dolls & wood crafts enough to want to have them and display them in their homes. That, plus the fact that I was giving them to someone I love makes it all the more special.


In any event, back to "Mummy - Where's My Mummy?" He has a wood dowel body, cloth arms and a cloth head and is carrying a sign that says, "I Want My Mummy!"

His whole body is covered with gauze. Before I made him I figured that two large boxes of gauze would be enough to wrap all of him. Buy, was I wrong. I think my hubby actually bought close to ten boxes of gauze and I used all of it. That became one expensive mummy. Of course, I didn't tell my daughter-in-law that. Her mouth would have dropped at how much it cost to make him.

In any event, after I finished applying all his gauze I added a cloth serpent around his neck, a rubber snake, several patches, and a heart. I also applied several areas of black and gray blush to his whole body as I wanted him to look "dirty." It all had the right effect and I was happy with the way he turned out.


Last, but not least of the BIG Halloween dolls and wood crafts is a woodcraft that is probably one of my all time favorites. I named it "I Just Love The Fall!" and it was made based upon a Rustic Treasures design.

"I Just Love The Fall" is a 25" wide x 30" tall painted 3/4" pine wood craft featuring a large ghost, red barn, cat, fence, stars, and suspended moons.

Both the ghost and cat are wearing bandannas and a mixture of colored raffia is used throughout as decorative accents.


This wood craft usually resides in the dining room fireplace display and stays out for the entire Fall, Halloween, and Thanksgiving season.

I just happen to like it's rustic and primitive appearance which fits in well with all my other Fall, Halloween, or Thanksgiving decorations.

It is definitely one the favorite things I made with my husband. I actually think it's one of his favorites, too.

I hope you've enjoy seeing some of my favorite BIG Halloween Dolls and wood crafts that I use to decorate my home during the Fall season.

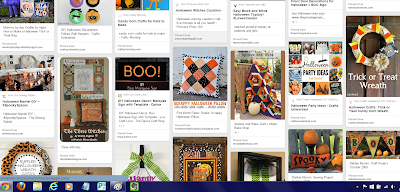
Since I love Halloween almost as much as I love Fall I had to create a Halloween Pinterest board.  It's filled with all sorts of Halloween crafts tutorials, video's, patterns and how-to's that I have found.


I hope you enjoy some of the Halloween crafts tutorials, video's, patterns and how-to's I have found for making ghosts, goblins, witches, skeletons, Frankenstein, vampires, and tombstones. Oh! My!

If you love my Halloween Craft Tutorials, Video's, Patterns and How-To's on board please follow my board by clicking on the link above.

Monday, September 14, 2015

For The Love Of Sewing - My Sewing Tutorials, Video's, Patterns and How-To's Pinterest Board


Over the years I've written about sewing and how my family has "sewing in our bones."  I sew, my sister sews, my sister-in-laws sew, my nieces sew, my mother sewed, my grandmother sewed, my aunts all sewed, and my great grandmothers and aunts all sewed.  Suffice to say I come from a long line of sewers.

There's no doubt about it. We're a sewing family. We've got sewing in our bones!

Personally, I just love to sew. You might even say that not only do I have "sewing in my bones" but, I have a "need to sew." But, what does that mean?

Anyone who loves to sew knows what I mean when I say "I just have an urge to sew." An overwhelming desire to create. And when you do, you get into a mode - "a sewing mode" which may last for days on end. Sometimes, even months on end. You must be wondering, "Is that relaxing?" For me it is. It's the best form of relaxation.

I love designing my own creations and also love finding all sorts of beautiful things to sew.  As a result I have many, many sewing projects on the back burner.  To store all the sewing projects I'd love to create I created a sewing Pinterest board.


 If you love sewing as much as I do or want to learn how to sew perhaps these tutorials, patterns, video's and how-to's will be helpful.

If you love our Sewing Tutorials, Video's, Patterns and How-To's board please follow our board by clicking on the link above.


Crafts Tutorials, Video's, Patterns and How-To's Pinterest Board


Over the years I've posted many articles about crafters and crafting inspirations. I was inspired for the fashions on the Victorian Era by something my Grandmother did. When I was a very young girl she gave me a very old print of Godey’s Fashions for August 1870 that belonged to my great, great aunt Flossie. I was captivated by the dresses and from that moment on I was hooked. In fact, sometimes I think I was born in the wrong era. From that moment I wanted to make beautiful Victorian dolls and create my own Victorian doll patterns.

I have also loved dolls, sewing, floral arrangements, genealogy, history and crafts since I was a little girl. I was always making or sewing something and always wanted to design my own dolls. My mother and her best friend inspired me to sew and taught me how to. In fact, I come from a family of sewers. My mom does, my sister does, all my sister's in-law do, my aunt did, my grandmother did, and my nieces do. All of the women in our family sew. All the members of our family either sew or craft to one degree or another - even the men! And, I think we all inspire each other by loving everything we all create.

All different types of crafts inspire me.  In fact, there isn't a craft I don't have on my bucket list of crafts to make.  I want to make them all - at least once. While I can't make them all at the same time I can save the craft projects I want to try at a later point in time. I hope you find something here to inspire you.


I love arts and crafts tutorials, articles, and how-to's websites and have found many, many tutorials and tutorial websites online that offer fabulous tutorials, articles, and how-to's. Here's a few I've found and would love to try.

If you love my Crafts Tutorials, Video's, Patterns and How-To's board please follow my board by clicking on the link above.

Sunday, September 13, 2015

For The Love of Cross-stitch and Needlework


To say that I love cross-stitch would really be an understatement. I LOVE cross-stitch and just find it so relaxing. As a result I've made many cross-stitch creations over the years - as you can see in the collage above.

Many I've made for my own home decor and many I've made as gifts. I always buy cross-stitch kits as I don't have the time or inclination to select the individual DMC embroidery floss colors each and every time. So kits it is.

Some of the kits I loved and some I had a few issues with. So, I thought it might be helpful if I reviewed the kits I've made for you just in case you were thinking of making the cross-stitch kit yourself. All of my cross-stitch kit reviews were posted here in my "Linda's Blog" and on my "The Book & Crafts Review Corner" blog.

I also love looking at cross-stitch and needlwork tutorials I find all over the web.  So, of course, I set-up Pinterest boards for both.  Enjoy!


I just love to cross-stitch and love watching cross-stitch video's, finding free cross-stitch designs, and reading tutorials on cross-stitching. Here's a few I've found.

If you love my Cross-Stitch Tutorials, Video's, Patterns and How-To's board please follow my board by clicking on the link above.


There's nothing more relaxing for me than needlework. If you love needlepoint, hand embroidery, machine embroidery, digitized embroidery, crewel and stitchery or would love to learn perhaps these tutorials, video's and how-to's will be helpful.

If you love my Needlework Tutorials, Embroidery, Needlepoint, Crewel & Stitchery Video's, Patterns & How-To's board please follow my board by clicking on the link above.

Friday, September 11, 2015

For The Love Of Creative Embroidery, Crazy Quilting, and (SRE) Silk Ribbon Embroidery


If you've been following along with all the posts on my Linda's Blog you know that back in 2012 I took my very first online class with Pat Winter on Artful Gathering. The class was called Crazy Quilting 101 and I LOVED every minute of the class. Pat was such a fantastic teacher. I only wished I had taken one of her classes years before.

After that class my head was filled with all sorts of ideas for crazy quilting creations that I could make and, maybe, give as Xmas presents.

With Xmas presents in mind, of course, I did some shopping.

Now I know that's no surprise to you. Linda, shopping?  There's always time for shopping! Right?

So, what did I buy back then?


It's been three years since I bought those supplies.  I still have them and they definitely won't go to waste.  If you know me you know that I will eventually get to making everything I had in mind for these supplies.

With Pat's class I learned how to crazy quilt, how to create beautiful (SRE) silk ribbon embroidery flowers, and how to stitch beautiful creative embroidery.  I loved all of it and since then have been saving tons of porjects I'd like to try on three different Pinterest boards.


I love creative embroidery and love learning how to create astonishing embroidery. I hope you do, too. Here's a few tutorials, video's and how-to's to help you with creating your own beautiful creative embroidery pieces.

If you love my Creative Embroidery Tutorials, Video's, Patterns and How-To's board please follow my board by clicking on the link above.


I just LOVE crazy quilting and especially love watching how-to videos and reading tutorials. I hope you like my selection.

If you love my Crazy Quilting Tutorials, Video's, Patterns and How-To's board please follow my board by clicking on the link above.


I just LOVE silk ribbon embroidery (SRE) embroidery and love watching how-to videos and reading tutorials on creating these beautiful needlework pieces of art. If you do, too I hope these tutorials, video's and how-to's are helpful.

If you love my Silk Ribbon Embroidery Tutorials, Video's, Patterns and How-To's board please follow my board by clicking on the link above.