On August 30, 2010 I received an email from the Favecrafts.com Editorial Team asking if I would be interested in answering the Monthly Craft Question over at FaveCraftsBlog. The question was: Monthly Craft Question: Do you like to use patterns when crafting or do you just wing it?
Here's what I said: Well, that is certainly an interesting question for a doll pattern designer. My quick answer is “of course I use patterns/templates/instructions.” The truth is, for me personally, I do and I don’t. I tend to like visual instructions (like diagrams) or pattern pieces versus written instructions. That’s me. However, everyone is different so all my patterns include diagram sheet(s) showing the steps from start to finish, pattern piece sheets labeled so that you can use them to complete the doll from start to finish, and written instructions containing more detailed sewing verbiage. So, whichever type of crafter you are you can follow the design from start to finish.
For sure it's no secret that I love the Fall season and designing dolls for the Fall season.
One of my favorite dolls to design for this season besides witches, ghosts, goblins, pilgrims, Dracula, Frankenstein, and mummies is scarecrows.
Several years ago I wrote an article on my love of scarecrows and their history in a Linda's Blog post entitled "A Teddy Bear As A Scarecrow!" and thought you might like to reread it now and see pictures of some of the scarecrows that are decorating my house this year.
The other day I just had a feeling that the day was not going to be a normally peaceful day.
I don't know why - just a feeling I got.
But, as the morning progressed and nothing strange had happened I started to think the day was going to be okay.
That was foolish on my part.
You see, the day turned out to be anything but normal. It was actually a cool, crisp day to the start of Fall which was a pleasant relief from all the hot, humid days we've been experiencing.
So, hubby and I decided to go for a walk. Since it was so beautiful out we decided to go for a long, leisurely stroll - and that was our mistake!
As we were pulling into the driveway hubby and I got a sense that something wasn't right. The ground was shaking and the house was being rocked off it's foundation.
And, we do mean off its' foundation - hard as that may seem for you to believe.
We looked at each other and said, "what on heaven's earth is going on?" The house was literally rocking to and fro.
As we gingerly stepped out of the car we realized it couldn't be an earthquake as the ground under our feet wasn't moving - thank goodness for that! But, the house was still rockin to and fro!
YIKES!
And, out of the corner of my eye I thought I saw movement in the windows. Not just movement in one window - but, all of the windows. As if someone were peeking out the windows and realized too late they had been seen. Now we knew something was going on inside the house.
And, then we heard it - LOUD music.
Not just any music, but the song "The Monster Mash" by Bobby "Boris" Pickett was playing louder than was acceptable in our neighborhood.
We were surprised that we hadn't heard the LOUD music as we were driving up the street.
We were even more surprised that none of our neighbors could hear it.
In fact, our next door neighbor came out and waved at us as he got in his car. He didn't seem to hear the LOUD music.
We looked at each other and said, "He didn't hear that?" How can he not hear that? It's extremely loud. Catchy, but LOUD.
It was catchy and we did have to admit - how can you not like "The Monster Mash?"
It's definitely a song that gets your feet moving.
However, it seems we were the only ones who could hear the music.
We could see from where we were standing in the driveway that there was definite movement inside the house. Not just any movement. There seemed to be many, many people dancing.
On closer inspection we realized that it wasn't people dancing - it was the Halloween, Thanksgiving, and Fall dolls dancing. They were having a party while we were out. A "Monster Mash" party.
At this point I could see that hubby was perspiring. I thought for sure he was getting angry and that within a few minutes his blood would be boiling.
Then the strangest thing happened - he started to do "The Monster Mash" right out in the driveway.
"It was a graveyard smash"......right in our driveway.
"The Monster Mash!"
"It caught on in a flash!"
And, then my arms and legs started moving.
I was doing "The Monster Mash" right out in our driveway.
Two old fogies doing "The Monster Mash!"
"The scene was rockin', all were digging the sounds!" Even us, in the driveway.
Everyone was doing "The Monster Mash!"
"It caught on in a flash!"
"The Monster Mash!"
But, everything wasn't cool.
The house was still rockin' and our feet were still mashing. It had to stop. We had to stop it.
But, "The Monster Mash" was the hit of the land.
Well, make that the hit of our house.
The dolls were all filing out of the door in single order.
Ghosts, witches, mummies, Dracula, Frankenstein, pilgrims, scarecrows, even turkey's, - all doing "The Monster Mash!" Right in our driveway.
We realized it couldn't be stopped.
Why, "it was a graveyard smash!"
So, hubby and I looked at each other and decided that life was just too short not to enjoy yourselves.
Albeit we were doing "The Monster Mash" with thousands of dolls.
We looked at each other and said, "what a scene this must be for the neighbors!"
But, none of the neighbors were coming out of their houses.
In fact, our next door neighbor returned and just waved at us before he went into his house.
That was strange!
Then we thought, "for sure he could see everyone in our driveway doing "The Monster Mash!"
Couldn't he?"
Or, was it just hubby and I looking ridiculous by ourselves?
Could we be doing "The Monster Mash!" all by ourselves?
Or, were we even doing "The Monster Mash" at all?
Was it all just in our imagination?
Weren't we just doing "The Monster Mash" with thousands of dolls?
Well, in the case of our dolls maybe we should call them "monsters!" "Monsters" for all the trouble they cause us.
In any event, I guess we'll never know.
That day was anything but normal.
Strange, but in a way glorious.
How can you not like "The Monster Mash?"
"It catches on in a flash!"
So, when you get to our door this Halloween, tell them Boris sent you.......
I just LOVE creating with wool felt. Whether it's an ornament, a pillow, a wall-hanging, or a penny rug - I just LOVE it.
I was introduced to penny rugs during a shopping trip with my Mom to Sturbridge many, many years ago. There were several wonderful primitives shops out there that we liked to visit who carried primitive doll kits, wool felt kits, punchneedle kits, and penny rug kits.
One store in particular specialized in wool fabric. And, boy, did they have wool fabric. Some of the most beautiful wool fabric you'd ever want to see. And, boy, was it EXPENSIVE.
This store, in particular, would put together wool fabric bundles, maybe 10-15 wool pieces per bundle. I just loved looking at the color combination's and would imagine what I could make out of them. Then, my Mother would snap me back to reality by turning the price tag over. YIKES! Beautiful wool is expensive. Alas, all I could do was dream and save my pennies.
During the last couple of years there was a store out there that we liked to visit that put together penny rug kits. It, too, is no longer there. However, during our last visit I bought several penny rug wool kits and, finally, had a chance to put some of them together this summer.
One of my favorite kits and patterns is the "Pumpkin Patch" which is shown in the picture at the beginning of this post. It is based upon a Lakeview Primitives pattern and features a large primitive pumpkin.
The pattern was very easy to follow and I had no problems with it. It contained the pattern pieces, supplies list, and directions for creating the Pumpkin Patch penny rug decoration. As penny rug decorations are usually put together using a blanket stitch the pattern also included an illustration for how you stitch a blanket stitch. The pattern also calls for pre-felted wool - which, in my case, was already provided in the kit. However, if you don't have a kit and buy wool the pattern contains directions for felting your wool.
The wool kit was nicely put together by the store and contained plenty of the wool and DMC floss needed for the pattern. In fact, there was plenty of wool scraps and DMC floss left over that I could utilize for another design if I wanted to. And, believe me, it will be put to good use.
The finished size of the "Pumpkin Patch" penny rug is 17" x 12" and I folded the top over to create a pocket that I could insert a dowel into so I could hang my pumpkin patch picture from. I tied ribbon to the sides of the dowel so I could hang it from one of the pegs on my fireplace.
It's labeled as a penny rug pattern, but it isn't a traditional penny rug. A traditional penny rug is a decoration made of stitched together coin shaped fabric scraps - preferably wool felt scraps.
However, like all things over time, penny rug decorations have evolved in the primitive and folk-art community from the traditional penny (coin) shaped decorative pieces to just about any medium size primitive or folk-art needlecraft wool felt decoration. Some may be coin shaped wool circles sewn together to make a table-mat, table runner, coaster, wall hanging, etc. Others may contain a few of the coin shaped wool circles along the edges while others don't contain any of the coin shaped circles at all.
I, of course, fell in love with penny rugs and wool felt kits from the minute I saw them and just had to make some. I bought some kits and wrote about three penny rug and wool felt kits I had bought and put together last January in a post on my "The Book Review Corner" blog entitled "I Really Wanted To Try Needle Felting and Penny Rug Felting - I Loved It!"
So, what exactly is a traditional penny rug? Traditionally it is a medium sized decoration made of stitched together coin shaped wool fabric circle scraps. Usually the coin shaped wool scraps are sewn together into a pattern to form a table-mat, wall hanging, table runner, etc.
Like everything else there is a history associated with penny rugs and, since I'm a history buff, I thought you might enjoy a little history lesson.
According to Wikipedia the history of penny rugs is as follows:
In the 1800s, starting around the time of the Civil War, thrifty homemakers would use scraps of wool or felted wool from old clothing, blankets and hats to create designs for mats or rugs. Using coins as templates, they created circles and each piece was then stitched in blanket stitch fashion. (Thus, the name "penny" rug). Sometimes, the mats or rugs were backed with old burlap bags or feed sacks. Sometimes a penny was stitched inside the mat to make it lie flat.
Penny rugs are not actual rugs for the floor, but decorative coverings for beds, tables and dressers and mantles. Sometimes they are used as wall hangings or pillows. Most designs include circles and some include images from everyday life such as cats, flowers, birds and shapes such as stars and hearts.
Penny rugs are made by selecting good quality 100% wool. It must not be too thick. It may be hand-dyed or over dyed to give the piece dimension. Circles are cut from the wool in varying sizes and then stitched together concentrically using complementary colors. The circles are stitched to a wool backing in a pleasing design. When finished the entire piece should have a backing to cover the stitches and to protect it. The backing may be wool, linen or burlap.
I ran across a wonderful blog the other day by Colleen MacKinnon called "Penny Rugs and More - From the beginnings to the finishings...recycling wool into penny rugs and more." It's all about her traditional penny rugs and contains wonderful posts about her penny rugs and wool felt creations as well as several free tutorials on making penny rugs. If you love penny rugs or want to learn how to make a traditional penny rug then you should pay a visit to her "Penny Rugs and More" blog.
I have several more penny rugs kits left to make and will, hopefully, if time permits, get them done this winter.
In the meantime I'm just loving my "Pumpkin Patch" wall hanging. I hope you do too.
Several years ago my Mom urged me to set-up a table at her church fair as the cost of the table was a donation to the church and it might provide me with an opportunity to sell a couple things. I love being outside during the Fall when it's not too hot and not too cold. So, I thought - why not.
So, my Mom and I set-up our tables. She was manning the used book and CD's table and I was right next to her. The church fair was a combination of tables consisting of handmade items, used items, food, etc. Mainly members of the church hoping to raise some money for their church.
Luckily for us it was a beautiful Fall day and my Mom and I were positioned as the first tables you would see after parking your car in the parking lot. I had decided that I should bring one of my BIG dolls as an enticement for my table. So, I decided to bring one of my non-scary Halloween dolls, a 39" Frankenstein, based upon a Tenderberry Stitches Design that I named "Pledge Me Frank!"
He's a Frankenstein that thinks that he is being pledged to a fraternity. He's not, but he thinks he is. I'm not sure what is going on inside his head, but he thinks he's a college student not a Frankenstein. I'm not sure how he gets around campus with his feet the way they are. One facing one direction and the other facing another direction. He definitely can't climb stairs.
His body is made of wood and his head is made of cloth. His face is embroidered and he has black bead eyes and curly black hair. Wooden pegs hang out the sides of his head.
Frank is wearing one of my husband's old black sweatshirts and is wearing some of my grandson's old jeans. His thick wool socks were my brothers. That is, until they got holes in them and then became mine. He has the words "My Heart Belongs To You Witchie Poo!" embroidered on the front of his sweatshirt and is carrying a Halloween banner.
In any event, I had him positioned just outside my table and a little girl about 4 or 5 years old walked by him. He was about her height.
Well, she became fascinated by him and came back a couple of times and just stared and stared at him. She seemed to be fascinated by his feet.
So, I decided to ask her a question. I walked over to her and said, "Do you think there's something wrong with his feet?" She looked at me and shook her head "yes" and then looked at her mother and said, "Mom, can I have my feet like that!" Well, her mother, my mother and I all laughed at the same time. Her mother replied, "I don't think so, honey!"
We all got a good laugh out of that.
I think I sold 2 or 3 small ornaments that day, not even covering the cost of the table, but it didn't matter. It was a beautiful day and My Mom and I thoroughly enjoyed ourselves. Plus, we had a wonderful story to tell for years to come. It doesn't get much better than that!
After writing my blog post entitledMaybe It's Time To Start Decorating For Fall? I started to think about this drive to sew, create, decorate and in doing so was reminded of an article I wrote about this in November of 2006 for Primitive Times Magazine. I thought you might enjoy reading it so I decided to re-post it. Here's what I wrote:
What Is It About This Season That Drives My Creativity?
It's almost like clockwork. Like some internal drive. Some innate driving force. For sure, it's something!
By now I'm sure you must be wondering what I'm talking about.
Well, I'm talking about my "creativity drive" and the Fall/Christmas season. What is it about this season that drives my creativity?
Every year around the end of August I can start to feel it. This urge to create starts to show itself. It starts slowly and builds gradually until it reaches a full-blown crescendo in November. But, I can feel it starting and I know that I won't have any control over it, once again.
Every year it just takes over my body. And, then I just have to either sew, create floral arrangements or craft something.
Or, I have to design patterns and sew some more dolls. Like I need any more dolls! But, that's a subject for another article! The point is, I just have to create - SOMETHING! ANYTHING!
Of course, my husband would say; "Why don't you create doing the housework!" Nah! That's no fun.
This inner force, whatever it is has got a creative mind all its own. And, it definitely has a hold on me. Look out, anyone or anything that gets in its way.
Forget the housework - what's a little dirt and dust! Forget the shopping - who needs to eat! Forget the bills - YIKES!!! Forget the family! Oh, boy! That's a no-no! Forget eating - that's okay - it's called creativity dieting! Even forget to take the dog out to do his business! Come on now that's something you have to do! Well, maybe not. He can hold it.
So, what is it that takes over? I'm not sure but I know that I'm not alone with this. Many crafters that I've talked to tell me that they also experience this. It might be at different times of the year, but they know when it's starting. Maybe it's a crafting thing? When you're in the "crafting", "creating" mode you are "IN THE MODE."
And, when I'm in the mode, I'll sew hundreds of dolls or design hundreds of patterns. I might put together multiple numbers of floral arrangements, or anything else that I seem to want to create.
I don't know about you, but I'm a little obsessive when it comes to my sewing and crafting. I have to cut everything out first, then sew everything, then put everything together. That means if I have 100 items to cut out I cut all one hundred before I start to sew anything.
The same holds true with sewing. I'll sit there and sew all one hundred dolls and then I'll put all one hundred dolls together. Of course, this means that I have to write-up 100 patterns all at once - which is really a chore. All the pattern designers will know what I mean by that statement.
In any event, I never said my way was the way to go about it. It's just my way of feeding my "hungry" inner creativity drive. Maybe I should call it my "hungry" inner obsessive creativity drive?
Sometimes I don't know what's worse. My inner creativity drive or living with over 1,000 handmade dolls. Hmmmm.....? Definitely, living with over 1,000 handmade dolls is worse. They talk back to me.
So, what is this creative drive and where does it come from? Why in late August? Why the Fall/Christmas season?
Maybe it relates back to the fact that as a child I loved to sew all my Christmas presents? I come from a large family so there were quite a few presents to make. Maybe it's the act of making presents to give to my loved ones? Generosity drives it? Hmmm..... Probably not.
Or, maybe there's just something about the bright, cheery, vibrant colors of the Fall season? Maybe it's feeling the cool, brisk, New England climate while raking leaves and then going inside to a cinnamon candle burning and a cup of tea or cocoa? Hmmm...... Probably not.
Maybe it's because for every holiday as a child I would scour the woods for materials to make a centerpiece? Or, every holiday season the family would gather together to make a new Christmas decoration? Hmmm.... Probably not.
Maybe it's just because I come from a family of crafters and sewers? It's just plain in my genes - in my DNA. Hmmm.......
Is that possible? Can a person have "creative" DNA? Hmmmm.... I wonder. Creative DNA! I don't know. I just know that I'm not alone with this. Other crafters have told me they, too, have an inner driving force. Maybe we all have "creative" DNA?
I don't know if I'll ever find out why I have this drive or what it is about this season that enhances my creativity?
Maybe, however, I should I should stop worrying about it and just enjoy the "creative" moments? Tis the season - the "creative" season that is!
A couple of Christmas's ago my younger brother, you know - the one who has the amazing workshop, gave hubby and I a wonderful present for our "Bud."
It was a wooden box that he had built that was meant to store a large bag of dog food. It had a handle on the front which when pulled would open a tilted draw. It also had a lower bottom draw and a top that when lifted up had a small storage area.
Well, we, of course, loved it and immediately placed it in the kitchen. However, instead of using it to store dog food we used it to store all his medicines, diabetics testing kit, extra leashes, etc.
It no longer houses our "Bud's" medicines, etc. Instead it houses all his precious "things." All of his belongings that we want to keep safely stored away.
It's a beautiful wooden box and I'd been meaning to show it to all of you. Just never got a chance.
In any event, I'm so happy we have it to house things that belonged to our special little guy. It will forever be "Bud's Box."
Print165 - Linda's How-Do-I Series? How To Make A Fabric Covered Round Basket E-Book
Since I had just finished my Linda's Blog post on the fabric covered baskets I had made I thought you might enjoy a step-by-step "How-to" on how to make one of your own.
How To Make A Fabric Covered Basket- Updated March 2015
Supplies Needed
1 Small Round Basket With Handle - 3" Round
1/4 Yard Fabric - 36" Wide
1" Lace Trim - 16" Long
DMC Embroidery Floss
Sewing Thread
Dual Temperature Glue Gun
Glue Sticks
Measuring Tape
Large Plain Piece Of Paper
Iron
Instructions
(Note - These instructions are for ADULT use only as they require the use of a hot glue gun. Always use caution when working with any kind of hot glue gun.)
1. Measure the width of your basket and then measure the height of your basket from the bottom of the basket to the top of the rim. Multiply the height of your basket times 2 and then add this to the width of your basket.
2. Follow the diagram shown below and draw a circle the width + height X2 of your basket on a large plain piece of paper. Draw a circle around your initial circle another 1/2" around for your seam allowance and gathering of your fabric. Now, to this adjusted circle you have just drawn add another 3/4" around for the ruffle.
3. Cut 2 pieces of fabric for your lining and basket cover according to the final circle pattern you have just drawn.
4. Measure the length of the handle of your basket from the bottom of the handle starting on the left hand side of the basket to the bottom of the handle on the right hand side of the basket and add 3/4" - this is your adjusted handle length. Measure the circumference of the handle and add 3/4" - this is your adjusted handle width.
5. Cut a rectangular strip of fabric the adjusted length of your handle by the adjusted width of your handle.
6. With wrong sides together (WST) turn both edges of your adjusted handle length under 1/4" and press.
7. With wrong sides together (WST) turn both edges of your adjusted handle width under 1/4" and press.
8. Wrap the handle fabric around the handle overlapping the pressed under edges until the handle fabric is tight to and completely covers the handle. Hand sew the overlap closed. Position the handle fabric so the hand sewn seam is on the underside of the handle.
9. Cut a slit in the center of your lining for the width plus height of the basket X2.
10. Cut a piece of the 1" lace trim to match the circumference of the circle plus 1/2" for an overlap.
11. With right sides together (RST) position the lace trim on the edge of the basket cover so the finished edge is facing towards the inside of the circle and the edges are overlapping. Then stitch the lace trim to the edge of the basket cover using a 1/4" seam allowance.
12. With right side together (RST) sew the lining to the basket cover using a 1/4" seam allowance.
13. Turn the lining and basket cover right sides out (RST).
14. Insert the basket through the slit in the lining and pull the basket cover up until the bottom and sides are tight.
15. Turn the sides of the
slit under 1/4" and then pull the lining up and around the bottom of the handles until they are completed covered. Overlap the turned under edges of the slit and then hand sew the slit closed.
16. Sew a gathering stitch 3/4" down from the edge of the cover with the DMC embroidery floss. Pull tightly to gather and then knot to secure. The gathering should be slightly over the rim of the basket as shown in the picture below.
17. Position the ruffle so it is facing upwards against the sides of the handle and then using the low temperature setting of the dual temperature glue gun glue the sides of the ruffle to the handles like those shown in the picture below.
18. Cut 4 strips of fabric 1/2" wide by 8" long and tie into 2" wide bows. Trim the ends and then glue two bows (one on top of the other) to the sides of the baskets using the low temperature setting of the dual temperature glue gun like those shown in the picture above.
19. Congratulations - You're Done!
My "Linda's How-Do-I Series? How To Make A Fabric Covered Round Basket" free e-book includes my Linda's Blog post and my instructions on how to make a fabric covered round basket of your own.
Patterns, e-patterns, printables, e-printables, e-books, graphics, tutorials, how-to's, articles and other e-products are for personal use only. You may not modify, photocopy, download, upload, post, transmit, display, perform, publish, license, reprint, create derivative works from, mass duplicate, re-sell, digitize, and reproduce in any other form (print, digital or electric) or commercially apply, embed, share, Email, or redistribution in any other means. Use of any of the above is prohibited without the written permission of Linda Walsh.
However, you may link to my website(s)/blog(s) and the individual page(s)/blog post(s) (including 1 picture) but do not copy, reprint or duplicate my website(s)/blog(s) or individual page(s)/post(s ) without my permission.
Items made from Linda Walsh Originals E-Patterns are intended for personal use for fun or small scale personal and business profit as long as you credit us with the design. Large scale commercial use (i.e. mass production) of items made from Linda Walsh Originals E-Patterns are by permission only.
I know that it will come as no surprise to all of you, but I just LOVE decorating - especially if it's for the Fall season.
Well, maybe add the Christmas season to that.
Maybe even add the Spring season to that.
Go ahead add the Summer season to that as well.
Maybe I should say I just LOVE decorating for every season.
Ya think!
However, if I had to choose a favorite season it would have to be Fall.
Maybe it has to do with the beautiful and vibrant colors of the season and the cool crispness of the Fall air.
Maybe it's the amazing array of vibrant colors of the Fall silk florals.
Maybe it's the vibrant colors of fall fabrics.
Whatever it is - I'm drawn to them. I just LOVE them and LOVE decorating with all of them. They invigorate me.
But it isn't just decorating with vibrant Fall colors. Something happens in the Fall that seems to trigger my inner design creativity - my muse.
Maybe it's the vibrant colors and the multitudes of design possibilities for Fall doll designs. I'm not sure.
I just find that at this time of the year more than any other I get the urge to design, create, and sew. Like an urge waiting at the door all year for the signal that it's time. And, when it is - look out. Creativity is at an all time high. It doesn't necessarily mean it's creativity at it's best. It just means it's an urge that can't be ignored. At least - not for me.
For the last few weeks I could feel the urge starting. I've been looking at some of my works in progress, some of my to-do's, and some of the kits I've bought from time to time. I've even caught myself just looking at some of my fabric stashes.
There are dolls waiting to be sewn. Kits waiting to be put together and designs on napkins and little pieces of paper waiting for me to do something with them.
It's like a hoard of designs all waiting for the signal. Waiting to pounce. It's time, it's time - come on - it's time! Time to unleash the muse.....
But, I can't - not yet. Down muse - down!
I have too much else to do right now. There is no time for my muse.
I'm sorry to say that muse, but it's true. I have no time for you right now. You will have to wait just a little longer.
So, I've decided that maybe I can calm my muse down by doing a little decorating - a little Fall decorating.
Maybe this just may put my muse in abeyance for just a little longer.
Now, that might be a solution for me, but don't tell my husband that.
You see, while he loves the look of all the Fall decorations he doesn't necessarily enjoy the work involved in getting it that way.
It means we will be going up and down and up and down the basement stairs bringing all my Fall floral decorations up and bringing all my Summer decorations down. The new ones come out and the old ones get put away. It's a lot of work and something that drives my husband crazy.
Up and down we go.
And, each and every time I go by my fabric stashes, my dolls waiting to be put together, and my designs waiting to be finalized.
I almost have to swerve to avoid them as I feel if I get too close they'll grab me and pull me into their web - never to be seen again for months on end. My muse will get me and it will win.
So, I don't get too close.
I have so much to do right now. I can't give in to my inner creativity.
Down MUSE! Down I say!
Please stay away - MAYBE for just a little while longer.
During a basketry crafting phase several years ago I decided I wanted to take some of the baskets I had and cover them with fabric.
I wanted to place several fabric covered baskets in my kitchen and one large woven covered basket in my master bathroom.
For the kitchen I wanted to cover several baskets with the same fabric as the curtains and bench pad that I had in my kitchen.
The basket fabric would compliment my curtains and bench and would be placed in the space between the top of my cupboards in the kitchen and the ceiling. I had a lot of room up there and I thought it would look really nice having baskets up there.
I wanted to use handle baskets and since I only had so much room between the cupboards and the ceiling height would be an issue. So, I measured all the handle baskets I thought I would like to see if they would fit. Luckily, most of them did.
I had seen several pictures of covered baskets and thought it shouldn't be too hard to figure out how to cover them.
I wanted my baskets to have a gathered inner lining and outer cover with a finished seam in order to create a ruffle along the rims of the basket. Some of the baskets I was using were round and some were oval.
So, I measured the length and width of the bottoms of my baskets. Then I measured the circumference and height of the sides of all the baskets. The circumference was for the width around the rim of the basket and the height was from the top of the rim of the basket on the left hand side to the top of the rim of the basket on the right hand side.
I was going to cut out two large round or oval circles for each basket that would be big enough to cover the entire basket, except the handle.
As I wanted to create a gathered effect and seam allowance for my basket lining and covers I added 1/2" to the circumference of all my baskets. And, as I wanted to create a gathered ruffle along the rim of my baskets I added 1 1/2" to the the adjusted circumference.
Then to create my patterns for each basket I drew the length and width of the bottoms of my baskets on a large piece of paper. To this I added 1/2" around the circumference and then added another 1 1/2" around this adjusted circumference.
I then measured the length and width of my round or oval circles to make sure that I had added enough to the circumference for the ruffle and enough to have plenty of room for the seam allowance and gathering. After I was satisfied with my pattern I cut two round or oval shapes for each respective basket.
The handle would be added first and would be made out of a long rectangular type tube that I was going to scrunch up when I was finished hand sewing the seam together.
For the handles I measured the length of the handle from one side to the other and measured the circumference of the handle so I would know how long to make my tube and how wide it would need to be.
I added several more inches to the length of the tube so I would get a scrunched up effect and added 1" to the width of the tubes so I could fold each of the ends wrong sides together (WST) and then overlap the edges to create a nice finished seam that would be hand sewn.
I was also going to add wire ribbon bows to the sides of one of the basket, fabric lined bows to the sides of another, and fringed bows to the sides of the other basket.
Two of the baskets were going to have lace trim around the rim of the basket and one was going to have ruffled trim around the outside and inside rim of the basket.
I was going to create a seam allowance along the rims of my baskets so I would have a nice finished edge for my ruffle. As I was going to machine stitch my two pieces together I needed to provide a slit down the center of each lining to insert the baskets. The slit would be the diameter of the basket from the left hand side of the handle to the right hand side of the handle. The ends of this slit would be turned wrong sides together (WST) and then hand sewn shut.
Once I had inserted the baskets into the lining and cover and then hand sewn the slits together I measured 1 1/2" down from my seam allowance for my ruffle. I tightened my fabric so the bottom of my basket cover was smooth to the bottom and sides and then sewed a gathering stitch 1 1/2" down from my seam allowance. Then I gathered the lining and cover tightly to the actual circumference of the basket using DMC embroidery thread and secured the thread. To hold the cover and lining in place I inserted a needle and thread just below the rims of each basket and tacked my lining and cover in several places around the rim.
I hot glued my trims and ruffles around the rims of my baskets. I tied each of the bows I was going to use and then hot glued them to the sides of their respective baskets.
I had also decided to create several small round covered baskets with a lace ruffle trim, which are shown in the picture to the left. I created a .PDF E-Book for making this round fabric covered basket and will be posting that shortly.
During this period I also wanted to create a large woven covered basket to hold towels in my master bathroom. For this I used an old Simplicity #9420 craft pattern that I had purchased years before. This basket is shown in the picture at the beginning of this post and is a great decoration for my master bathroom.
I don't know if you've ever heard the expression, "What's yours is mine and what's mine is mine!" It basically signifies an evil person. Probably a very greedy one.
Well, I thought you'd like to see the "Farmer And The Dell" bank that my brother made and gave to me for Christmas.
Now, you might be wondering what the expression had to do with this bank?
Well, there are two slits in the heads. One is in the farmer's head and one is in the wife's head. When you put a coin in the wife's head it goes into her section of the bank.
When you put a coin in the farmer's head where do you think it goes? If you said his section of the bank you'd be wrong. It goes into her section of the bank! LOL LOL
What's yours is mine and what's mine is mine. For this gift that's a really TRUE statement. While I don't agree with the expression I certainly love my bank. Especially since it was a handmade gift from my younger brother.
Or, is it because I get all the money! LOL LOL Hmmmm.......
I just love it when I receive comments on my blogs - especially if they are in regards to the Victorian era and Victorian dolls. Well, this morning there was a comment on my Victorian Dolls, Victorian Traditions, The Victorian Era and Me Blog from Marta of Dolls from the Attic...Mis Munecas . Marta's comment was: Hi Linda you have a beautiful blog...I'm surprised I didn't run into it before, because we love the same things.
I would love if you visit me at Dolls from the Attic...I think you will like it, and maybe care to follow it.
Bisous
Marta Of course, my curiosity was piqued as I thought she might love the Victorian era as I do and first checked out her profile. Marta's profile said - I should've been a Jane Austen character... a Dashwood sister with Sense and Sensibility; but secretly longing to be out in the moors sporting dirty, broken fingernails and wrestling with Heathcliff in another novel. Now I knew for sure that we shared the same interests and clicked over to visit her blog. Well, I was in 7th heaven - or maybe I should say, Victorian heaven. I knew for sure that I would be following her blog and immediately added her RSS feed to my Google Reader. Her blog was filled to the brim with pictures of Victorian dolls, Victorian people, and Victorian fashions. Plus, every article was historic in nature. And, if you're a reader of my Linda's Blog you all know how much I LOVE history - especially Victorian history. Here's Marta's Dolls from the Attic...Mis Munecas blog description: Dolls have always been a part of humankind, found in Egyptian excavations, and in Greek and Roman children's graves. Dolls and history go hand in hand, so is my intention with this blog to convey my passion for the dolls of the Renaissance, and the 19th and early 20th century. By borrowing from the work of the masters and archival photographs, I will be able to link them to the history of the times and briefly touch on the primitives. Welcome to my blog, and stay awhile. If you love the Victorian era as Marta and I obviously do I hope you'll visit her Dolls from the Attic...Mis Munecas blog. I wasn't able to spend a lot of time on Marta's blog this morning, but I'm definitely going back. Next time I'm going to bring a whole pot of tea with me. I'll definitely be there for awhile. After all, I'll be in Victorian heaven. I might never leave.
After I was finished with my recent post about my niece entitled "A Gift from My Niece and A Graduation!" I couldn't help but remember something she gave me when she turned 21. It was a five dollar bill. Now you might be wondering what's the big deal with a five dollar bill? Well, the five dollar bill had to do with it was a piece of paper from December 19, 1992 and a young girl's bet. It seems during the family Christmas celebration many, many years ago that I bet my niece that she would not be taller than me by the time she turned 21. Now why would I make such a bet? Well, I'm 5' 10" tall and I figured it was a sure fire winner for me. Easy way to make $5.00. My niece probably figured since she was tall for her age that she'd be taller than I was by the time she turned 21. Well, at 21 she's tall, but not as tall as her aunt. So, she paid me $5.00. She'd lost the agreement from so many years ago. Of course, at my age, she had to remind me of the agreement and show me the piece of paper she'd so lovingly saved from so many years ago. I was a little embarrassed at not remembering something that we'd done, but amazed that she had saved the paper. If you look at the picture closely you can see the fold lines from it being saved in a little girl's wallet for 9 years. I was so sorry that I hadn't exactly remembered the bet. However, that didn't stop me from accepting the money! LOL LOL Pay up, kiddo! A bet's a bet! Remembered or not!
My mother LOVED flowers and LOVED the color blue. So, my sister and I chose a spray of blue, white and yellow flowers for her viewing service. For blue we chose mainly iris.
Well, we each took home a few of the iris with the thoughts of pressing or drying them for keepsakes purposes.
I decided that I wanted to dry my iris and then add them to a shadowbox to preserve them. I wanted her prayer card to be the center focus with the dried florals surrounding it.
Unfortunately, I didn't have enough iris for the shadow box so I decide to add some dried roses from some of the birthday bouquets that hubby had given me.
The colors blended well and I was pleased with the way it turned out.


 We were even more surprised that none of our neighbors could hear it.
 We could see from where we were standing in the driveway that there was definite movement inside the house. Not just any movement. There seemed to be many, many people dancing.
 "It caught on in a flash!"
 The house was still rockin' and our feet were still mashing. It had to stop. We had to stop it.
 In fact, our next door neighbor returned and just waved at us before he went into his house.
 Weren't we just doing "The Monster Mash" with thousands of dolls?
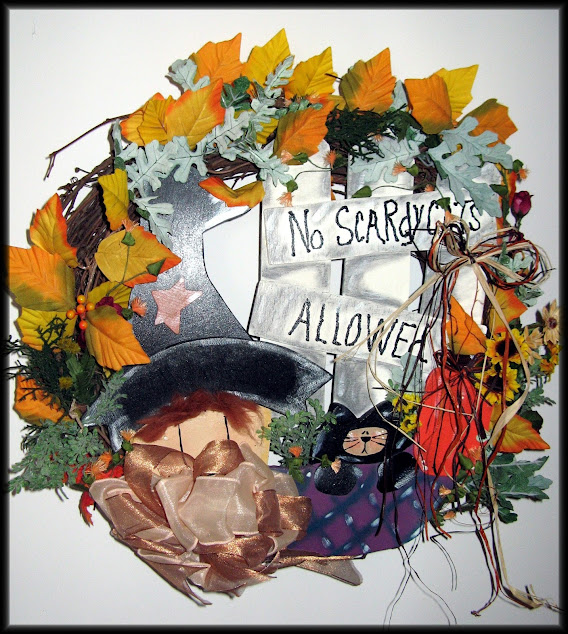


 In the 1800s, starting around the time of the Civil War, thrifty homemakers would use scraps of wool or felted wool from old clothing, blankets and hats to create designs for mats or rugs. Using coins as templates, they created circles and each piece was then stitched in blanket stitch fashion. (Thus, the name "penny" rug). Sometimes, the mats or rugs were backed with old burlap bags or feed sacks. Sometimes a penny was stitched inside the mat to make it lie flat.

 After writing my blog post entitled
 Every year around the end of August I can start to feel it. This urge to create starts to show itself. It starts slowly and builds gradually until it reaches a full-blown crescendo in November. But, I can feel it starting and I know that I won't have any control over it, once again.
 This inner force, whatever it is has got a creative mind all its own. And, it definitely has a hold on me. Look out, anyone or anything that gets in its way.
 I don't know about you, but I'm a little obsessive when it comes to my sewing and crafting. I have to cut everything out first, then sew everything, then put everything together. That means if I have 100 items to cut out I cut all one hundred before I start to sew anything.
 Sometimes I don't know what's worse. My inner creativity drive or living with over 1,000 handmade dolls. Hmmmm.....? Definitely, living with over 1,000 handmade dolls is worse. They talk back to me.
 Maybe it's because for every holiday as a child I would scour the woods for materials to make a centerpiece? Or, every holiday season the family would gather together to make a new Christmas decoration? Hmmm.... Probably not.


 I know that it will come as no surprise to all of you, but I just LOVE decorating - especially if it's for the Fall season.
 However, if I had to choose a favorite season it would have to be Fall.
 For the last few weeks I could feel the urge starting. I've been looking at some of my works in progress, some of my to-do's, and some of the kits I've bought from time to time. I've even caught myself just looking at some of my fabric stashes.
 But, I can't - not yet. Down muse - down!
 Now, that might be a solution for me, but don't tell my husband that.
 Up and down we go.
 During a basketry crafting phase several years ago I decided I wanted to take some of the baskets I had and cover them with fabric.
 I had seen several pictures of covered baskets and thought it shouldn't be too hard to figure out how to cover them.
 I was going to cut out two large round or oval circles for each basket that would be big enough to cover the entire basket, except the handle.
 For the handles I measured the length of the handle from one side to the other and measured the circumference of the handle so I would know how long to make my tube and how wide it would need to be.


