Monday, March 25, 2013

Fabric Is Just Too Much Fun


I really do need to get more focused and stop playing.  I just can't help myself when I'm having so much fun.  Of course, nothing else gets done when I'm having fun, but life isn't all about work - now is it?

Have I got you wondering what I've been doing that's so much fun? 

Well, I've been designing new fabrics for my Linda Walsh Originals Spoonflower Custom Fabric Store.

I've been designing fabrics for three years now and so far I've designed 159 fabrics. To say I LOVE designing fabric is putting it mildly. I LOVE, LOVE, LOVE it.

Designing the fabrics is the easy part.  Making items out of the fabrics I've designed is the time consuming part.  I've been toiling away and have made many, many baby shower decorations and gifts out of some of my baby shower fabric lines.  I'm still working on that line and will have several new fabrics to share with you.

Next on the agenda for making items is the Babies In The Pumpkin Patch group of fabrics I designed.  They just happen to be Fall themed and just happen to be filed with all my favorite Fall colors.  It's FALL - my favorite time of the year so what else can you expect? My creative juices for everything FALL, babies, and pumpkins will be in overdrive.

So stay tuned.  The "dollies" and I have lots and lots to show you. 

Saturday, March 23, 2013

My Hydrangea In Bloom Cross-Stitch Kit - Dimensions The Gold Collection Petites


As you all know I love cross-stitch kits and love making them over the long winter season.  One of the cross-stitch kits I decided to try this Winter was a counted cross-stitch kit from Dimensions The Gold Collection Petites entitled Hydrangea In Bloom.

Like the other Dimensions Gold Collection kits I had bought the Dimensions Needlecrafts Counted Cross Stitch by Kathryn White, Hydrangea In Bloom kit included the pattern, pre-sorted cotton thread, 18 count ivory cotton Aida, gold beads for the center of the blossoms, needle and instructions.

The Hydrangea In Bloom pattern uses full counted cross-stitch, half cross-stitch and outline stitching, and beads  for emphasis and depth and this detailing really makes the picture stand out. The design of this cross-stitch gives the finished picture a 3 dimensional aspect with the half cross stitch and outlining being used for artistic effect.

The pattern came with starting, stitching, finishing and even cleaning instructions as well as samples of the various stitches required, and color coded keys (with code #'s, lengths, color names, and cross-stitch symbols) and a chart with color coded symbols. The colors and symbols on the keys and chart were easy to read and follow.

While I was very pleased with the end results of this design there are some things in the kit and in the instructions that can be improved upon.

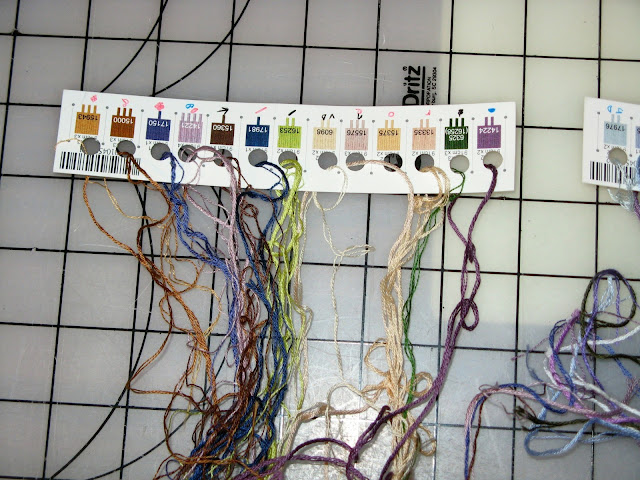
As was the case with previous Dimensions kits the thread sorter was poorly designed. The embroidery threads were glued to two foam backed 6" by 1 1/4" strips of cardboard that had a picture of the color of the thread and it's number. In order to get to the threads you had to separate the foam back from the cardboard strip. Very quickly the threads separated from their section and then you no longer knew what the thread number was to tie to your symbols & legends. I had to punch a hole in the thread sorter cardboard strip just below the color of the thread & it's number and then insert the threads through the hole and tie them in a loose knot so my threads, colors, and numbers would stay together.


I also added the symbols to the strip to make reading the chart easier.  To make things even easier for the user the color symbol should have been shown on the thread sorter strip of cardboard as well. That way you would only need to use the thread sorter strip of cardboard to follow your chart.

The Hydrangea In Bloom kit creates a 5" by 7" hydrangea picture using the 18 count ivory cotton Aida cloth which was included in the kit.  However, the piece wouldn't fit into the 10" round embroidery hoop that I wanted to use so I could cross-stitch the whole 5" by 7" picture without having to move the cloth within the hoop or create creases in my picture from the hoop.  I could have used a smaller hoop but that would have required moving the cloth within the hoop which would create creases where the hoop was.  I hate that as no matter how hard you try it is very difficult ironing out creases caused by embroidery hoops.

So, I decided to sew cloth strips to the edges of  my cloth so it would easily fit within my 10" round embroidery frame as shown in the picture below:


The kit should have included a  larger piece of the 18 count ivory cotton Aida cloth in order to avoid this problem.

The finishing calls for centering your design on a 5" by 7" piece of cardboard and folding the excess fabric around the cardboard and mitering the corners.  As I as going to put my picture in an 8"  by 10" triple matted frame I decided to mount my picture on a piece of adhesive cardboard that I had cut to fit the inside of my frame.

I had chosen a white frame with dark teal blue, white, and gold triple matting to finish it which I think really brought out the beautiful blue, pink, and lilac colors of the hydrangea.  Plus the triple matting allowed for enough room for the gold beads that were included in the kit to emphasize the hydrangea flower center.


It took me 55 hours to complete this picture including the framing.  Despite the problems I encountered with the thread sorter and Aida cloth I was very happy with the way my Dimensions Needlecrafts Counted Cross Stitch by Kathryn White, Hydrangea In Bloom turned out.

Friday, February 15, 2013

My Sister's Amazing Quilt E-Patterns


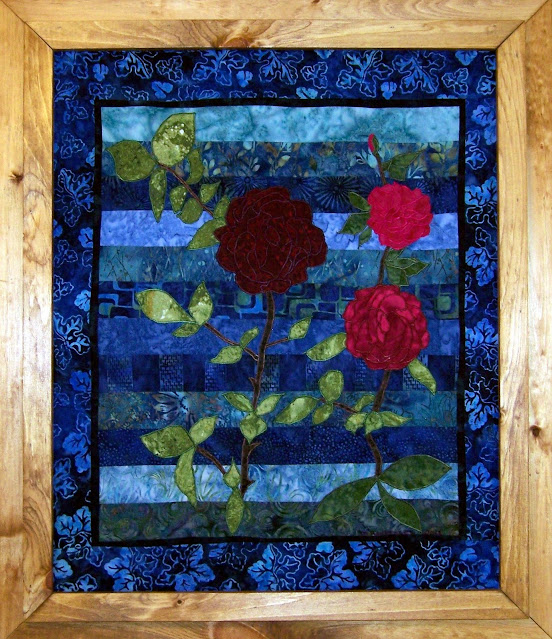
I know I'm a little prejudiced but I can't help it. I'm proud as a peacock about my sister's wall or frame quilted wall art. Just when I think I've seen her most beautiful creation along comes another one. I think she's amazing. I hope you do, too.

If you'd like to buy any of her instant download e-patterns just click on the picture or link below for the creation you're interested in. I hope you enjoy sewing her quilted designs. 


BUTTERFLY TRILOGY


MAGNOLIA

SILENT NIGHT

FALL HARVEST

COME SAIL AWAY

FLOWER TRILOGY


Alpacas Under The Sycamore

MOMS JOY

Sunset Silhouettes


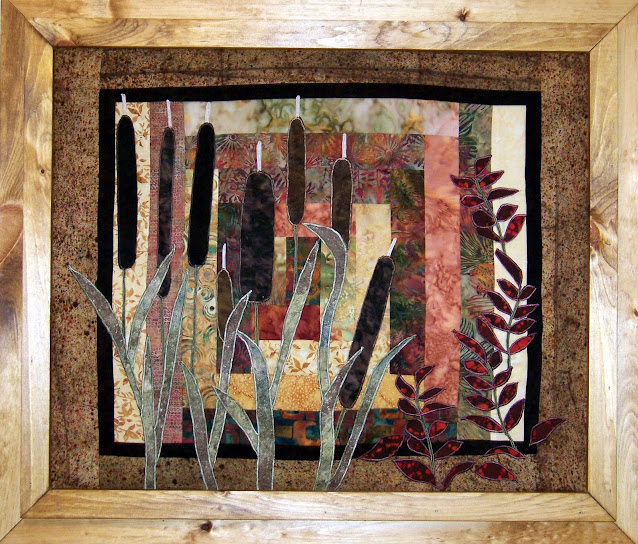
Cattails

Trillium Blues

DADS TIGER

Sunny Day Suzie


Pretty Pink Cones

Copyright © 2013 - 2023 - All Rights Reserved - Designed By Debbie Bohringer

Wednesday, February 13, 2013

Butterfly Trilogy - New E-Pattern By Inspired Creations By D


My sister just loves sewing, quilting, flowers, gardens, animals, and insects - like butterflies.  So, I shouldn't have been surprised when she designed a butterfly quilt trilogy e-pattern.    Of course I LOVE everything she does but I have to say that she just keeps getting better and better and better.  How beautiful are they?

Here's what she had to say about her design:

Butterflies, butterflies and more butterflies. BUTTERFLY TRILOGY is my second pattern in my trilogy series. I absolutely love the Spring when the gardens are coming to life. I have so many beautiful things going on at once; but one of those things I really enjoy seeing is the Monarch and Swallowtail butterflies flying from flower to flower. Living in the North I don't get to see the beautiful Blue Morpho butterfly as it stays in the Southern most zones, but because it is my favorite color, I thought it was the right thing to include as the third item in this trilogy. 3 designs in 1 pattern; make one or all three. Keep one for yourself and give two as gifts or keep all three, or give all three as gifts - so many possibilities in 1 pattern!

Copyright © 2004 - 2023 - All Rights Reserved - Designed By Debbie Bohringer

Friday, February 08, 2013

LOVE Winter Floral Arrangements


Over the years I have experimented with different ways to create floral arrangements. One year I wanted to create miniature trees so my basement was filled with pine needle branches hanging from the rafters and drying upside down,

Another year I wanted to create dried floral arrangements so my basement was filled with perennial flowers from my gardens. The trees and arrangements looked pretty when completed but just didn't last. Plus, they created a moth problem. So, I stopped making them.

Then there were the pine-cones of all types and sizes that I and other family members gathered. They made beautiful pine-cone baskets that I've posted about many, many times. All of the pine-cone baskets I made years and years ago are still being displayed. They still look wonderful.

Then there were the dried floral arrangements that I made from dried floral I had bought that were supposedly treated so they would last. They didn't and also generated moths. So, out they all went.


The only things that have lasted are the pine-cone baskets and the silk floral arrangements I have made over the years. They're all beautiful to look at and don't generate moths. When I first started creating silk arrangements over 25 years ago there weren't a lot of silk floral to choose from and most weren't very real looking. That's why I always preferred the dried floral. However, over the years the silk floral have gotten more realistic looking and there are more and more to choose from for every season and holiday.

I've created many, many silk floral for every season and for every holiday to decorate my home and love them. Of course, I'd rather have real flowers everywhere but I'd have to be a millionaire, make that billionaire, to afford decorating my house that way. I'll stick with the silk floral.

Here's some of the winter silk floral that are decorating my house for the winter season:


I love creating with the silk floral and love shopping through the floral sections of A.C. Moore, Joann's and Michaels. If I have a silk floral arrangement in mind that I want to make I wait for the 30% to 50% off sale at any one of those stores. Never buy the floral at regular price. They ALWAYS go on sale before the holiday or season or after the holiday or season. I prefer the pre holiday or season sales several months before the actual holiday or season as you have the best selection then.

I usually create one silk floral arrangement at a time and can spend a couple hours deciding which silk floral stems to buy. I hold them all in my hand and go back and forth and up and down the aisles with different stem selections until I get the right color blends and sizes I want. I always know what size arrangement I want to create and what basket or container I'm going to use ahead of time.

Right now I have more than enough silk floral arrangements to choose from. Making them is the easy part. Choosing which to use each holiday or season is the hard part as I can't use them all.

Hope you enjoyed seeing some of my winter silk floral arrangements.

Monday, February 04, 2013

Gotta LOVE Snowmen and Snowladies

I HATE snow, but I LOVE snowmen and snow-ladies. So, its no surprise that I love to decorate my home during the winter season with some of the snow men and snow-ladies I have made. Some are my designs. Some are dolls I made based on other doll makers designs.  I hope you enjoy my snowmen decorations.


On the left is a snowman I call "Charlie" and he was made based upon a "From My Heart To Yours" pattern. He stands 30" tall. His wool hat was one of my old ones and his flannel scarf was made from one of my younger brothers old flannel shirts.

On the right is Snow Go Noodles. He's one of my designs and is a 28" country snowman decoration.

On the left is Nellie Snow-lady. She's one of my designs and is a 23" snow-lady doll. 


In the upper right hand corner is "Snow Cone Sam. He's 26" and was made based upon a "Time Worn Treasures" pattern. His jeans were from my two year old grandson, Noodles. 

Sweetheart Faith is in the lower right hand corner. She's also one of my designs. 

On the left is "Sam, The Skiing Snowman." Hubby and I stenciled and painted his ski's. He stands 36" tall and was made based upon a "Maggie Ann & Friends" pattern. He's wearing one of my brothers old wool hats and the scarf around his neck is an old scarf given to us many years ago from someone in the family. His rolled up socks belong to my younger brother.  In the upper right hand corner is two more of my designs - Doug The Handy Dandy Gentleman and Petronella The Birdhouse Lady.  He's a 13" Victorian snowman.   Petronella is a 13" Victorian snow-lady.   

In the lower right hand corner is two more of my designs - Brr... It's Cold Outside! Bruce and Brr... Why Is It So Cold! Laura.  Bruce is a 9" snowman doll.    Laura is a 9" Victorian snow-lady. 


On the top right hand shelf is one of my first snowman designs - Brian Snow Buddy.

On the second shelf are two more of my designs - Jerry Snow Guy and Sissie Snow Gal.  He's a 10" country snowman.   Sissie is a 10" country snow-lady. 

And, on the bottom shelf are two more of my designs -Benjamin Cross My Heart and Isabell Cross My Heart.  He's a 7" primitive shelf sitter snowman.    Isabell is a 7" primitive shelf sitter snow-lady. 

Sunday, February 03, 2013

The Birthday Flowers This Year


To me one of the most beautiful things in this world are flowers. It doesn't matter how hard you try you can NEVER capture their natural beauty - you just can't. It is perfection beyond human capabilities as far as I'm concerned.

Hubby knows I feel this way which is why every year for my birthday he surprises me with astonishing flower bouquets. Last month he got me another "Oh, my god!" arrangement.

You know, one of those floral arrangements that just cause your jaw to drop and your mouth to be wide open in astonishment. I just LOVE those kind of arrangements.


And, of course, I have to take a few pictures.  Okay, maybe more than a few.  I can't help it.  They just amaze me with their beauty.

I hope you would agree.


Thanks for the flowers and beautiful images, dear.