Friday, September 03, 2010

A Young Girl's Bet - Pay Up, Kiddo!


After I was finished with my recent post about my niece entitled "A Gift from My Niece and A Graduation!" I couldn't help but remember something she gave me when she turned 21.    It was a five dollar bill. 

Now you might be wondering what's the big deal with a five dollar bill? 

Well, the five dollar bill had to do with it was a piece of paper from December 19, 1992 and a young girl's bet. 

It seems during the family Christmas celebration many, many years ago that I bet my niece that she would not be taller than me by the time she turned 21. 

Now why would I make such a bet?  Well, I'm 5' 10" tall and I figured it was a sure fire winner for me.  Easy way to make $5.00.  My niece probably figured since she was tall for her age that she'd be taller than I was by the time she turned 21. 

Well, at 21 she's tall, but not as tall as her aunt.  So, she paid me $5.00.  She'd lost the agreement from so many years ago. 

Of course, at my age, she had to remind me of the agreement and show me the piece of paper she'd so lovingly saved from so many years ago.  I was a little embarrassed at not remembering something that we'd done, but amazed that she had saved the paper.  If you look at the picture closely you can see the fold lines from it being saved in a little girl's wallet for 9 years. 

I was so sorry that I hadn't exactly remembered the bet.  However, that didn't stop me from accepting the money! LOL LOL 

Pay up, kiddo! A bet's a bet!  Remembered or not! 

The Last Present From My Mom - Just Because!


Every once in awhile my Mom would surprise me with a little present. Something she'd seen that she thought I would like. Or, just because.

Well, on one of my visits last Fall she surprised me with the blue vase shown in the picture above.

She had seen it in the Smithsonian Catalog, loved the blue colors, and decided she would buy this for me - just because.

Well, when I opened it I could understand why she loved it so much. The blue colors and swirling pattern were just beautiful.

My beautiful blue vase from Mom sits on the end table in my sun-room, which was my mother's favorite room in our house.

Every time I look at the vase I'm reminded of my mother, her beautiful blue eyes, and a loving gesture - just because.


Wednesday, September 01, 2010

Shadowbox Picture For Mom's Flowers


My mother LOVED flowers and LOVED the color blue. So, my sister and I chose a spray of blue, white and yellow flowers for her viewing service. For blue we chose mainly iris.

Well, we each took home a few of the iris with the thoughts of pressing or drying them for keepsakes purposes.

I decided that I wanted to dry my iris and then add them to a shadowbox to preserve them. I wanted her prayer card to be the center focus with the dried florals surrounding it.

Unfortunately, I didn't have enough iris for the shadow box so I decide to add some dried roses from some of the birthday bouquets that hubby had given me.

The colors blended well and I was pleased with the way it turned out.

"

Wednesday, August 25, 2010

Check Out My Halloween Photo Collage!


Things have been so crazy this summer my emails have been piling up and I haven't gotten around to blogging about so many of the things I want to blog about.  The stack of emails is so large I get heartburn just looking at it! LOL LOL

However, every once in a while I get an email suggesting that I take a look at this or that.  I generally don't accept most of them as my blogging opinion isn't for sale, but every once in awhile I get one that piques my curiosity and lets me play a little.

Well, one of those emails that I got back in June suggested that I review an online collage service.  Here's the gist of the email:

Hello Linda,

At www.photovisi.com we have developed a free online service that lets you create collages from your photos easily. I'm trying to spread the word about our service, and think readers of Tips for Crafters on the Web would be interested in what it can do.

We've put extra effort into giving users a quality selection of collage designs and options for customization. It's very easy to use too: select one of the many collage templates, add your photos and then customize by dragging items around. After the collage is finished it's available for download.

I'd be really happy if you decide to write a short post about Photovisi.

Thanks,
Maurice
http://www.photovisi.com

According to their website: Photovisi is a free and easy to use online tool to create photo collages. Select one of the many collage templates, add your photos and then customize by dragging items around. After the collage is finished, it's available for download and print! Want to try it out?

So, I thought why not?

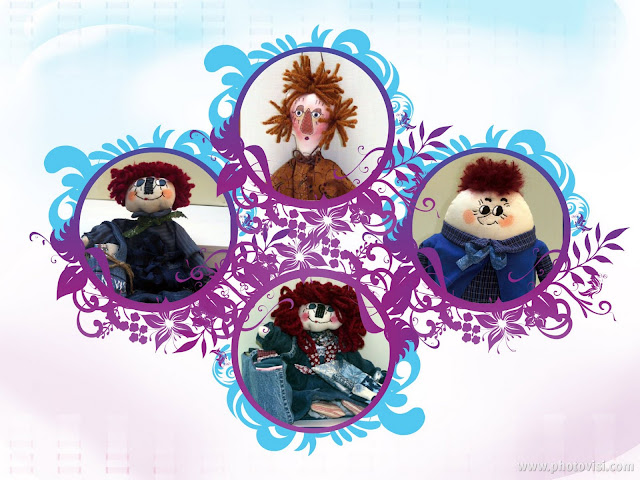
There were three different collage sections with 12 collage templates each to choose from.   So, I picked one.  Then I added my photos.  I could add photo's from my computer, photo's from my webcam, add my own background or change my particular templates background to another from their selection, or add more shapes from this templates selection to my collage.  So, I chose 4 doll pictures from my computer and added them as the collage that I had chosen to fit 4 pictures.

All of the doll pictures I take are cropped and bordered.  I quickly learned that square pictures are the best size for the Photovisi.com collages so I had to crop them.  You just select the picture by double clicking it and then hit the crop button.  A cropping tool comes up that you can then apply to your picture.  You can also add a background photo if you want to or change the background color.

It seems the crop tool works best on the larger pictures so upload the largest size picture and then crop it to a square picture. When I tried uploading smaller size pictures from my computer that were already cropped and square the crop tool didn't work. It froze and then I had to start over.

You can also enlarge the size of your photo, move it around, or rotate it any way you want. The same is true for any of the shapes you add. You can move them around, re-size them, and rotate them until you get the collage you want.

After you've added your images and have the collage you want then you save the collage.  In save you are given several resolution options for your download and can decide if you want to publish it to the Photovisi.com gallery, add a title, and add keywords.

I selected the largest resolution as I always like to re-size my images down to several different sizes that I can use on my websites and blogs. I did not check the add to the gallery as I didn't want to add my collages to the public gallery. I added a title, but didn't add the keywords. I figured that the keywords were only good for the search engines and if you weren't part of the public gallery then you wouldn't need the keywords anyways.

After I saved my collage I was prompted to "click here to download your collage!"  So, of course, I did and saved it. One thing I did note was that the collages you create are only saved on Photovisi.com for 2 days so if you want to save your collage you have to download it and save it to your computer.

I was then prompted to share my collage via email so I sent it to myself.  Then I was asked if I wanted to "Click here to get your collage printed on mugs, posters and more!" or "Click here to download your collage" and I chose the latter to download. I was also prompted if I liked Photovisi.com to share it on any of the social networking websites. The email feature and share button are great for sharing your collage with family and friends.

Basically, I found the whole process quick and easy to do and I had no problems along the way. The only issue I ran into was when I signed up the activation email was sent to my spam account, which is par for the course these days for computer generated emails.

I had selected a 1920x1440 resolution so the collage I downloaded was large. If I wanted to use it on my websites or blogs I would need to re-size it, which would be no problem.

My collage was saved in My Gallery on Photovisi.com so I could view it there (at least for two days from the date of creation) and create some more. I could also view all the collages in the Photovisi.com public gallery to see what everyone else was creating.

I figured that in My Gallery that not only would all my collages be shown, but there would be a button to create another. That wasn't the case. I soon learned that to create another collage I would need to go back to the home page and click the "click here to start" button to start the process over.

The first collage I created is shown in the picture at the top of this post. It was extremely quick and easy to do, including the cropping.

So, I decided to try another. This time I added some of my pattern pictures, a background image I liked, and different shapes. I was able to easily add the shapes and then re-size them for the size I wanted and to easily move them around the collage. Plus, I was able to easily rotate them to get them to be exactly where and how I wanted them. It was all quick and easy to do.

Here's the results:


Since I was just playing around with my collage I wasn't concerned as to whether or not this would be the best way to display my patterns. Obviously, in a collage it would be better to have larger pictures so as to enhance your product display. However, for these purposes this suited me just fine.

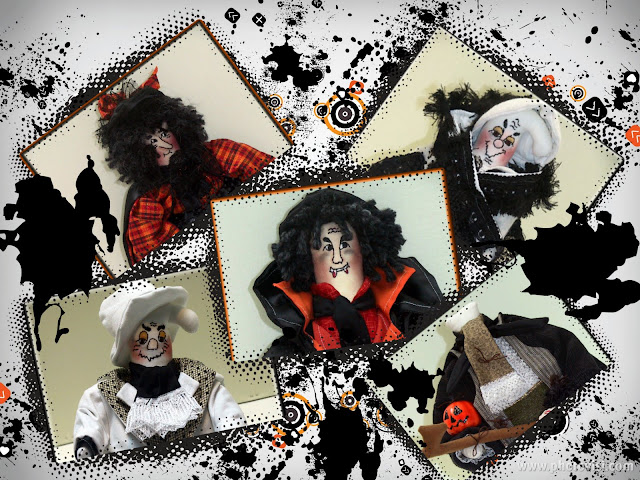
So, I decided to play again. This time with some of my Halloween designs. At first the images that I uploaded were not large enough to be cropped and when I tried to do so the crop tool froze. However, when I uploaded larger images the crop tool worked fine. Here's the results:


I also checked my email to see how the collage that I emailed to myself came out. It was great. Large and clear enough to be easily viewed in my email.

All in all I think this would be a great way for anyone to create collages and share their photo's. It would be a lot of fun for Mom's, Dad's, and the kids to create and share their photo's together. And, then email or share them with family and friends.

As far as for small business use, if you're looking for a quick way to add a splash of color to your product images, add different backgrounds or shapes to your product images, create some cute advertising buttons, or create a quick newsletter or blog post collage picture this is a quick and easy website to utilize for those purposes. Collage would also be a great way to easily add multiple product images to your website or blog within one picture.

All in all I liked the website. It would be nice, however, if they were to move the Google ads from the middle of the page - like to the top or bottom. I understand why they're doing it, but it's a little annoying seeing it there in the middle of every screen.

Thanks, for the suggestion, Maurice. I had fun playing around. Now I'd better get back to work - or maybe not. Maybe another collage would be fun.......

Ribbon Floral Shadowboxes - Something A Little Different


Many, many years ago I wanted to make something a little different than a doll.

I had been intrigued with ribbon florals since I had seen some of the absolutely stunning creations of some of my creative embroidery friends. I wanted to try making flowers out of ribbons. Not to be added to cloth, but used in some sort of floral arrangement.

While shopping at a local craft store with my mother I had come across a booth selling dried floral shadowbox pictures that contained a half basket and dried florals. The concept and colors were perfect for my half bath so I bought two.

Well, in thinking about creating something utilizing the ribbon florals I thought maybe a half basket filled with ribbon florals glued to a painted canvas panel and surrounded by a painted wooden shadowbox would fit the bill.

Of course, this also meant that hubby needed to make shadowbox frames for me to attach to the 8"x10" painted canvas. So, we talked about what I wanted to make and he suggested that we make shadowbox frames that would be routed to hold the canvas panel within the shadowbox and nail the frames to the sides of the canvas panels. I agreed so we started.


As with everything I do we had quite a few ribbon floral shadowboxes to make.

To start off I decided what colors I wanted to use for the frames and what colors I wanted to use for the canvas panel.  Once I knew what colors I wanted to use for each picture I then selected the ribbons (some wired, some not) that I wanted to use for each flower.

I also selected wider wired ribbons and wired paper to be used for a bow on top of the wicker baskets in each picture.  To all this I added some silk floral leaves that would serve as a back drop for the floral baskets.

We used 1/2"x2" pine boards to create the shadowbox frames and routed about 1/4" for the canvas panels to rest against. We assembled the frames and then sanded them.  As I wanted the frames to be different colors than the canvas panels I painted the frames and canvas panels separately and then when dry we nailed the frames to the sides of the canvas panel.  Then we added picture hangers to the top center back of each frame.

I cut the miniature wicker baskets I had chosen for each picture in half and spray painted them on the outside. I added a small amount of Spanish Moss to the inside of each and then glued a small rectangular block of floral foam to the inside of the baskets.  Then I glued my half baskets to their respective canvas panels in the center and about 1/4 of the way up.  After I was happy with the gluing and positioning of the baskets I added the silk leaves I wanted to use for each picture.

I then proceeded to create the ribbon flowers. I had several printouts from various magazines to help me with this and ended up making maybe 4 to 6 different styles of ribbon flowers in multiple colors. Nowadays there are so many wonderful books about ribbon crafts that you could spend all day just browsing through them.

Back to the story - for some of the flowers I added a tiny miniature ribbon floral to the center  in order to finish the center seed section. When the flowers were done I tied a floral pick to each of them and then inserted the pick into the floral foam of the basket.  I had to cut several of the wood stems of the floral picks to shorten them as they were too long for my foam block.

When I was happy with the arrangement of all the ribbon flowers I tied the larger wired ribbons and wired paper into bows and then glued them to the front of their respective baskets.

Both hubby and I were pleased with the way our ribbon floral shadowboxes had come out. They were a little different, but would make great gifts that holiday season. 

Flower Fairies - They're Just Too Adorable!


Sometimes you run across something that is just too adorable to pass up. You find yourself drawn to it and you just HAVE to make it.


Well, such for the case with something I had seen in Crafts magazine back in 2001. They were running a 4-part series by Julie McGuffee on creating flower fairies for every season. I just fell in LOVE with these adorable little fairies and decided I just had to make some.


They're made using wood doll pins and stands, wood beads for their heads, tiny wood beads for their arms, and silk florals for their outfits.

 
I deviated from the pattern in creating my fairies as I wanted their wood doll pin bodies to be painted a complimentary color to their silk floral outfits and for their arms to be made out of their respective silk floral.


I also deviated from the pattern with regards to their hair. I gave them regular doll hair versus Spanish Moss as the patterns had called for. Plus, I made most of the silk floral outfits much longer than the patterns had specified.


When I was done I had the cutest collection of little floral fairies. They're just too adorable and make great stocking gifts. What do you think?

Copyright © 2004 - 2023 - All Rights Reserved - Designed and Written By Linda Walsh

Saturday, August 21, 2010

My Favorite Pinecone Wreath - I Just had To Make One


I know that I've told you many times that when I was a child on several occasions we had projects for making Christmas decorations. It might have been a Styrofoam church or paper garland or just about anything else.

Well, on one of those occasions my Mother decided to make a pine-cone and acorn wreath. She wanted a wreath that was 14" round that she could hang near the front door. She also wanted it made in such a way that she could add some seasonal floral to it and change it out with the seasons.

So, she gathered all the pinecones and acorns. Well, make that - she had all her children gather all the pinecones and acorns from the woods around our house. She washed all the pinecones and acorns in the sink and then she painstakingly dried the pinecones in the stove - unlike me who dries them in a box over a year's period.

When they were done drying she sorted the pinecones and acorns by size and then picked out the ones she wanted for her wreath. She laid them out on the floor in a circular pattern so she would know which pinecone and acorn she would be placing where.

She had bought a 14" double rail flat ring and plenty of wire. She was going to wrap the wire around the back of the pinecone and then wire each pinecone to the double rail flat ring. My Dad drilled a hole in each of the acorns so she could fasten them to the metal frame of the ring.

Well, little did she know that the pinecones and wire would quickly start to hurt her hands. In trying to tie the pinecones to the wreath she ended up cutting her hands with the wire. However, she wouldn't give up and was determined to finish her wreath - cuts or no cuts.

So, she spent the better part of a weekend making her wreath. My dad also lent her a hand when her hands just couldn't tighten the pinecones anymore. When all the pinecones had been wired to the wreath and she was pleased with the results she sprayed it with varnish to seal it.

For the Christmas season she added a few poinsettia flowers that she could easily remove after the holidays. The wreath was beautiful when she was done and I know she and my Dad were very proud of their work. Unfortunately, I don't have a picture of how it came out so I can't show it to you.

My Mother's wreath moved with her from house to house and every season and  for over 40 years she would change the florals on her wreath with the change of seasons. Well, several years ago when my Mother was moving she handed me a large bag with something in it that she wanted me to fix. Inside the bag was her pinecone wreath. It was finally showing its age and needed some sprucing up - along with a few replacements to the pinecones and acorns.

It was really in tough shape and I knew that it was going to take a LOT of work to fix it up. Plus, in the back of my mind, I could still see all the cuts on her hands from all the wire. I certainly didn't want that to happen to me.

Fortunately, for me, with the invention of hot glue guns it wouldn't be as much work to wire the pinecones to the ring. Some would be wired, but some of the pinecones and acorns could be glued to each other.

So, I told her I'd try my best to fix it for her. Unfortunately, I haven't had a chance to fix her wreath. It's still sitting in a box in my basement. I have every intention of doing this for her. It's just a matter of finding the time.

Sadly, with my Mother's passing this year she won't be able to see her beautiful wreath restored to all its glory. Hopefully, when I finally do repair it she will be smiling down at me and the results.

Despite the fact that I can still remember all the cuts on my Mother's hands about twenty years ago I decided I wanted to try making a pinecone wreath of my own. While shopping for craft supplies I had come across a bag of white tipped if pinecones that had been sprayed white on the tips. They just looked so lovely I just had to buy them. I thought they might look good in a pinecone basket and I bought them already spray painted it would save me the time of having to spray them myself.

This was all during the time when I thought it would be a great idea to collect all the pinecones from the lawn as we had a wealth of them that had fallen from the white pine and evergreen trees that year. I've posted about them in a post on my Linda's Blog entitled "The Pinecone Baskets - Now That's A Good Idea!"

This time I wasn't going to use a double rail flat ring. I was going to use a 8 1/2" oasis foam ring, some floral picks, and hot glue. I would wrap some of the floral picks around the back of the pinecones and then stick them in the foam. Then I would add hot glue to hold them and then hot glue them to each other. No cut hands for me. No sirree!

I had decided that my wreath would have a combination of the white tipped pinecones and some of the pinecones from my yard.  I also wanted to add preserved spiral eucalyptus (dark green, dried teal colored floral berries, and 1/2" red holly berry head wire stems to my wreath.

I decided which pinecones I wanted to use and then laid them out in an arrangement.  When I was happy with the pinecone selection I started putting the wreath together.  It took several hours to complete, but when I was done I was happy with the results which are shown in the picture at the beginning of this article.

This wreath has become my all time favorite wreath and hangs on the wall in my living room year round. 

Copyright © 2004 - 2023 - All Rights Reserved - Designed and Written By Linda Walsh

Too Much To Do - So Little Time!


I'm not exactly sure why I was rummaging through all the bags of craft projects waiting to be finished in my basement the other day but, I was.  It's not like I need anything else to do!  In fact, you could say that I'm out of my mind. 

I had gone down there looking for some of the primitive doll kits I had put together. So, instead of just looking through the bags with the primitive dolls  I, of course, started looking through all the bags. And, there are lots of them. Winter dolls - waiting to be completed. Summer dolls - waiting to be completed. Halloween dolls - waiting to be created, etc.  The bags go on and on - as do the contents.

Now you might be wondering what I'm talking about with all the bags. Well, I have tons of doll patterns with their respective pattern pieces already cut-out and stored as a kit - waiting to be sewn.  I have just plain cloth dolls, wood and cloth dolls, craft kits, etc.  And, all the wood was cut ahead of time and is waiting with its' respective pattern to be completed. 

Why would I do this?  Well,  I'm very organized and I never do anything in moderation. When I'm designing doll patterns I design many of them. When I'm cutting out fabric for patterns I want to make, I cut many of them. When I'm sewing dolls, I sew all of the ones I've cut out. This approach saves me a lot of time but, this approach leaves me with many, many patterns saved as kits - waiting to be finished.

Do I have a lot of kits in bags downstairs - well, YES! Too many actually - which is a little foolish as I don't know when I'll get the time to finish them all. I am determined, however, that they will be finished.  It might not be within this millennium, but they will be finished.   That is, unless I add more. 

Too much to do - so little time!

Clipart - Courtesy of Picturesof.net

Friday, August 20, 2010

How To Make A Pinecone Wreath - Free How-To By Linda Walsh

Since I had just finished my Linda's Blog post on all the pine cone wreath I had made over twenty years ago I thought you might enjoy a step-by-step "How-to" on how to make one of your own.

My instructions on how to make a pinecone wreath of your own are shown below.

How To Make A Pine Cone Wreath


Supplies Needed

1 Oasis Foam Ring - 8 1/2"
1 Can Spray Varnish
Pinecones - 2 Packages Natural Small Pinecones
White Tipped Pinecones - 1 Package
Dark Green Preserved Eucalyptus - 1 - 2  Packages 
Dried Floral Berries - Teal Colored - 1 - 2 Packages 
1/2" Red Holly Berry Head Wire Stems - 1 to 2 Packages
Floral Picks - 1 to 2 Packages
Dual Temperature Glue Gun
Glue Gun and Glue Sticks
Medium Gauge Wire
Wire Cutters

Instructions

(Note - These instructions are for ADULT use only as they require the use of a hot glue gun.  Always use caution when working with any kind of hot glue gun.)

1. Lay the white tipped pinecones out single file in a circle. Make sure you have enough pinecones to snugly fill the center of the 8 1/2" oasis foam ring.
2. Lay the natural small pinecones out single file on their sides within the circle of white tipped pinecones. Make sure you have enough pinecones to snugly fill the inner circle of the 8 1/2" oasis foam ring.
3. Lay the natural small pinecones out single file on their sides along the outer circle of the white tipped pinecones. Make sure you have enough pinecones to snugly fill the outer circle of the 8 1/2" oasis foam ring.
4. Cut a long piece on the medium gauge wire and fold it in half and then form a 1" loop. Twist the wire around itself to hold the loop and then tightly wrap the wire around the top center back of the oasis foam ring.  Twist the ends to secure it. This will form the loop to hold the wreath to the wall.
5. Starting with the white tipped pinecones wrap a floral pick around the bottom of one of the pinecones and then insert it into the center of the foam. You may need to trim the wood pick slightly with the wire cutters if it is too long. Then using the low temperature setting of the dual temperature glue gun glue the pinecone to the foam to hold it.
6. Wrap a floral pick around the bottom of the second white tipped pinecone and then position it snugly against the 1st pinecone and in the center of the foam ring. You may need to trim the wood pick slightly with the wire cutters if it is too long. Then using the low temperature setting of the dual temperature glue gun glue the pinecone to the foam (if need be) and to the 1st pinecone to hold it.
7. Continue in this manner until you have filled the the center of the foam ring with a singular row of white tipped pinecones - snuggly fit.
8. For the inner circle wrap a floral pick around the bottom of one of the natural small pinecones and then insert it on its side into the inner center of the foam ring. It should be snuggly positioned against the inner side of the white tipped pinecone. You may need to trim the wood pick slightly with the wire cutters if it is too long. Then using the low temperature setting of the dual temperature glue gun glue the pinecone to the inner center of the foam to hold it.
9. Wrap a floral pick around the bottom of the second natural small pinecone and then position it on its side snugly against the 1st pinecone in the inner circle of the foam ring and snuggly against the inner side of the white tipped pinecone. You may need to trim the wood pick slightly with the wire cutters if it is too long. Then using the low temperature setting of the dual temperature glue gun glue the pinecone to the foam (if need be). Then using the low temperature setting of the dual temperature glue gun glue it to the natural small pinecone on its side in the inner circle, and to the side of the white tipped pinecone to hold it.
10. Continue in this manner until you have filled the the inner circle of the foam ring with a singular row of natural small pinecones - snuggly fit.
11. For the outer circle wrap a floral pick around the bottom of one of the natural small pinecones and then insert it on its side into the outer circle of the foam ring. It should be snuggly positioned against the outer side of the white tipped pinecone. You may need to trim the wood pick slightly with the wire cutters if it is too long. Then using the low temperature setting of the dual temperature glue gun glue the pinecone to the outer circle of the foam to hold it.
12. Wrap a floral pick around the bottom of the second natural small pinecone and then position it on its side snugly against the 1st pinecone in the outer circle of the foam ring and snuggly against the outer side of the white tipped pinecone. You may need to trim the wood pick slightly with the wire cutters if it is too long. Then using the low temperature setting of the dual temperature glue gun glue the pinecone to the foam (if need be). Then using the low temperature setting of the dual temperature glue gun glue it to the natural small pinecone on its side in the outer circle, and to the outer side of the white tipped pinecone to hold it.
13. Continue in this manner until you have filled the the outer circle of the foam ring with a singular row of natural small pinecones - snuggly fit.
14. Cut the eucalyptus into many, many 3" - 4" sections with the wire cutters. Insert the preserved eucalyptus in between all the pinecones and using the low temperature setting of the dual temperature glue gun glue it to the pinecones. Continue in this manner until the wreath has been filled and the eucalyptus placement is pleasing to the eye.
15. Cut the dried floral berries into many, many 3" - 4" sections. Insert the dried floral berries in between all the pinecones and and eucalyptus until the placement is pleasing to the eye. Then using the low temperature setting of the dual temperature glue gun glue it to hold it in place.
16. Fold many, many of the red holly berry wire stems in half and then insert them in between the pinecones, eucalyptus, and dried floral berries until the placement is pleasing to the eye. If need be, using the low temperature setting of the dual temperature glue gun glue it to hold it in place.
17. Spray the whole wreath with varnish.
18. Congratulations - You're Done!
 
I also created a .PDF "Linda's How-Do-I Series How To Make A Pinecone Wreath" e-book for this as well.


To view and download my free e-book please CLICK HERE. You'll be brought to Google Drive where you can view our free e-book. Then just download our free .pdf e-book from the File menu in the upper left hand corner.

For more information on all my free e-patterns, e-printables and e-books please CLICK HERE.

Please respect My Terms of Use:  All patterns, e-patterns, printables, e-printables, e-books, graphics, tutorials, how-to's, articles and other e-products © 2004-2023 Linda Walsh Originals-Designs by Linda Walsh. All rights reserved. Commercial selling or reselling by any means prohibited without the written consent of Linda Walsh.

Patterns, e-patterns, printables, e-printables, e-books, graphics, tutorials, how-to's, articles and other e-products are for personal use only. You may not modify, photocopy, download, upload, post, transmit, display, perform, publish, license, reprint, create derivative works from, mass duplicate, re-sell, digitize, and reproduce in any other form (print, digital or electric) or commercially apply, embed, share, Email, or redistribution in any other means. Use of any of the above is prohibited without the written permission of Linda Walsh.

However, you may link to my website(s)/blog(s) and the individual page(s)/blog post(s) (including 1 picture) but do not copy, reprint or duplicate my website(s)/blog(s) or individual page(s)/post(s ) without my permission.

Items made from Linda Walsh Originals E-Patterns are intended for personal use for fun or small scale personal and business profit as long as you credit us with the design. Large scale commercial use (i.e. mass production) of items made from Linda Walsh Originals E-Patterns are by permission only.

Please see my Terms and Conditions for additional information.

Copyright © 2004 - 2023 - All Rights Reserved - Written By Linda Walsh of Linda Walsh Originals and Linda's Blog. Linda is a doll maker and doll pattern designer.

Wednesday, August 18, 2010

How To Make A Pinecone Tree - Free How-To By Linda Walsh

Since I had just finished my Linda's Blog post on the pine cone trees I had made I thought you might enjoy a step-by-step "How-to" on how to make one of your own. If you'd like to read my post entitled "Dried White Pine - It Was A Good Idea - Or Was It?"

My instructions on how to make a small pinecone tree of your own are shown below.

How To Make A Small Pinecone Tree


Supplies Needed

1 Can Spray Varnish or Lacquer
1- Green Styrofoam Cone 12"X4"
Package of Green Preserved Boxwood or Eucalyptus
1/2" Red Velvet Ribbon - 4 Yards
1/2" Covered Box Decorations - 1 Package
Florist Wood Picks With Wire - 1 Package
Red Berry Spray With Multiple Berries or Dried Red Floral Bulbs
Miniature White Floral Flowers (I used ones that looked like snow flakes)
Dried or Preserved Pine Cones of Various Shapes and Sizes
1/4" Pine Wood - 6" by 6"
3/4" Wood Dowel - 3" Long
Wood Screw - 1 1/2" Long
Wood Stain - 1 Small Can
Sand Paper
Dual Temperature Glue Gun
Glue Gun and Glue Sticks
Wire Cutters
Drill

Instructions

(Note - These instructions are for ADULT use only as they require the use of a hot glue gun.  Always use caution when working with any kind of hot glue gun.)

 1.  Cut a 6" by 6" square out of the 1/4" pine wood.  Round the edges and then completely sand it.
 2.  Cut a 3" long piece out of the 3/4" dowel.
 3.  Measure the center of the 6"x6" square and mark both the top of the square and bottom of the square with an X. 
 4.  Drill a small starter hole in the bottom of the 6"x6" square at the X for the wood screw.
 5.  Screw the 1 1/2" long wood screw to the bottom of the 6"X6" square until just the tip of it is showing through to the top.
 6.  Position the dowel on the X on the top of the 6"x6" square centering the tip of the wood screw at the center of the dowel.
 7.  Finish screwing the 6"x6" square to the wood dowel until they are both secure.
 8.  Stain the 6"x6" square and dowel with the wood stain. Let dry completely.
 9. Spray the 6”x6” square and dowel with the varnish or lacquer. Let dry completely.
10.  Position the center of the bottom of the green Styrofoam cone onto the dowel and push it down the dowel until the bottom of the Styrofoam cone is flat against the top of the 6"x6" square.  You may need to carve out a small amount of the center bottom of the green Styrofoam cone to get this area started.
11.  Remove the green Styrofoam cone from the dowel and glue all around the dowel and center bottom of the 6"x6"square using the low temperature setting of the dual temperature glue gun. Then re-position the green Styrofoam cone onto the dowel and center of the 6"x6" square.
12.  Glue the first layer of medium sized pine cones to the green Styrofoam cone using the low temperature setting of the dual temperature glue gun.   Position the pine cones so they abut one another and are pleasing to the eye.  Don't worry about gaps in between the pine cones as you will be filling these in with smaller pine cones.
13.  Continue gluing the pine cones in rows in this manner using the low temperature setting of the dual temperature glue gun until you reach the top of the green Styrofoam cone.
14.  Glue a medium sized pine cone to the top of the green Styrofoam cone using the low temperature setting of the dual temperature glue gun.
15.  Using the low temperature setting of the dual temperature glue gun glue the smaller pine cones in between the larger pine cones until all the gaps are filled.
16.  Spray the tree and pine cones with varnish or lacquer.  Let dry completely.
17.  Using the wire cutters cut several 2" - 3" pieces of the preserved boxwood or eucalyptus and then using the low temperature setting of the dual temperature glue gun glue the preserved box wood or eucalyptus amongst the pine cones until the arrangement is pleasing to the eye.
18.  Using the wire cutters cut the red berries so they are individual and then using the low temperature setting of the dual temperature glue gun glue the red berries amongst the pine cones until their placement is pleasing to the eye.
19.  Using the wire cutters cut the miniature white flowers into individual pieces and then using the low temperature setting of the dual temperature glue gun glue the miniature white flowers amongst the pine cones until their placement is pleasing to the eye.
20.  Stick the bottom center of the 1/2" covered box decorations with a floral pick and then stick them amongst the pine cones until their placement is pleasing to the eye.  Glue to hold if necessary using the low temperature setting of the dual temperature glue gun.
21.
  Cut sixteen 12" pieces of the 1/2" red velvet ribbon and then tie each into a bow.  Tie the wire of the floral pick around the center of the bow and then fasten the floral pick and bow amongst the pine cones until their placement is pleasing to the eye.  Glue to hold if necessary using the low temperature setting of the dual temperature glue gun.
22.  Congratulations - You're Done!


I also created a .PDF "Linda's How-Do-I Series How To Make A Small Pinecone Tree" e-book for this as well.

To view and download my free e-book please CLICK HERE. You'll be brought to Google Drive where you can view our free e-book. Then just download our free .pdf e-book from the File menu in the upper left hand corner.

For more information on all my free e-patterns, e-printables and e-books please CLICK HERE.


Please respect My Terms of Use:  All patterns, e-patterns, printables, e-printables, e-books, graphics, tutorials, how-to's, articles and other e-products © 2004-2023 Linda Walsh Originals-Designs by Linda Walsh. All rights reserved. Commercial selling or reselling by any means prohibited without the written consent of Linda Walsh.

Patterns, e-patterns, printables, e-printables, e-books, graphics, tutorials, how-to's, articles and other e-products are for personal use only. You may not modify, photocopy, download, upload, post, transmit, display, perform, publish, license, reprint, create derivative works from, mass duplicate, re-sell, digitize, and reproduce in any other form (print, digital or electric) or commercially apply, embed, share, Email, or redistribution in any other means. Use of any of the above is prohibited without the written permission of Linda Walsh.

However, you may link to my website(s)/blog(s) and the individual page(s)/blog post(s) (including 1 picture) but do not copy, reprint or duplicate my website(s)/blog(s) or individual page(s)/post(s ) without my permission.

Items made from Linda Walsh Originals E-Patterns are intended for personal use for fun or small scale personal and business profit as long as you credit us with the design. Large scale commercial use (i.e. mass production) of items made from Linda Walsh Originals E-Patterns are by permission only.

Please see my Terms and Conditions for additional information.

Copyright © 2004 - 2023 - All Rights Reserved - Written By Linda Walsh of Linda Walsh Originals and Linda's Blog. Linda is a doll maker and doll pattern designer.

Tuesday, August 17, 2010

Just How Many Cross-Stitch Kits Did You Buy!

You might have noticed that I bought quite a few cross-stitch kits this year. What I didn't tell you in that post was I actually bought many, many more than that.

I can imagine what you're thinking (she's nuts!) but, I didn't buy them just because I'm obsessed with cross-stitch - I actually had a purpose in mind. The problem was I couldn't decide which cross-stitch kit I wanted for this particular purpose and then when I was looking at all the kits I found others that I just had to have.

So, I ended up buying nine other kits. Five were for the purpose I had in mind and four were because I just had to make them. Actually for the latter it's probably more because they were either Victorian, houses, or just plain cute.

By now you must be wondering what purpose I had in mind that would cause me to buy so many other cross-stitch kits. Well, I was trying to find a large Victorian cross-stitch picture that I could make to replace a large picture hubby and I had hanging in our bedroom. The large picture that is hanging there is a pressed flower collage I had created years ago.

As with everything I seem to do there is a story behind the collage. I have been in love with flowers and cut flowers since I was a little girl. My favorite flowers to plant and cut to make a floral arrangement were and still are dahlia's. The bigger the better. So, when it came time for me to decide what to plant in my perennial gardens I wanted to plant all sorts of flowers including dahlia's.

I've always been amazed by the sheer beauty of flowers and wanted to find a way to keep them forever. I decided I should try my hand at pressing them and then creating floral collages out of them.  So, over a decade ago I decided to dry some of the beautiful flowers I had in my perennial gardens and embarked on pressing hundreds of them over the course of one summer.

To press them I used old telephone books, paper towels, and bricks. First I laid paper towel on the back pages of a phone book and then laid the flowers on top of the paper towel until the page was filled. Then I laid another paper towel on top of the flowers and then flipped several of the phone book pages on top of that.

Then I laid another paper towel on the new section, more flowers, another piece of paper towel, and flipped more pages of the phone book on that until I had completely filled the phone book up. Then I laid a brick on the front cover of the phone book and set it aside for the pressed flowers to dry.

When they were completely dry I arranged them into a dried floral collage which I glued to a large piece of press board. Then I matted it and framed it and hung it in my bedroom.

Well, several decades later some of the pressed flowers have browned and the color has faded from most of the flowers. Hubby thought it was time to change it and suggested that perhaps I might find a cross-stitch picture that would fit the bill.

So, I immediately thought of some of the beautiful Victorian scenes I had seen from time to time in several cross-stitch kits. Of course, my problem was I loved all of them and couldn't choose. Plus, I wasn't quite sure exactly which ones would be big enough for the picture. So, I bought all the ones I liked and thought might do the trick.

Here's what I bought for the Victorian picture I had in mind:


Dimensions 'A WALK ON THE BEACH' Cross-Stitch Kit

Dimensions Gold Collection In Her Garden Counted Cross Stitch Kit: 11x16

Gold Collection A Stroll In The Park Counted Cross-Stitch Kit - 16"X12"

New Gold Collection A Treasured Time Counted Cross Stitch Kit-16""X12"" 16 Count New

Dimensions Counted Cross-Stitch Kit-M' Lady's Chateau

Of course, while I was out looking I found other cross-stitch kits that I liked. Now, if you're a follower of "The Book Review Corner" blog and my Linda's Blog you know that I love houses and that my house is filled with pictures of houses (and dolls). So, when I saw the following I just had to have them:


Haunted Hotel - Cross Stitch Kit


Queen Anne House - Cross Stitch Kit


Victorian House Christmas Village


Girl Silhouette - Cross Stitch Kit

The Victorian scenes will definitely take awhile to complete. The little houses should be fairly quick. I'll let you know what I think about each of the kits after I've finished them and I'll be sure to include pictures in my post so you can see how I've finished everything.

I think I've bought enough cross-stitch kits now to last several more decades. What do you think?

Dried White Pine - It Was A Good Idea - Or Was It?


In a previous post on my Linda's Blog entitled "The Pine Cone Baskets - Now That's A Good Idea!" I told you that twenty years ago I had a great idea to collect all the pine cones from the lawn to use for making pine cone baskets.  We had a wealth of them that had fallen from the white pine and evergreen trees that year.  So, they were plentiful and free.

During this time I had another brainstorm and thought it would be fun to dry white pine needles and make miniature pine trees. The winter that year had been harsh and we had many, many large branches of our white pines down on the ground. I just thought it would be a waste to just throw all the branches and pine needles away.

So, I decided to cut the branches into manageable sizes and then dry them upside down and hang them from the beams in our cellar. I used elastic bands to tie the branches together and then tied them to wire coat hangers that I then hung from nails I had hammered into our wood beams in the basement.

I let the pine needles dry for several months and then decided I'd try to make a miniature tree. To my dismay the pine sap from the white pine trees didn't exactly dry like I thought it would and I had pine sap all over my hands. Also, to my dismay the pine needles hadn't dried exactly as I thought they would and started falling our almost immediately.

So, to keep them in tack within their little pods I cut them to about an inch in length. I took a 12" foam tree and started inserting them into the bottom of the foam tree working my way up to the top. By the time I was done it actually looked like a miniature white pine tree and I was pleased with the results.


So, I started to decorate it with some small bead garland I had bought and some miniature ornaments. I put a metal star on the top and was satisfied that my tree looked like a real tree.

Unfortunately the tree didn't last and the needles started falling out and turning yellow. I hadn't thought to glue the mini pods with the needles into the foam or to spray the tree either with a preservative or with some green paint.  Duh! That would have been smart.

Plus, to my dismay I learned that white pine branches drying upside down in one's basement tends to attract moths. NOT A GOOD THING.

So, I threw away all the dried branches and resorted to either using pre-dried floral from the craft stores ( which was way too expensive) or use pine cones. I certainly had plenty of them. I had stored all the different pine cones that had fallen from the trees in various boxes which were stored in my basement.

However, I quickly learned that you couldn't make miniature pine cone trees without tiny little pine cones. If I wanted to use the pine cone trees that I had I wouldn't be making  miniature trees. They would be anywhere from 12" tall and up.  That was fine with me - I had plenty of pine cones.

The first tree I made, which is shown in the picture at the beginning of this post, was 13 inches tall.  It didn't take long to make.  The second tree I made, which is shown above in the picture to the right, was 30 inches tall and took a long time to make.

However, I  was pleased with the way they both turned out and put them out during the Christmas holidays.  The large tree sits in the middle of my dining room table and the small tree is on the counter in my kitchen.

The first year I made the miniature white pine trees I had them out during the holidays.  However, as mentioned they just didn't last so they were all thrown away.  I hated to do that, but sometimes you win with an idea and sometimes you don't.  Was it a good idea - probably not!

Copyright © 2004 - 2023 - All Rights Reserved - Designed and Written By Linda Walsh