Friday, June 14, 2019

My "Snowman and Friends" Dimensions Gold Petites Collection Cross-Stitch Picture


It seems a little crazy at the start of the summer to be posting about a winter cross-stitch picture I just finished.  You might wonder why I didn't post this in the winter.   Well, there's a really good reason for that.  I started this back on the Fall of 2018 and finally just finished it in June.  Everyone who cross-stitches knows that WIP sometimes take months or years to complete....lol.


I was looking for more cross-stitch winter seasonal pictures to display during the winter season and was drawn to the picture in the Dimensions Gold Collection Petites "Snowman & Friends" picture when I saw it.  So, I decided to buy the kit and add it to my other winter cross-stitch decorations on my fireplace mantle.

Like the other Dimensions Gold Collection Petites kits I had bought the kit included the pattern, pre-sorted cotton thread, 18 count white cotton Aida, needle and instructions.

The "Snowman & Friends" pattern uses full counted cross-stitch, french knots and outline stitching for emphasis and depth and this detailing really makes the picture stand out. It also varies the number of threads used with the various stitches to add to the depth emphasis. The design of this cross-stitch gives the finished picture a 3 dimensional aspect with the cross stitch, french knots and outlining being used for artistic effect.


Unlike other cross-stitch pictures I have done this one left large areas of the picture unfinished and just showing the white Aida cloth, like the picture shown above.  It also did not square the picture to the border.


However, I don't like leaving large sections of the cross-stitch picture unfinished so I opted to finish mine, as shown in the picture above.

Unlike other cross-stitch pictures I've completed the jagged edges to the unfinished areas and border required me to improvise and fill in the cross-stitch picture so I had a 5" by 7" rectangle border to my picture.  So,  I utilized the extra floss from the kit and added the colors and images that I envisioned the picture would have if it had been completely finished.


Not only did I decide to totally finish the picture around the edges but also decided to embellish it in a few other areas of the white snow to create more of a 3-dimensional effect.  I used 3-strands of the white floss and created several areas of french knots to create the effect of snow piles.

I also added more blue back stitching in the snow areas to highlight the depth of the snow piles and did the same in sections of the evergreen tree.

For the areas around the border that I filled in and for the large sections of white snow I used 2 strands of the respective floss color I was using in a half cross-stitch pattern.


I decided to use an 9" round embroidery frame to stitch this embroidery.  The white Aida wasn't big enough to fit into the frame so I sewed 4 muslin strips to the four sides of the Aida to keep the Aida tight and stretched so I could easily cross-stitch this design.

The pattern came with starting and working order instructions as well as samples of the various stitches required and instructions for creating them, color coded keys (with code #'s, lengths, color names, and cross-stitch symbols) and a chart with color coded symbols. The colors and symbols on the keys and chart were easy to read and follow.

While I was very pleased with the end results of this design there are some things in the kit and in the instructions that can be improved upon.

Unlike the problem I had with the size and readability of some of the other cross-stitch charts in the kits I had bought this color chart was large enough and easy to follow.

As was the case with previous Dimensions kits the thread sorter was poorly designed. The embroidery threads were glued to foam backed strips of cardboard that had a picture of the color of the thread and it's number. In order to get to the threads you had to separate the foam back from the cardboard strip. Very quickly the threads separated from their section and then you no longer knew what the thread number was to tie to your symbols & legends.

As I have done with other cross-stitch kits I've completed I had to design my own thread color sorter and symbol key. I took a piece of thin cardboard and cut a long rectangular piece out to use as a thread sorter. I then punched holes in my cardboard strip in which to tie each of the different colors. Just below the hole I wrote the DMC floss # and just above the hole I added the respective color coded cross-stitch symbol. I then inserted the floss threads that went with that # and symbol through the hole and tied them in a loose knot. This kit could be much improved if different thread sorter with respective #'s and color coded symbols was provided.

Short of changing the thread sorter all together to make things even easier for the user the color symbol should at the very least have been shown on the thread sorter strip of cardboard as well. That way you would only need to use the thread sorter strip of cardboard to follow your chart.

The pattern included instructions for finishing the piece. I didn't need these as I knew what type of picture frame I was going to use, the  mat I was going to use and the way in which I wanted to finish the picture.

I tend to favor adhesive mounting boards for the cross-stitch pictures I'm inserting into a finished picture frame. I had decided to use an 8" by 10" wood frame I had bought that had a white and gold double depth mat with a 5" by 7" opening.   Since the frame I was using didn't have enough depth to the inside of the frame I knew I wouldn't be able to use a 1/4" foam adhesive mounting board for this picture. 


I also wouldn't be able to mount this on an 8" by 10" adhesive board either as I didn't have enough depth to insert my finished mounted cross-stitch picture and then insert the back of the picture frame.  There just wasn't enough depth to then secure the back of the frame with the metal clips.

So, I opted instead to adhere my cross-stitch to a 5" by 7" Pres-On self-stick thin adhesive mounting board and secure my picture around the 5" by 7" mounting board.  This would allow for just enough depth along the side in which to secure the back of the frame with the metal clips.

When I had finished securing my cross-stitch around the 5" by 7" board I centered the picture within the white and gold mat and then secured it to the back of the white mat with masking tape.

When the picture was finished I was very happy with the way it turned out. It would be perfect for the winter season for my fireplace mantle.  I hope you like it too.

Monday, June 10, 2019

My Victorian Miniature Dress Ornaments Free E-Patterns


I have been in love with beautiful little girl dresses my whole life. I have to blame my grandmother "Dee" for this as she used to buy me the most beautiful little girl dresses. They were frilly, flouncy, lacy, filled with tulle underskirt dresses and I just loved them. I could stand and look for hours at my dresses.  The dresses I loved - the tulle not so much!

I, of course, wasn't allowed to touch them - I'd get them dirty. They were for our best occasions which I was hoping would be that day or the next day just so I could wear the dresses. Inevitably, a holiday or special occasion would occur and I would get to wear one of my dresses.

I'd tell my mother I just wanted to put them on for a few minutes.  Truth be told I wanted to put them on and just twirl around and around and watch them poof out!

I could just twirl and twirl and twirl in them. Around and around I'd go.  Until I got dizzy and fell down and, you guessed it, the dresses would get dirty.

My mother always knew I'd get the dresses dirty and then she'd have to wash and iron them before the special occasion I might be wearing them to so she always said "no." 

I never understood then why she'd say "no."  I do now, but didn't back then so I'd pout for the rest of the day.

In our family room we had some steps right next to a sofa. When I was wearing one of these dresses I would love to stand on the steps and then jump down into the sofa.
As I did my dress would fly up in the air like a parachute and then come landing down on me.  I loved it and thought this was a lot of fun!

Of course, everyone could see my frilly underwear, leotards, slip, etc. when I did this - but, only for the briefest of moments.

My Grandmother would "tsk, tsk" and would give me one of those looks of "that's not a lady like thing to do!" I'd just look back at her and smile. I just had to be me.

And, then I'd look over at my Mother and she'd be smiling. She knew I just had to be me, too.

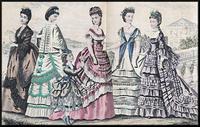
My Grandmother was born in 1896 and she definitely had a closet of beautiful Victorian dresses when she was growing up, like the one shown in the picture to the right.  Unfortunately, she passed away in 1975.

While she is not here with me now she left an indelible impression on me, my life, and my creativity. She is largely responsible for my love of Victorian dresses.

When I was knee-high she gave me a very old print of Godey's Fashions for August 1870 that belonged to my great, great Aunt Flossie (the first female in my family to graduate from college). I was captivated with the dresses and forever hooked. That was the start of my love of Victorian dresses.


When I was designing some of my doll patterns I decided I wanted to design some Victorian dress ornaments.  I thought they would be cute and could be hung up as decorations for most of the year.


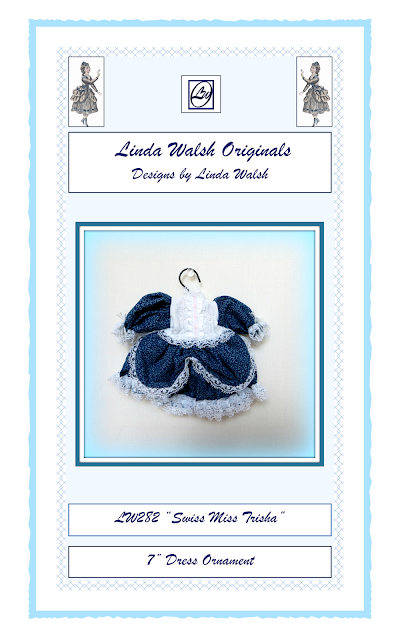
The first dress ornament I decided to create was a 7" Victorian dress ornament that would hang on a miniature hanger.  It had multiple over-skirts, lace trimmed bodice and a ton of decorative lace trims.


The 2nd dress I created was a 7" dress ornament with large gathered sleeves, split front and back over-skirt, lace trimmed bodice, and a ton of decorative lace trims.

A couple of weeks ago I decided to update these e-patterns and to make them available to all of you as free e-patterns.  Perhaps I'll encourage you to develop a love of Victorian dress ornaments too.  My Grandmother would definitely like that.


To view and download my free e-book please CLICK HERE. You'll be brought to Google Drive where you can view our free e-book. Then just download our free .pdf e-book.


To view and download my free e-book please CLICK HERE. You'll be brought to Google Drive where you can view our free e-book. Then just download our free .pdf e-book.

For more information on all my free e-patterns, e-printables and e-books please CLICK HERE.

Please respect My Terms of Use:  All patterns, e-patterns, printables, e-printables, e-books, graphics, tutorials, how-to's, articles and other e-products © 2004-2023 Linda Walsh Originals-Designs by Linda Walsh. All rights reserved. Commercial selling or reselling by any means prohibited without the written consent of Linda Walsh.

Patterns, e-patterns, printables, e-printables, e-books, graphics, tutorials, how-to's, articles and other e-products are for personal use only. You may not modify, photocopy, download, upload, post, transmit, display, perform, publish, license, reprint, create derivative works from, mass duplicate, re-sell, digitize, and reproduce in any other form (print, digital or electric) or commercially apply, embed, share, Email, or redistribution in any other means. Use of any of the above is prohibited without the written permission of Linda Walsh.

However, you may link to my website(s)/blog(s) and the individual page(s)/blog post(s) (including 1 picture) but do not copy, reprint or duplicate my website(s)/blog(s) or individual page(s)/post(s ) without my permission.

Items made from Linda Walsh Originals E-Patterns are intended for personal use for fun or small scale personal and business profit as long as you credit us with the design. Large scale commercial use (i.e. mass production) of items made from Linda Walsh Originals E-Patterns are by permission only.

Please see my Terms and Conditions for additional information.

Copyright © 2004 - 2023 - All Rights Reserved - Written By Linda Walsh of Linda Walsh Originals and Linda's Blog. Linda is a doll maker and doll pattern designer.

Saturday, June 08, 2019

My "Bruce Sunshine" Primitive Cloth Doll Clown Free E-Pattern


"Bruce Sunshine" is one of the members of the "Clown Around With Me Group" of cloth clown dolls that are a fun loving group of various kinds of clown dolls that love to having fun,  laughing and, most of all love to make you laugh.

In fact, they're willing to try anything to bring a smile to your face.

They'll make fun of themselves. Fall down. Run around. Bump into each other. Even pretend to slap each other - all in the name of "good" fun.

They love to laugh. They love to have fun. But, most of all they love making you laugh.

They are all so confident that they can make you laugh that they even have a contest going - to see which clown can make you laugh the most. The winner gets a free trip to Clown College.

"Bruce Sunshine" is a 19" primitive clown cloth doll. His body is made of muslin and his face is embroidered with black eyes, embroidered nose with dark rose water coloring , black embroidered smile, and embroidered cheek circles with bright orange water coloring. His eyebrows are embroidered as are his eyelashes. And, he has smile triangles on the sides of his eyes.

Bruce Sunshine has a mass of thick, curly, auburn colored yarn hair on the sides of his head with the back left bald. His favorite and coordinated beanie is on the top and back of his head.

He is wearing his favorite fringed print shirt which is gathered at the neck and has ruffled trim down the front center. He is also wearing his favorite fringed print pants with ruffled trim suspenders. There are two large white buttons holding the suspenders on the front of his pants. His pants are gathered to the tops of his boots on the bottom and gathered at the waist. His black boots are cross laced and he is coffee stained throughout.

"Bruce Sunshine" is a ray of sunshine on a cloudy day. Nothing even his"BFF" clown pal "Ambrose Blues!" can change.

Nope! Nothing can change Bruce's mood.

If he wins the trip to Clown College - that's good.

If he doesn't win the trip to Clown College - one of his pals will and that's good.

Nope! Nothing can get "Bruce Sunshine" down.

My "Ambrose Blues" Primitive Cloth Doll Clown Free E-Pattern


"Ambrose Blues" is also a member of our the "Clown Around With Me Group" of clown dolls.

The "Clown Around With Me Group" of cloth clown dolls are a fun loving group of various kinds of clown dolls that love to having fun,  laughing and, most of all love to make you laugh.

In fact, they're willing to try anything to bring a smile to your face.

They'll make fun of themselves. Fall down. Run around. Bump into each other. Even pretend to slap each other - all in the name of "good" fun.

They love to laugh. They love to have fun. But, most of all they love making you laugh.

They are all so confident that they can make you laugh that they even have a contest going - to see which clown can make you laugh the most. The winner gets a free trip to Clown College.

"Ambrose Blues" is a 19" primitive clown cloth doll. His body is made of muslin and his face is embroidered with black eyes, embroidered nose with dark rose water coloring , black embroidered lips with yellow water coloring, and embroidered cheek circles with bright orange water coloring. His eyebrows are embroidered as are his eyelashes. And, he has smile triangles on the sides of his eyes.

Ambrose has a mass of thick, straight, bright orange yarn hair on the sides of his head with the back left bald. His favorite and coordinated beanie is on the top and back of his head.

He is wearing his favorite fringed striped shirt which is gathered at the neck and has ribbon trim down the front center. He is also wearing his favorite fringed striped pants with ribbon suspenders. His pants are gathered to the tops of his boots on the bottom and gathered at the waist. Large gray buttons are holding his suspenders to his pants in the front. His black boots are cross laced and he is coffee stained throughout.

"Ambrose Blues!" has a serious case of the "blues" is hoping to win. He knows he's funny , but he's just plain "blue" lately. He does not know why and is hoping a little time away at Clown College will resolve his "blues."

He's hoping that maybe the other clowns will recognize how "blue" he is and let him win. Poor Ambrose - he's "got the blues!"

Friday, June 07, 2019

My "Clown Around Sunshine Clarence" Free Cloth Doll E-Pattern


"Clown Around Sunshine Clarence" just loves having fun and always sees the beauty and good in everything.  He likes to spread joy, happiness, and kindness to everyone he encounters and incorporates his "positive" attitude in everything he does.

"Clown Around Sunshine Clarence" is a 16" country raggedy cloth clown doll. He has a muslin body and embroidered face with black and white satin stitched eyes, red satin stitched nose, and an outline embroidered mouth with red stain stitched lips. His eyebrows are embroidered as are his eyelashes and he has orange blushed cheeks. His legs are cross-laced with bright, yellow straps tied into knots. Clarence has a mass of thick straight orange yarn hair glued along the side seams and top of his head.

He is wearing a yellow shirt that is gathered at the neck and wrists and his wrists have matching yellow straps tied in a knot. His pants have suspenders, are gathered at the waist and have cuffs on the bottom of his pant legs. He has a bandanna tied in a knot around his neck that matches his pants.

"Clown Around Sunshine Clarence" loves to clown around but prefers spreading sunshine wherever he goes.

Thursday, June 06, 2019

My "Gypsy Annie" Free Primitive Cloth Doll E-Pattern


While "Primitive Andy" is the shyest "dollie" on the planet, and "Primitive Annie" is the sweetest "dollie" on the planet, "Gypsy Annie" takes the prize at being the most adventuresome "dollie" on the planet. She may be a "dollie", but she is a "gypsy" after all. She travels from town to town and lives an unconventional life.

Given how much she travels it's amazing that she was even aware of all the brouhaha she had created concerning the lack of stories for "Primitive Andy", "Primitive Annie" and herself over on "The Dollie Storage Room" blog and Linda's Blog  eight years ago.

You see, she was the impetus behind the letter writing and privately urged their stories being told then. She wrote the notes. If she thought seven years was enough time back then, most assuredly she thinks fifteen years is more than enough to wait for her story. I would have to agree which is why I decided to post her story now.

So, here's her story:

Like many of her relatives "Gypsy Annie" is a fortune teller. It's not an occupation she would have picked for herself. She'd rather be a travel agent, but she had a natural ability for it and so that is what she does for a living.

"Gypsy Annie" really prefers to travel and would love to travel around the world some day. The problem is that she doesn't make a lot of money as a fortune teller. But she's saving her pennies and hoping to do a bit of traveling this summer.

Gypsy Annie has a coffee stained cloth body, embroidered face with black bead eyes, and oodles of freckles.  She has red lace-tied boots and long raggedy red looped hair along the sides and top of her head.

She is wearing a coffee stained,  tattered, and fringed shirt that is gathered at the neck and has fringed sleeves that are gathered at the wrists. Her skirt is gathered at the waist and fringed along the edges. She has a tattered sash and fringe tied around her waist and she is wearing a pair of fringed bloomers that are gathered at the waist. She has a fringed gypsy kerchief tied around her head.

"Gypsy Annie" is a wanderer by nature. She dreams of one day circling the globe. She knows there is something like that in her future. She just doesn't know when it will happen. She's got her fingers crossed for "soon!"

Sunday, June 02, 2019

My Lady Loren of Galapagos Custom Fabric Is Now Available!


Lady Loren of Galapagos is in a really happy mood and is dancing up a storm.

The reason is she loves the fact that her custom fabric designs are now available in my Linda Walsh Originals Fabric Designs Spoonflower shop.

Think of all the possibilities for creating adorable home decor.

I've got a few items in mind that I want to make and hope you do too.  Let's dance!
© 2019 - 2023 Copyright Linda Walsh Originals - Designs By Linda Walsh

Friday, May 31, 2019

I Can Hardly Wait For Artful Gathering To Start!


I'm a lifetime student or lifetime crafter always in search of learning something new.  So, for someone like me, what could be better than taking online classes.  I love taking online arts & crafts classes and could, literally,  spend 24/7 just doing this.

In 2012 I discovered the Artful Gathering online classes and fell in love with them. They offer online art retreats that are available in the Spring and Summer each year that are are taught by some of the most unbelievable and creative artists I have ever encountered and whose creativity is beyond measure.

Artful Gathering was established in 2009 by Christina Zinnia Galliher, who is an exceptional artist in her own right.   I am taking her "Leonardo Loves Zia" class this Spring and can hardly wait. 

Here's what Zinnia had to say about Artful Gathering: Artful Gathering Online Art Retreats is a one-of-a-kind online event destination. Each summer we celebrate our annual tradition of presenting brand new mixed media art workshops, with new and returning art mentors.

We have been presenting our retreats online for at least a decade, working side by side with artisans from all over the world. We gather online in the spirit of our like-minded passion for learning, and out of a mutual reverence for the individual differences that make our artistic perspectives unique to us.

Our workshops are designed and presented by real-world working artists. Our mentors are selected not only on the basis of their knowledge and expertise within a particular genre, but for their passion for sharing with and inspiring others on the journey. 

Artistic people don't all fit into the same niche. Most of us are like a unique tapestry woven together with our personal experiences and creative vision. This is why Artful Gathering embraces a wide variety of artistic perspectives; there is always something new to see, do, and learn!

We love to seek new ways to inspire your imagination and broaden your horizons. What better way to learn than to see through the eyes of a kindred spirit. We hope to spark a passion for art in you. 

So far I've taken 11 Artful Gathering e-classes and can hardly wait to take classes this spring and summer.  I wasn't able to take any classes last year so, as you can imagine, I'm itching to go.

I've always looked forward to the excellent instructing by all the phenomenal artists that teach at Artful Gathering but, what really makes the classes outstanding is the student and teacher class participation.  That's what makes all the classes so delightful.  My guess is this year will be no different.


It's always been hard to select my classes as there are always so many unbelievable classes to choose from. The instructors are always amazing and their selection of classes to teach are always amazing.  This year was no exception.

Am I in love with the Artful Gathering choices this year.  Absolutely!  There are so many classes I wanted to take, but couldn't fit them all in time wise.  Here's what I decided to take:

Artful Gathering 2019 Session 1 "Leonardo Loves Zia" Class by Christina Zinnia Galliher

In the Spring (Session 1) this year I'm taking Christina Zinnia Galliher's "Leonardo Loves Zia" class.  Here's what Zinnia had to say about this class: In this workshop, I want to take you on a journey of possibilities, where you can see how paper can be manipulated into one of a kind sculpting projects. No patterns or graphic images are used, we’ll start from the ground up. (I will provide head templates for reference).


Artful Gathering 2019 Session 2 "Beyond the Imaginarium: A Compendium of Holiday Merriment" Class by Mary Jane Chadbourne

In The Summer (Session 2) this year I'm taking Mary Jane Chadbourne's "Beyond the Imaginarium: A Compendium of Holiday Merriment" class.   Here's what Mary Jane had to say about this class: This new workshop will take you way beyond the original and very popular, “Imaginarium – Anthology of an Art Doll” class with creating all sorts of dolls who will help you ring in the holiday season and with plenty of time to not only enjoy the creating, but be ready for the holidays ahead of time!

Here's some of the  Artful Gathering online classes I've taken followed by my finished pieces:


It's only a couple of days until Session 1 begins and I can hardly wait.


Wednesday, May 29, 2019

Linda's How-Do-I Series? How To Design An E-Pattern & Where To Sell Them Online Free E-Book

Back in 2009 I decided to share my secrets of pattern designing.  Some thought it was a little foolish back then as it would be foolish as a pattern designer to give away trade secrets to the competition.

Actually, I was happy to do this. It was kind of a "pay it forward" for all the help I had received years ago when I was just starting out.

I was happy to do this and thrilled to know there were so many individuals out there  who wanted to design their own patterns which meant the interest in sewing, creating, and selling of e-products (i.e. digital goods) on the Internet was growing. More growth meant more business for all of us. Plus, if it meant more growth for e-patterns which, in my opinion were still in their infancy on the Internet at the time, then it was a really good thing..

Over the years I revised and updated my original e-book.  Well, I'm happy to report that it was time to revise it again and to revise my "I'm An Independent Pattern Designer - Where Can I Sell My E-Patterns?" Linda's Blog post as well.

I'm happy to report my free "Linda's How-Do-I Series? How To Design An E-Pattern and Where To Sell Them E-Book" is finished and is now available as a free download in Google Drive.

So, am I still giving away trade secrets? Guilty as charged.

Is more competition bad news? Absolutely not! I couldn't be happier, especially if it translates into more business for e-patterns on the Internet.

You know my crafting community motto - what helps one of us helps all of us.

I hope you enjoy the revised version of my "Linda's How-Do-I Series? How To Design A Print Pattern and E-Pattern and Where To Sell Them E-Book" and hope it motivates you to create your own e-patterns.

To view and download my free e-book please CLICK HERE. You'll be brought to Google Drive where you can view our free e-book. Then just download our free .pdf e-book by clicking on the down arrow in the top center.

For more information on all my free e-patterns, e-printables and e-books please CLICK HERE.

Please respect My Terms of Use:  All patterns, e-patterns, printables, e-printables, e-books, graphics, tutorials, how-to's, articles and other e-products © 2004-2023 Linda Walsh Originals-Designs by Linda Walsh. All rights reserved. Commercial selling or reselling by any means prohibited without the written consent of Linda Walsh.

Patterns, e-patterns, printables, e-printables, e-books, graphics, tutorials, how-to's, articles and other e-products are for personal use only. You may not modify, photocopy, download, upload, post, transmit, display, perform, publish, license, reprint, create derivative works from, mass duplicate, re-sell, digitize, and reproduce in any other form (print, digital or electric) or commercially apply, embed, share, Email, or redistribution in any other means. Use of any of the above is prohibited without the written permission of Linda Walsh.

However, you may link to my website(s)/blog(s) and the individual page(s)/blog post(s) (including 1 picture) but do not copy, reprint or duplicate my website(s)/blog(s) or individual page(s)/post(s ) without my permission.

Items made from Linda Walsh Originals E-Patterns are intended for personal use for fun or small scale personal and business profit as long as you credit us with the design. Large scale commercial use (i.e. mass production) of items made from Linda Walsh Originals E-Patterns are by permission only.

Please see my Terms and Conditions for additional information.

Copyright © 2004 - 2023 - All Rights Reserved - Written By Linda Walsh of Linda Walsh Originals and Linda's Blog. Linda is a doll maker and doll pattern designer.