Monday, October 24, 2011
FREE Pattern Ideas Suggestions Over The Years
The other day I received a free pattern suggestion from one of my readers and I couldn't be happier.
As you can imagine after selling patterns online for seven years I've received quite a few emails. Some are for help with pattern issues, website issues, HTML, blog problems, general information, design ideas, etc. Most are unsolicited and I try to help if I can. In fact, several of my blogs and e-books were generated based on my trying to help another artist or crafter with an issue they were having.
I'm a firm believer in "paying it forward" and helping if I can. After all, we all started sometime and when I started on line I received a lot of help from many sources - all of which was greatly appreciated. Of course, back then there weren't any where near the number of artist and crafters websites and blogs that there are today.
I can even remember a forum conversation when blogs were new and a crafter/seller was saying that they would never buy anything from a blog. I thought that was a silly statement back then and well, nowadays it would be a ridiculous statement. In fact, now you can't always tell the difference between a selling website and a selling blog. There are millions of them now. The arts and crafts area on the web has certainly grown in seven years to gigantic proportions.
Back in 2006 I decided to solicit free pattern suggestions from my blog readers to see what kinds of free patterns they'd like to see me design and received quite a few responses. There have been continuous requests over the years, but I hadn't received any lately until the email the other day.
Well, since I'd just finished a massive 10-month e-pattern redesign project I began to think about what projects I'd like to start next. As you can imagine I have a massive list of arts or crafts projects that I'd like to try, blog ideas, crafting ideas, WIP's to complete - and the list goes on and on. Even though I'm optimistic there is no way in my lifetime that I'll be able to do everything and try everything I'd like to.
While sorting through some of my massive piles of to-do's I received the email for the free pattern idea. Of course, that prompted me to look at my free pattern ideas suggestions folder again.
I enjoyed reading through the suggestions again and thought you might, too. I hope you enjoy reading the requests:
Violet writes - Hi Linda, I had a thought on what free patterns I would like to see you design. Although it is only a suggestion. I have always admired my nan and pop for staying together as long as they have and seeing them still "in love" to this day. Anyway, I would love to see you design Grandma and Grandpa dolls. I just don't see many patterns around that are Grandma and Grandpa, which is quite sad. All the best, Violet
As a follow-up to this Violet sent me an email that said: Hi, Linda, After I suggested the grandparents dolls for your free patterns I decided to make some grandparent dolls up. lol It just stuck in my mind and I had to do it. hehe (They aren't that great, but considering I didn't have a pattern to follow. Just thought I'd let you know. Hope you had a good week. Violet.
Sandy writes - Hi Linda, My name is Sandy and I have twin granddaughters that are going to turn 2 yrs. Old in May and I would love to make them an old fashioned Monkey doll with the wool socks. Do you have the pattern for this ? If you do I would so appreciate it. Thank You. Sincerely, Sandy
Dolly writes - Hello, I am new to doll making so an easy prim pattern would be great. I've been trying to draw one but can't seem to get the balance between head and body. I'm not great at sewing around curves on the machine either. Also would give me a chance to use stuff I have without investing a lot of money. Any pattern to make this easier for me would be great. Thanks, Dolly - Happy Holidays!!
Pammie writes - Yes design cloth dolls all sizes.
Carrie writes - Hi, there. I just found your site and it is gorgeous! I am looking for a FREE doll pattern. I just got my first sewing machine for Christmas yesterday, at the age of 27. So, I am looking for something easy to try. Thanks! Carrie
Joan writes - Hello Linda, My name is Joan and I crochet and sew. I've never made a doll before. I pretty much make clothes. I want to know how to make a doll and also to quilt. I don't know anyone who can show me. It would be awesome if you offered a free pattern to try. Anything that is pretty basic for us "newbies". If I can do it then I would absolutely pay for a pattern. Thank you. Sincerely, Joan
Vicky writes - Hello Linda.. I was looking at your web site.. really nice.. I would love to be able to make some prim dolls, I prefer something like your Primitive Annie, with a little larger head, a Mammy doll, with wire curls.. Thank you Vicky
Olga writes - Hi LindaI have been sewing dolls since my little girl, now 33, was little. I would like you to make a doll that grows. Now I have a 2 year old granddaughter and would like to make her a doll that grows with her. Could you do that for me please. Olga from PA
AnnaLee writes - I have a beautiful 18" Kitty Collier that is in a 40's style swimsuit - I'd like something like a full sailor dress for her - she's a platinum blond.
OR....I have a Revlon Doll - the taller and she has no clothes AT ALL...through time they've disappeared. She's from the 50's I got her brand new. Good luck deciding. Anna (Edmond, OK)
Wendy writes - hi , i like your site. i have made a few dolls and am looking for a life size doll pattern for my 2 year old grandson. cant afford the $10 patterns this year. Wendy
The Hammonds write- There seem to be a lot of site with free patterns for antique dolls weather cloth or porcelain. What I would like to find is one that my 7 year old could sew for her fake barbies 10 1/2 to 12 inches tall. Thanks For taking the time to listen :) The Hammonds
Anonymous posted on my Linda's Blog - what about colonial dress patterns for preteens.
Hi Hello, My name is Esttella age 53 and I love making cloth rag dolls, do you have any patterns for the old fashioned cloth doll? I would love to hear from you. Regards Esttella
Jennie writes - Hi my name is Jennie - looking for free patterns. What about a clown pattern for a doll. It could be a jumpsuit with a ruffle or BIG bow that could be converted to a pair of trousers with an all-in-one top with an elasticated ruffle at the neck (for ease of putting on)- with a waist coat. Big gloves (stuffed with cotton wool and the same for shoes (big ones or eatern ones with turned up toes and a bell/felt ball attached. All of which could be made from odd bits of material (I'm sure I'm not the only one with a scrap rag bag of 'useful' bits that they KNOW will come in handy at some point).
Athlyn writes - You are looking for ideas for free doll patterns and my suggestions would be raggedy anns and angels. Thank you very much. Athlyn
Mel writes - Hi, I am at uni studying home ec teaching and I am making some basic pajamas - like proto-type kind. So I am wondering f u have a large doll size pattern u could email me....the pj's need a collar, shorts, shirts, and needs to button up.... Any ideas? Thanks, Linda
Brenda writes - My idea would be self portrate doll...shoot sorry spelling.... Made with loving hands. Bren
Judy writes - Hi, if you do or have any time of time out or shy baby they have too many names, I would love that. I'm new at dolls so starting big. lol thanks Judy
Lynda writes - You have a lovely website. I would think a lot of people would love free raggedy ann thpe dolls, snuggly, soft baby dolls and soft, snuggle teddy bears.
Lisa Marie writes - What kind of free doll pattern would I like? Well..I like doll patterns that are simple...country/prim style...maybe all one piece? Or simple attachments of arms and legs!! Homespun simple clothing....easy or no faces too!!! I don't like the big ones either..I like..maybe 12-15" ones. Does that help? Hopefully!! Thanks for asking!! Hugs..Lisa Marie
Pat writes - I would love to see some free patterns that I could send to my 86 year old mother who loves to sit and sew by hand. I was hoping to find something for the seasons. Thak you. Pat
Melinda writes - I am teaching my daughter and nieces to sew because their mothers do not know themselves. Could you please design a very simple basic rag doll to make available to youngins. Either that or some cute basic ornies they can have success with! Thanks you. Hugs, Melinda
Shirlee writes - ONES THAT SHOW YOU HOW TO DO FACES...
Bekki writes - hi, I would like a free detailed realistic, but cartoony art doll pattern. thanks, bekki
Gloria writes - Patterns for Barbie and the 13 inch baby doll.
Over the years I knew that I wouldn't be able to fulfill all the free pattern suggestions so I started my The Best Free Craft Articles blog hoping that my readers might find a free suggestions for a craft project they would like over there. I'm happy to say that The Best Free Craft Articles blog is still growing strong with 910 articles to date. Lots of wonderful ideas.
All of the free ideas I've received over the years have been terrific ideas and have given me a lot to think about from a doll pattern designer perspective and from a FUN perspective. I have some time on my hands now and I'm itching to start designing and sewing again. You never know what I'll come up with - hopefully, some more freebies. We'll see.
Please keep those free pattern ideas coming.
Thanks to all who wrote to me over the years.
Graphic Courtesy of Denise Bailey at KKL Primitives - http://www.kklprimitives.com/
Labels:
doll making,
doll pattern designer,
Doll Pattern Ideas,
dolls,
E-Pattern
Thursday, October 13, 2011
My Christmas Delights Pillow Cross Stitch Kit From Pine Mountain Designs
Every so often I see a kit that I think might be cute and easy to make. Something I could quickly make for a Christmas present or "just because" type present. Such was the case with the "Christmas Delights" pillow kit from Pine Mountain designs.
What drew my attention to the pillow kit was the pillow sham was pre-sewn. A definite time saver when you're as busy as I am. So, I bought it and decided to give it a try.
The kit came in a resealable heavier plastic bag and contained the pre-sewn pillow sham, DMC floss, button decorations, tapestry needle, and instructions. The pre-sewn pillow was a combination of rectangular cotton strips surrounding a rectangular burlap piece that would be embroidered upon.
The cross-stitch chart and symbols were in black and white and easy to follow. The instructions, cross-stitch chart, and symbol key were all contained on the front side of a single piece of paper. Definitely an indication that this would be a fairly easy pillow to do.
The instructions called for a 10" x 16" pillow form to be inserted through the opening in the back. I went to a local JoAnn's store to buy my pillow but was unable to find a 10" x 16" pillow form. All they had were 12" x 16" pillow forms. So, I bought the 12" x 16" pillow form and crossed my fingers that it would work.
I had to insert my embroidery hoop back through the back opening of the pillow sham in order to attach my embroidery hoop so I could embroider the burlap section of the front of the pillow. Using the pre-sewn pillow sham saved a lot of time in putting the pillow together, but added a little time to the embroidery process as you had to make sure you didn't catch the thread in the pillow back fabric.
The "Christmas Delights" kit was easy to do and I completed in in 9 1/2 hours. I do think the burlap fabric chosen for this kit could have been of a tighter weave. It was very loose and I still have concerns as to how well this will hold up over time.
When it came to inserting my 12" by 16" pillow form into the back having my fingers crossed didn't help. It was too big and the back opening didn't close as the pillow sham kit had intended. It was bulging at the back opening. As I had already bought the pillow form for this project and the project was already completed I really didn't want to have to hunt for a 10" by 16" pillow form. So, I added a velcro strip that I sewed on to the sides of the back opening and closed my pillow sham. It worked and I have a full plump pillow which over time will deflate a little.
My pillow came out fine despite a few pillow form adjustments as you can see from the picture above and picture below. It will make a darling gift. Hmm.... who should I give it to?
Labels:
Christmas,
craft kits,
crafts,
cross-stitch,
gifts,
handmade,
holidays,
home decor,
Linda's Craft Kits Reviews,
needlecraft,
pillows
Friday, September 30, 2011
Queen Anne House Cross-stitch Kit From Mill Hill Buttons and Beads
When trying to decide on which small cross-stitch kits I wanted to try this year I knew I wanted to cover several holidays and seasons. To cover the Christmas holiday season and the winter season I choose the counted cross-stitch & bead design from Mill Hill - Queen Anne House - Cross Stitch Kit. I, of course, just love Victorian Houses so this was a simple choice for me!
Like the other Mill Hill - Buttons & Beads Series patterns I had bought the Queen Anne House - Cross Stitch Kit included the pattern, embroidery thread, perforated paper, beads, 2 needles and instructions.
The Queen Anne House - Cross Stitch Kit pattern uses full counted cross-stitch and outline stitching as well as beads for emphasis and depth. The pattern also calls for certain areas of the perforated paper to be left untouched as the background.
Given the experience I had with my "Spirit of Quilting Angel Counted Cross Stitch Project" and the fragile nature of perforated paper I decided to add wide masking tape to the back of my perforated paper before I started cross-stitching. I also decided to utilize the rectangular wood frame jig that my darling husband built for me that I could tape the edges of my perforated paper to. The wood frame jig was a rectangular embroidery hoop of sorts, but without bending the paper. He made it out of 1/2" x 1" pine wood strips. It also had an adjustable center strip that I used for this 5 x 5 square design.
I also decided this time that I needed to draw diagonal lines to locate the exact center of the perforated paper as in the Gather Together cross-stitch picture I was slightly off center by a few holes which caused a problem with inserting the needles in the holes along one of the edges of my frame. So, I drew a diagonal line across each corner to get the center point of the perforated paper.
I had also run into a slight problem with the beads along the edge of the Gather Together cross-stitch picture I had done when framing it so this time I also drew squares on the perforated paper to show me where the 5" x 5" square was and where a 4 1/2" x 4 1/2" square would be. The reason for the latter was because one of the frames I was considering for this while 5" x 5" only displayed 4 1/2" x 4 1/2" in the glass window. So, I wanted to make sure that I was okay as far as the design and beads were concerned along the edges were I to use this frame. Ten to one I was going to use the shadowbox frame like I had done for my Gather Together cross-stitch picture so this wouldn't be a problem. But, just in case I didn't I wanted to be prepared.
While the end results of this design were wonderful some things in the kit and in the instructions could be improved upon. I'd like to offer the following constructive suggestions:
The cross-stitch chart was in black and white as was the floss color code and symbol key. Both were easy to read and very clear. While I had no problem with the chart and keys I did have a problem with the way the DMC floss was presented. All of the floss was tied together in one big knot so you had to separate the floss pieces yourself, sort them, and try to interpret which color belonged to which floss # and symbol key on the color chart. If you only have a few colors to deal with this isn't a problem. However, if you have several different colors of say green to choose from that are close in color then interpreting the chart can be tricky. You may assign the wrong color to the wrong symbol if the colors are too closely aligned.
As I have done with other cross-stitch kits I've completed I had to design my own thread color sorter and symbol key. I took a piece of thin cardboard and cut a 1" x 9" long rectangular piece out to use as a thread sorter. I then punched 20 holes in my cardboard strip in which to tie each of the different colors. Just above the hole I wrote the DMC floss # and just below the hole I added the respective cross-stitch symbol. I then inserted the floss threads that went with that # and symbol through the hole and tied them in a loose knot. This kit could be much improved if a thread sorter with respective #'s and symbols was provided.
The beads were contained within two small Ziploc bags which was fine. However, several different color beads were contained within each bag without any indication as to what bead numbers were included within the respective bag. If you only had one color bead to choose from in a bag this wouldn't have been a problem. However if there were multiple green beads within one bag or one bag contained green beads and the other bag contained green beads then you were left to interpret which color green bead the color chart was referring to. Labeling the Ziploc bags as to which bead number they contained would enhance this kit.
I love using beads in cross-stitch designs as I think they really enhance the designs, as was the case with this kit. However, I had a tough time trying to thread the really tiny needle that came in this kit for beading purposes. I know the head of the needle has to fit through the tiny bead openings, but these needles were really, really difficult to thread and trying to do so was not only frustrating, but time consuming.
The pattern called for certain areas of the perforated paper to be left untouched as the background like the picture shown below:

However, I didn't like seeing the different perforated sections in the background and opted instead to finish all of the background with half cross-stitching. My results with the totally finished background are shown below:
In deciding how to finish the background for the sky I at finish finished part of it with a combination of 1 strand of dark blue thread and 1 strand of light gray thread in a half-cross stitch pattern. After finishing both the left and right hand sides behind the trees I decided I didn't like it as the trees no longer stood out. So, I ripped my half cross-stitching out. Luckily with cross-stitch you can correct for errors in judgement. This time I chose a combination of 1 strand of light blue and 1 strand of white in a half cross-stitch pattern and was very pleased with the results.
I also decided that I didn't think the altered design of the house stood out as well from my background as I wanted it to so I added single strands of black thread to many areas of the house to outline it. The outlining worked perfectly and my house definitely stood out from the background now. I was very pleased with the results.
Despite the problems I encountered I was very happy with the way my Queen Anne House - Cross Stitch Kit turned out. There is a lot going on in a very small cross-stitch picture and it is amazing to see.
It took me 35 hours to complete this picture not including the framing. As always, my comments are meant to be constructive to enable future purchasers to benefit from my experience and to enhance their ability to create a wonderful little cross-stitch design.
Tuesday, September 13, 2011
Haunted Hotel Cross Stitch Kit From Mill Hill - Buttons & Beads
When trying to decide on which small cross-stitch kits I wanted to try this year I knew I wanted to cover several holidays and seasons. For one of my favorite holidays - Halloween I choose the counted cross-stitch & bead design from Mill Hill - Haunted Hotel - Cross Stitch Kit.
Like the other Mill Hill - Buttons & Beads Series patterns I had bought the Haunted Hotel - Cross Stitch Kit included the pattern, embroidery thread, perforated paper, beads, 2 needles and instructions.
The Haunted Hotel pattern uses full counted cross-stitch and outline stitching as well as beads for emphasis and depth. The pattern also calls for certain areas of the perforated paper to be left untouched as the background.
Given the experience I had with my "Spirit of Quilting Angel Counted Cross Stitch Project" and the fragile nature of perforated paper I decided to add wide masking tape to the back of my perforated paper before I started cross-stitching. I also decided to utilize the rectangular wood frame jig that my darling husband built for me that I could tape the edges of my perforated paper to. The wood frame jig was a rectangular embroidery hoop of sorts, but without bending the paper. He made it out of 1/2" x 1" pine wood strips. It also had an adjustable center strip that I used for this 5 x 5 square design.
I also decided this time that I needed to draw diagonal lines to locate the exact center of the perforated paper as in the Gather Together cross-stitch picture I was slightly off center by a few holes which caused a problem with inserting the needles in the holes along one of the edges of my frame. So, I drew a diagonal line across each corner to get the center point of the perforated paper.
I had also decided to use a black 8 x 10" shadowbox double white matted frame for this picture as it was black for Halloween. The double white mat had a 5" x 5" back opening with a 4 1/2" x 4 1/2" window. As a result I had to draw squares on the perforated paper to show me where the 5" x 5" square was and where a 4 1/2" x 4 1/2" square would be. I wanted to make sure that I was okay as far as the design and beads were concerned along the edges using this frame and mat. I quickly realized that the cats were right along the 5" x 5" bottom edges so I might have to adjust the design accordingly. As I went along I came to the conclusion that I didn't want to adjust the design and would need to remove one of the double mats in order for my cross-stitch to fit within this frame.
While the end results of this design were wonderful some things in the kit and in the instructions could be improved upon. I'd like to offer the following constructive suggestions:
The cross-stitch chart was in black and white as was the floss color code and symbol key. Both were easy to read and very clear. While I had no problem with the chart and keys I did have a problem with the way the DMC floss was presented. All of the floss was tied together in one big knot so you had to separate the floss pieces yourself, sort them, and try to interpret which color belonged to which floss # and symbol key on the color chart. If you only have a few colors to deal with this isn't a problem. However, if you have several different colors of say green to choose from that are close in color then interpreting the chart can be tricky. You may assign the wrong color to the wrong symbol if the colors are too closely aligned.
As I have done with other cross-stitch kits I've completed I had to design my own thread color sorter and symbol key. I took a piece of thin cardboard and cut a 1" x 9" long rectangular piece out to use as a thread sorter. I then punched 20 holes in my cardboard strip in which to tie each of the different colors. Just above the hole I wrote the DMC floss # and just below the hole I added the respective cross-stitch symbol. I then inserted the floss threads that went with that # and symbol through the hole and tied them in a loose knot. This kit could be much improved if a thread sorter with respective #'s and symbols was provided.
The beads were contained within two small Ziploc bags which was fine. However, several different color beads were contained within each bag without any indication as to what bead numbers were included within the respective bag. If you only had one color bead to choose from in a bag this wouldn't have been a problem. However if there were multiple green beads within one bag or one bag contained green beads and the other bag contained green beads then you were left to interpret which color green bead the color chart was referring to. Labeling the Ziploc bags as to which bead number they contained would enhance this kit.
I love using beads in cross-stitch designs as I think they really enhance the designs, as was the case with this kit. However, I had a tough time trying to thread the really tiny needle that came in this kit for beading purposes. I know the head of the needle has to fit through the tiny bead openings, but these needles were really, really difficult to thread and trying to do so was not only frustrating, but time consuming.
The pattern called for certain areas of the perforated paper to be left untouched as the background like the picture shown below:

However, I didn't like seeing the different perforated sections in the background and opted instead to finish all of the background with half cross-stitching. My results with the totally finished background are shown below:
Despite the problems I encountered I was really pleased with the way my Haunted Hotel - Cross Stitch Kit turned out. There is a lot going on in a very small cross-stitch picture and it is amazing to see.
As mentioned above, I knew that I was going to have to remove one of the double mats in order for my 5" x 5" picture to fit as I didn't want to lose 1/4" around all four sides in order to use the double mat with the 4 1/2" x 4 1/2" window.
In looking at the picture within the frame both my husband and I thought some stenciled wording and images along the sides of the white mat would be nice. After choosing the wording and images I went to apply the wording to the bottom of the white mat and ran into a problem with the rub on stencil. The wording wasn't rubbing off correcting and when I tried to take the stenciling off it torn the mat. YIKES!! I'd just ruined my mat and didn't have another.
Hubby suggested that maybe some type of a thin wooden plaque with a bronze plate of sorts might cover up the mishap. Problem was I didn't have one and I really wanted to finish this project and move on to the next one. You know how that is!
Then he mentioned decorative paper and, well, a light bulb went off in my head. I had loads of decorative paper that I was using to finish the backs of all my wooden shadowboxes. And, I had scissors for cutting decorative edges. Voila! Problem solved.
I cut a small rectangular piece of thick black paper with my decorative edge scissors and glued a smaller rectangular strip of thick orange paper that I cut with a different pair of decorative edge scissors on top for a 2nd layer. Then I painstakingly added "Trick or Treat" glitter stencils. I had measured the black rectangular piece of paper ahead of time so I knew when I glued it over my mishap that it would cover it. And, it did! Very well, indeed!
It took me 35 hours to complete this picture not including the framing or the time spend with the mishap. As always, my comments are meant to be constructive to enable future purchasers to benefit from my experience and to enhance their ability to create a wonderful little cross-stitch design.
After my mishap I thought I had ruined my cross-stitch. Now, however, I think the mishap might have been for a reason as the "Trick or Treat" paper sign is additive. It's delightfully "spooky" and adds to the ambiance of the little picture. Wouldn't you agree?
Monday, September 12, 2011
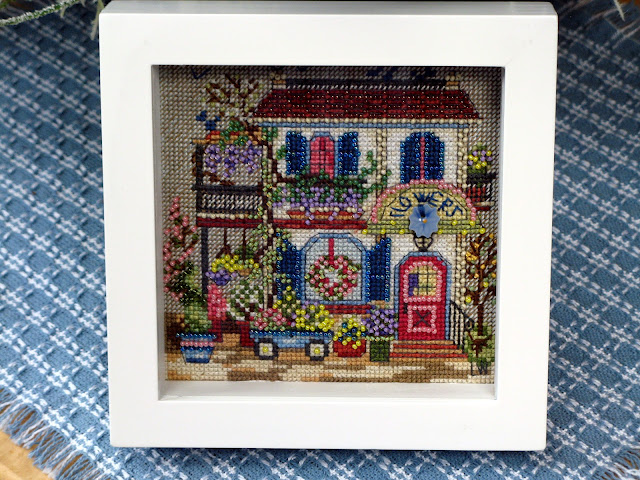
Flower Shoppe Cross Stitch Kit from Mill Hill - Buttons & Beads
When trying to decide on which small cross-stitch kits I wanted to try this year I knew I wanted to cover several holidays and seasons. For the Spring season the counted cross-stitch & bead design from Mill Hill - Flower Shoppe (beaded kit) seemed to fit the bill.
Like the other Mill Hill - Buttons & Beads Series patterns I had bought the Flower Shoppe included the pattern, embroidery thread, perforated paper, beads, 2 needles and instructions.
The Flower Shoppe pattern uses full counted cross-stitch and outline stitching as well as beads for emphasis and depth. The pattern also calls for certain areas of the perforated paper to be left untouched as the background.
Given the experience I had with my "Spirit of Quilting Angel Counted Cross Stitch Project" and the fragile nature of perforated paper I decided to add wide masking tape to the back of my perforated paper before I started cross-stitching. I also decided to utilize the rectangular wood frame jig that my darling husband built for me that I could tape the edges of my perforated paper to. The jig was a rectangular embroidery hoop of sorts, but without bending the paper. He made it out of 1/2" x 1" pine wood strips. It also had an adjustable center strip that I used for this 5 x 5 square design.
I also decided this time that I needed to draw diagonal lines to locate the exact center of the perforated paper as the last time with my Gather Together cross-stitch picture I was slightly off center by a few holes. So, I drew a diagonal line across each corner to get the center point of the perforated paper.
I had also run into a slight problem with the beads along the edge of the Gather Together cross-stitch picture I had done when framing it so this time I drew squares on the perforated paper to show me where the 5" x 5" square was and where a 4 1/2" x 4 1/2" square would be. The reason for the latter was because one of the frames I was considering for this while 5" x 5" only displayed 4 1/2" x 4 1/2" in the glass window. So, I wanted to make sure that I was okay as far as the design and beads were concerned along the edges were I to use this frame. Ten to one I was going to use the shadowbox frame like I had done for my Gather Together cross-stitch picture so this wouldn't be a problem. But, just in case I didn't I wanted to be prepared.
While the end results of this design were wonderful some things in the kit and in the instructions could be improved upon. I'd like to offer the following constructive suggestions:
The cross-stitch chart was in black and white as was the floss color code and symbol key. Both were easy to read and very clear. While I had no problem with the chart and keys I did have a problem with the way the DMC floss was presented. All of the floss was tied together in one big knot so you had to separate the floss pieces yourself, sort them, and try to interpret which color belonged to which floss # and symbol key on the color chart. If you only have a few colors to deal with this isn't a problem. However, if you have several different colors of say green to choose from that are close in color then interpreting the chart can be tricky. You may assign the wrong color to the wrong symbol if the colors are too closely aligned.
As I have done with other cross-stitch kits I've completed I had to design my own thread color sorter and symbol key. I took a piece of thin cardboard and cut a 1" x 9" long rectangular piece out to use as a thread sorter. I then punched 20 holes in my cardboard strip in which to tie each of the different colors. Just above the hole I wrote the DMC floss # and just below the hole I added the respective cross-stitch symbol. I then inserted the floss threads that went with that # and symbol through the hole and tied them in a loose knot. This kit could be much improved if a thread sorter with respective #'s and symbols was provided.
The beads were contained within two small Ziploc bags which was fine. However, several different color beads were contained within each bag without any indication as to what bead numbers were included within the respective bag. If you only had one color bead to choose from in a bag this wouldn't have been a problem. However if there were multiple green beads within one bag or one bag contained green beads and the other bag contained green beads then you were left to interpret which color green bead the color chart was referring to. Labeling the Ziploc bags as to which bead number they contained would enhance this kit.
I love using beads in cross-stitch designs as I think they really enhance the designs, as was the case with this kit. However, I had a tough time trying to thread the really tiny needle that came in this kit for beading purposes. I know the head of the needle has to fit through the tiny bead openings, but these needles were really, really difficult to thread and trying to do so was not only frustrating, but time consuming.
The pattern called for certain areas of the perforated paper to be left untouched as the background like the picture shown below:

However, I didn't like seeing the different perforated sections in the background and opted instead to finish all of the background with half cross-stitching. My results with the totally finished background are shown below:
Despite the problems I encountered I was really pleased with the way my Flower Shoppe (beaded kit) turned out. There is a lot going on in a very small cross-stitch picture and it is amazing to see.
I had decided that instead of using a picture frame to finish my cross-stitch I was going to use a 5 x 5 stained shadow box which is shown in the picture below. I think the shadowbox depth really adds dimension to the cross-stitch picture.
It took me 31 1/2 hours to complete this picture not including the framing. As always, my comments are meant to be constructive to enable future purchasers to benefit from my experience and to enhance their ability to create a wonderful little cross-stitch design.
I just LOVE how this cross-stitch picture came out. It's so cheery and delightful to look at. A definite "plus" for the Spring time. Too bad it's not right around the corner. It would be wonderful looking at this cheery little scene every day.
Sunday, September 11, 2011
Gather Together Cross Stitch Kit From Mill Hill - Button & Beads
One of the cross-stitch kits I decided to try this Fall was a counted cross-stitch & bead design from Mill Hill - Gather Together - Cross Stitch Kit.
The Gather Together - Cross Stitch Kit included the pattern, embroidery thread, perforated paper, beads, 2 needles and instructions.
The Gather Together - Cross Stitch Kit pattern uses full counted cross-stitch and outline stitching as well as beads for emphasis and depth. The pattern also calls for certain areas of the perforated paper to be left untouched as the background.
Given the experience I had with my "Spirit of Quilting Angel Counted Cross Stitch Project" and the fragile nature of perforated paper I decided to add wide masking tape to the back of my perforated paper before I started cross-stitching. I also decided to utilize the rectangular wood frame jig that my darling husband built for me that I could tape the edges of my perforated paper to. The jig was a rectangular embroidery hoop of sorts, but without bending the paper. He made it out of 1/2" x 1" pine wood strips. It also had an adjustable center strip that I used for this 5 x 5 square design.
While the end results of this design were wonderful some things in the kit and in the instructions could be improved upon. I'd like to offer the following constructive suggestions:
The cross-stitch chart was in black and white as was the floss color code and symbol key. Both were easy to read and very clear. While I had no problem with the chart and keys I did have a problem with the way the DMC floss was presented. All of the floss was tied together in one big knot so you had to separate the floss pieces yourself, sort them, and try to interpret which color belonged to which floss # and symbol key on the color chart. If you only have a few colors to deal with this isn't a problem. However, if you have several different colors of say green to choose from that are close in color then interpreting the chart can be tricky. You may assign the wrong color to the wrong symbol if the colors are too closely aligned.
As I have done with other cross-stitch kits I've completed I had to design my own thread color sorter and symbol key. I took a piece of thin cardboard and cut a 1" x 9" long rectangular piece out to use as a thread sorter. I then punched 20 holes in my cardboard strip in which to tie each of the different colors. Just above the hole I wrote the DMC floss # and just below the hole I added the respective cross-stitch symbol. I then inserted the floss threads that went with that # and symbol through the hole and tied them in a loose knot. This kit could be much improved if a thread sorter with respective #'s and symbols was provided.
The beads were contained within two small Ziploc bags which was fine. However, several different color beads were contained within each bag without any indication as to what bead numbers were included within the respective bag. If you only had one color bead to choose from in a bag this wouldn't have been a problem. However if there were multiple green beads within one bag or one bag contained green beads and the other bag contained green beads then you were left to interpret which color green bead the color chart was referring to. Labeling the Ziploc bags as to which bead number they contained would enhance this kit.
I love using beads in cross-stitch designs as I think they really enhance the designs, as was the case with this kit. However, I had a tough time trying to thread the really tiny needle that came in this kit for beading purposes. I know the head of the needle has to fit through the tiny bead openings, but these needles were really, really difficult to thread and trying to do so was not only frustrating, but time consuming.
The pattern called for certain areas of the perforated paper to be left untouched as the background like the picture shown below:

However, I didn't like seeing the different perforated sections in the background and opted instead to finish all of the background with half cross-stitching. My results with the totally finished background are shown below:
Despite the problems I encountered I was really pleased with the way my Gather Together - Cross Stitch Kit turned out. There is a lot going on in a very small cross-stitch picture and it is amazing to see.
I had decided that instead of using a picture frame to finish my cross-stitch I was going to use a 5 x 5 stained shadow box which is shown in the picture below. I think the shadowbox depth really adds dimension to the cross-stitch picture.
I did have a few issues of my own that I ran into. I was slightly off in my count to find the center of the diagram and, as a result, I was two rows closer to the right side edge of the frame I was using which made it difficult to push the needle through the holes along that edge. I should have drawn diagonal lines to locate the exact center of the perforated paper.
I had also run into a slight problem with the beads along the edge of the my finished cross-stitch picture. I wasn't exactly sure which picture frame I was going to use for this cross-stitch picture when I began this project. I had two in mind - a 5 x5 picture frame and 5 x 5 shadowbox. Well, the beading along the edge of this picture resolved that issue as I couldn't use the 5" x 5" picture frame as it only displayed 4 1/2" x 4 1/2" in the glass window and the beads were an issue. So, I used the shadowbox which showed 5" x 5" in the window and added a second row of beads along all four sides to totally square my picture.
It took me 32 hours to complete this picture not including the framing. As always, my comments are meant to be constructive to enable future purchasers to benefit from my experience and to enhance their ability to create a wonderful little cross-stitch design.
I LOVE how this Gather Together - Cross Stitch Kit picture came out and am astonished each time I look at it as to how much is contained within this tiny little picture. It's simply amazing.
Friday, September 09, 2011
My Spirit of Quilting Angel Counted Cross Stitch Project
In pondering what kind of cross-stitch kits I wanted to try this year I decided to focus on smaller projects of a less mammoth nature. If you've been following my Linda's Blog and Book & Crafts Review Corner blog you know that I completed two massive counted cross-stitch pictures in the past year.
The first I posted about last December in a post on my Linda's Blog entitled "You Spent How Many Hours On That Cross-Stitch?"
The 2nd one I wrote about last June in a Linda's Blog post entitled "315 Hours On Another Cross-Stitch Picture - WOW!"
Both of the above took hundreds of hours to complete and I didn't want to spend as much time on my cross-stitch kits this year. So, I looked for projects that were smaller in nature and which could fit in a small shadow box or picture frame. I didn't really want anything bigger than an 8 x 10 size picture.
As usual, I found several kits I liked. So, I bought a few. Actually, given my nature I bought quite a few. You know me - I can never do anything in moderation.
This time I bought a few counted cross-stitch kits and patterns that utilized perforated paper. I had never used perforated paper before and was curious as to how well it would stand up with detailed cross-stitching. I soon found out.
The 1st counted cross-stitch pattern that I tried was a Spirit of Quilting Angel Ornament from Brooke's Books Publishing. It was an angel counted cross-stitch ornament design by Brooke Nolan. She had many to choose from and I picked 3 that I liked: Spirit of Quilting Angel Ornament, Spirit Of Christmas Stitching Ornament, and Spirit Of Holiday Baking Ornament.
The pattern called for DMC floss, brown and gold 9x12 14 count perforated paper, and beads. I utilized some of the DMC floss I already had and substituted for some of the colors in the pattern and utilized some of the beads I already had. Since I was buying 9x12 perforated paper sheets I decided to just buy Perforated paper - Antique Brown
The pattern also suggested that if desired you could finish the back of the ornament pieces with acid free decorative paper. I opted not to go with that as well as I was going to put my angel in a shadow box.
The pattern came with two cross-stitch charts. The chart for the brown perforated paper contained the angel, sewing basket, and scissors. The chart for the gold perforated paper contained the wings, pincushion, and kitten. In this pattern the kitten was supposed to sit at the lower left hand corner of the angel and the sewing basket, scissors, and pincushion would be suspended from DMC floss hanging between the angels two hands.
In purchasing the perforated paper I hadn't really given any thought as to how I was going to actually work on this project. I quickly realized it wasn't something you could put into an embroidery hoop or square frame. The paper was stiff but, in my opinion, not stiff enough to be working on and holding at the same time.
Well, my darling husband, came up with a wonderful solution and built me a rectangular wood frame jig that I could tape the edges of my perforated paper to. It was a rectangular embroidery hoop of sorts, but without bending the paper. He made it out of 1/2" x 1" pine wood strips. It also has an adjustable center strip that I could use for the smaller counted cross-strip projects I would be doing using perforated paper.
The charts in the pattern were printed in black and white on shiny gloss paper. I had no problem reading and following the different black and white symbols but found the glossy paper a bit annoying as my needlework lamp would reflect off the paper.
At first the perforated paper seemed like it could handle the cross-stitch but I quickly learned that it can tear so you have to be careful with it. Especially when threading the ends of the thread or in the size of the needle you are using. Unfortunately, I learned the hard way as a section of my angel ripped. I repaired it with masking tape on the back side and decided to cover the ripped area with the kitten cross-stitch when it was complete.
The original pattern looked like the following:

My completed angel came out as follows:
It took me 37 hours (excluding the framing) to complete the angel, sewing basket, kitten, scissors, and pincushion. That was a far cry from 250+ hours and 315+ hours of my previous two massive cross-stitch projects.
While this project was easier and took less time dealing with the perforated paper was a little tricky. After my section ripped I decided to add wide masking tape to the entire back of the angel and other items to secure the threads and strengthen the perforated paper. In fact, for my future perforated paper counted cross-stitch projects I decided to add wide masking tape to the back of the perforated paper before starting the projects. For my future projects this would prove to be a lesson well learned.
I had decided early on that I wanted to mount my angel inside a wood stained glass covered and hinged shadowbox so she looked like she was suspended and flying. As a result there was no need to finish the back with decorative paper. After adding the masking tape to the back of the angel and other pieces I cut the angel and other pieces out and then glued the back of the angel to a foam board. I then glued the back of the foam board to the fabric back of the shadowbox so my angel was suspended about 3/4" from the back of the shadowbox. My finished piece came out as follows and she is leaning against the fireplace mantle in my dining room as pictured below and in the picture at the beginning of this article.
I was pleased with the way my angel came out and pleased with having learned a few things along the way with regards to dealing with perforated paper. It seems like it's very versatile for so many different types of projects but needs to be handled delicately if utilized for some very detailed counted cross-stitch works.
Thursday, September 08, 2011
For The LOVE of Counted Cross-Stitch!
I know that I've told you many, many times that I LOVE cross-stitch. Maybe I should say I've told you many, many, many, many times. Let's face it - I've told you so many times it might as well be ad infinitum.
I've also told you that I've been working on a MASSIVE project to revise all of my patterns to replace my hand drawn diagrams and pattern piece pages with computer assisted diagrams and pattern piece pages. Like cross -stitch that work is quite tedious and after nine months of working on it I can actually see light at the end of the tunnel. I will be done with all my patterns this Fall and I couldn't be happier.
In order to relax during the last nine months of tedious computer work I've been doing some counted cross-stitching. Counted cross-stitching can be quite tedious, but isn't quite the same as the stress and strain you can get from working on the computer with drawing computer assisted diagrams. At least I don't think it is.
In any event if you've been following my "The Book Review Corner Blog" you know that I've been reviewing all the cross-stitch kits I have completed and have written quite a few posts on the craft kits that I've bought over the years. If you'd like to read any of them just click on the cross-stitch review below that interests you.
In any event, during the last nine months I've managed to complete several cross-stitch kits. The largest one was a Victorian Lady that I wrote about in June in a post on my Linda's Blog entitled "315 Hours On Another Cross-Stitch Picture - WOW!" and in a post on my The Book Review Corner Blog in a post entitled "Linda's Review of In Her Garden - Dimensions Gold Collection Cross-Stitch Kit."
During this period I've also managed to complete six smaller cross-stitch kits and I'm happy to show you how they turned out and review them for you in several posts to follow.
I hope you enjoy seeing how my counted cross-stitch kits turned out and reading my reviews.
Have I mentioned I just LOVE counted cross-stitching?
I didn't think so!!!!
Wednesday, September 07, 2011
Oh, Joyous FALL!
Pumpkin Patch Penny Rug From Lakeview Primitives
I just LOVE this penny rug from Lakeview Primitives and love bringing it out each year when I'm decorating for the Fall. It's just so cheery. Wouldn't you agree?
Labels:
decorations,
Fall,
home decor,
seasonal
Monday, September 05, 2011
Shadows On The Wall
As we were unloading the groceries from the car I noticed a strange shadow moving across the dining room wall.Hmmm.....
Should I be afraid?
Was it a burglar?
Were we being robbed?
In the middle of the day?
So, of course, I asked hubby to check it out.
Well, he came back and reported that he hadn't seen anything.
I, of course, thought that was strange.
I knew I had seen a shadow moving across the wall.And, then, there it was AGAIN!
Slowly moving across the dining room wall.
What the.........???
There was something there.
Just look at those shadows.
Claw like, bat like.... MONSTER LIKE! And, getting bigger!
Definitely kind of eerie if not downright FRIGHTENING!
So, of course, I ran behind hubby and said, "There is something there. Go look!"As to be expected he came back and said, "There's NOTHING there!"
Now I know I'm not bats, even if the shadows look like bats or claws or even MONSTERS!
I knew I wasn't losing my mind!
So, I begged hubby to take a look AGAIN.
And, then something very, very strange happened.
Hubby, started humming .....ta da da dum, .....ta da da dum
and, started tip toeing into the dining room in a very CREEPY manner.
If I was losing my mind seeing shadows on the wall, well - he had definitely lost his......ta da da dum,.....ta da da dum
Then I heard it.
I had to get closer.
So, I started towards the dining room.
Then, all of a sudden I found myself tip toeing into the dining room, too.
.....ta da da dum, .....ta da da dum
It was greenish...... ICK!!!!
Yet, it was a familiar shape.
I knew I had seen it before.
It was dark in the dining room so the images were kind of blurry at first, but I knew I had seen them before.
Then it hit me .....ta da da dum, .....ta da da dum
.....ta da da dum, .....ta da da dum
I should have know it. This was September 1st after all and the start of the "dollies" favorite season - Fall, Halloween, and Thanksgiving.
When the room brightened enough so that I could see I was surrounded by witches, scarecrows, ghosts, goblins, Frankenstein's and mummies all CREEPING and tip toeing around.
Everywhere I looked there was a "dollie."
They were having a really, really good time. Singing.........
.....ta da da dum, .....ta da da dum
They're creepy and they're kooky, Mysterious and spooky,
They're all together ooky, The DOLLIE Family.
Their house is a museum Where people come to see 'em
(Neat)
(Sweet)
(Petite)
They really are a scream--The DOLLIE Family.
So get a witches shawl on
A broomstick you can crawl on
We're gonna pay a call on The DOLLIE Family.
.....ta da da dum, .....ta da da dum
Tuesday, August 16, 2011
Brothers & Sisters - Over 50 Years Ago

Oh, How Cute!
We are very fortunate in our family in that we are still a close knit family. As a result there is always a lot of bantering going on between the brothers and sisters. Well, during one such occasion of email bantering between myself and my "Irish twin" older brother I embedded the above picture into the email I was sending him.
The original picture was one of those little black & white Polaroid shots that were the only pictures available to us back then. The images are small and you really can't see a lot of the details.
However, nowadays with the ability to scan these old images and blow them up on the computer you get to see things you hadn't noticed before - like expressions, things being held, large heads, etc. On the picture above I immediately noticed how large my brother's head was and, of course, I had to tease him about it.
Well, in looking at a few other pictures from over 50 years ago I noticed a few other things in my expression. Here's what I saw:

I Don't Know What You Did To Piss Me Off, But You Did Something!

It's Mine - Give It To Me!

He's My Best Friend!

Okay, Enough With The Pictures!
My grandparents were always taking pictures of the two of us. If you look at my expression you can see that I've just about had enough of the picture taking that day.

You'd Never Know We Weren't Twins From This Shot!

Give That To Me!
I don't know what was grabbing my attention, but whatever it was - I wanted it!

Come On! It's Not That Funny!

A Mouthful of Something!
I don't know what we have in our hands, but our cheeks certainly are full. Maybe this was after we had the mumps?

Yeah, Yeah, Yeah! Enough With The Picture Taking - Let's Play!!

Just Let It All Hang Out!
When I blew this picture up I thought, "It's a good thing I had underwear on. How unlady like!" And, I noticed my mother's expression. She wasn't too happy. Perhaps, she, too, had enough of the picture taking that day.

She Might Be Happy, But I Don't Want a Baby Brother!
I guess my mother was happy that day, but my sister surely wasn't!

What Happened To My Sister's Bangs? Did She Try To Give Herself A Haircut?

Nope! She's Not Happy To Be Marching In That Parade! Love The White Gloves!

Look At The Toys! A Horse, A Truck, and Probably THE ROBOT Of The Season! Those Were The Days!
One of these days I hope to have enough time to scan it all the old family pictures. Some of the family photo's are even as far back as the civil war and are on tin. Those are really tiny. I can hardly wait to see what the expressions are on them. 
Look At The Toys! A Horse, A Truck, and Probably THE ROBOT Of The Season! Those Were The Days!
Unfortunately we don't have a lot of the print pictures. Some were lost over the years.
When video camera's first came out in the 50's my Dad rushed to get one. He spent hours just taking pictures of my brother and I running up and down the dunes at the beach or diving off the rocks. When we played them he just loved putting the movie projector into reverse to see us run backwards up the dunes or dive backwards onto the rocks. He and we would laugh and laugh every time. Nowadays with all the special effects going backwards is nothing. Back then, however, it was the latest in technology. Times change. So do the images and the equipment. Unfortunately, the video eroded over time. Video hasn't stood the test of time in the same way that old print pictures have.
I hope you enjoyed the black and white (and some color) pictures of my brothers and sister from over 50 years ago. I know that I did. Hope my siblings did!
Labels:
family
Subscribe to:
Posts (Atom)