Before my sister's visit for our needle felting craft adventure I had decided to buy some of the Clover needle felting applique molds I had previously seen. One of the molds I had bought was the Clover Applique Mold, Rose Design.
While my sister was working on her free style needle felted landscape design I decided to try creating a pink rose using the rose mold.
The mold contained two large front and back sheets with instructions. The two sheets looked a little cumbersome at first until I realized there were different languages on each sheet. So, I had to find the English section. While I can understand the cost effectiveness of doing this it's not the most user friendly approach and makes the instructions seem way too complicated.
One of the large sheets also contained basic punching text and pictorial information for the various sizes and pieces of their molds and how to use them with the roving which I found to be very helpful.
The instructions for using the particular mold were of a text and pictorial nature and once I found the English version they were easy to follow. They recommended in the instructions using their molds with the Clover Pen Style Needle Felting Tool and either the Clover Felting Needle Mat Small or the Clover Felting Needle Mat Large.
I soon realized that some of the pieces of the the molds were pretty tiny so only the single felting needle or Clover Pen Style Needle Felting Tool
I had no problem putting the pink rose together except I quickly found out that the needles for the Clover Pen Style Needle Felting Tool

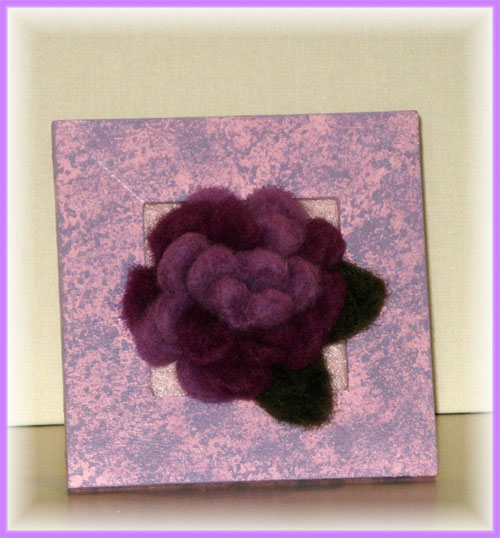
I was pleased with the way my pink rose came out but my sister thought it was boring (plus I had used up all the pink roving - bad sister!) so I decided to try a multi-colored purple rose next.
I had bought two 5" by 5" unfinished picture frames each with a 2 3/4" by 2 3/4" opening. The opening was just slightly smaller than my roses but I had decided that gluing them there and having them projecting out of the frame would be interesting.
So, I painted both unfinished wood frames first with pink acrylic paint and then sponge painted them with lilac acrylic paint using natural ocean sponges. Then I applied one coat of varnish.
I added felt backing and a small amount of batting to the 2 3/4" by 2 3/4" picture opening as backing for my roses and then hot glued them to the felt.
I like how they both roses turned out and will probably create some more of the roses as the mold is really easy to use, despite the 2 page instructions. You could make a rose to use as a corsage, to embellish a purse or vest, to decorate a large picture, to make long stemmed needle felted roses for a floral bouquet arrangement, decorate a hat, etc. I'm sure if you give me long enough I'll have a hundred other uses for a needle felted rose.
If you get a chance please check out my sister's Rock Garden Alpacas Etsy Shop where she sells her alpaca fiber and handmade alpaca fiber products.
Copyright © 2004 - 2023 - All Rights Reserved - Written By Linda Walsh. Linda is a doll maker and doll pattern designer.


No comments:
Post a Comment