

How To Make A Beautiful Fall Silk Floral Cornucopia


20” Dark Purple Cornucopia
Green Floral Foam Bricks - 2
13” Multi-Colored Fall Silk Floral Stem Bunch - 2 Bunches Each With 10 Small 3-Cluster Flower Stems
8” Fall Silk Floral Leaves - 6 Each With 3 Leaves Per Stem
Knife (For Cutting Floral Foam Brick)
Wire Cutters
Green Excelsior Basil - 1 Bag
18” Brown Eucalyptus Silk Floral Stem Bunch - 1 Bunch
18” Brown Bead Fall Silk Floral Stem - 1 Bunch
16” Burgundy Mum Floral Stem Bunch With 14 Medium Size Mums - 1 Bunch
Instructions:
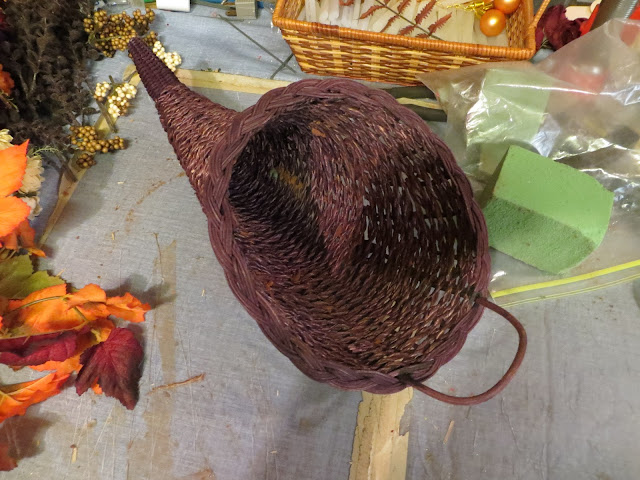

1) Line the insides of the purple cornucopia with green excelsior basil.
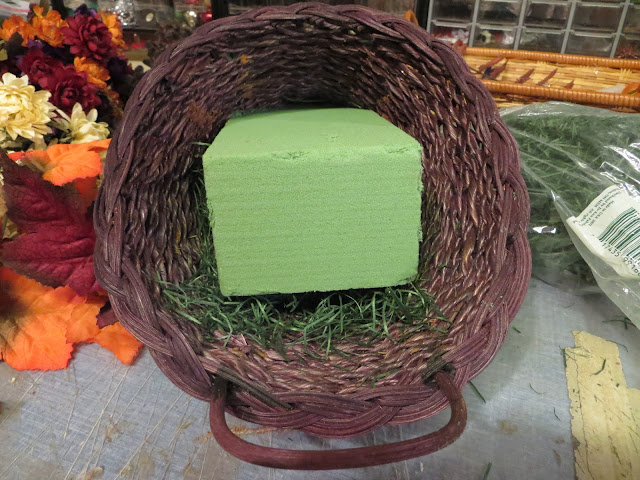
2) Shape one of the green floral foam bricks to fit the inside of the cornucopia and insert it into the cornucopia so that it is even with the top edge rim of the cornucopia but about 2” away from the bottom edge rim. Make sure the green excelsior basil surrounds the brick.

3) Cut several pieces of the other green floral foam brick to fit around the 1st floral brick and insert the pieces around the 1st brick until it is tight making sure your green excelsior basil is still lining the sides and inside of the cornucopia. Make sure the floral brick does not extend past the top rim edge and within the 2” on the bottom rim edge.


4) Cover the green floral foam brick with more green excelsior basil inserting it along the sides, top, and bottom of the cornucopia. Make sure you can’t see any of the green floral foam through the outsides of the cornucopia.

5) Insert the 8” silk floral leaves along the inside rim edge of the cornucopia until the leaves are touching the outside rim edge.

6) Cut the brown eucalyptus into several 6” long sections and insert them next to the 8” silk floral leaves around the inside rim edge. You want the 6” long pieces to extend outwards towards the sides of the cornucopia.

7) Cut 3 pieces of the 18” brown bead silk florals at the junction of their stem and insert them inside the cornucopia where shown in the picture above. If the length of the floral stems are too long trim them accordingly with wire cutters.

8) Cut the 14 burgundy mum stems at the junction of their stem. Insert the 14 burgundy mum stems as shown in the picture above so they are evenly positioned throughout the cornucopia and are pleasing to the eye. If the length of the floral stems are too long trim them accordingly with wire cutters.

9) Cut all of the 13” multi-colored fall silk floral cluster stems at the junction of their stem. Insert as many of the floral stems as you need to fill up the space in between the burgundy mums until the cornucopia is densely filled. Small purple, orange and burgundy clusters were used in the picture above. If the length of the floral stems are too long trim them accordingly with wire cutters.


10) Your cornucopia should look as pictured above and as shown below

I thought you might enjoy a step-by-step tutorial of how I made the purple cornucopia silk floral shown in the picture at the top of this post so I also created a free e-book for you.

To view and download my free e-book please CLICK HERE. You'll be brought to Google Drive where you can view my free e-book. Then just download my free .pdf e-book by clicking on the down arrow in the top center.
For more information on all my free e-patterns, e-printables and e-books please CLICK HERE.
Please respect My Terms of Use: All patterns, e-patterns, printables, e-printables, e-books, graphics, tutorials, how-to's, articles and other e-products © 2004-2023 Linda Walsh Originals-Designs by Linda Walsh. All rights reserved. Commercial selling or reselling by any means prohibited without the written consent of Linda Walsh.
Patterns, e-patterns, printables, e-printables, e-books, graphics, tutorials, how-to's, articles and other e-products are for personal use only. You may not modify, photocopy, download, upload, post, transmit, display, perform, publish, license, reprint, create derivative works from, mass duplicate, re-sell, digitize, and reproduce in any other form (print, digital or electric) or commercially apply, embed, share, Email, or redistribution in any other means. Use of any of the above is prohibited without the written permission of Linda Walsh.
Patterns, e-patterns, printables, e-printables, e-books, graphics, tutorials, how-to's, articles and other e-products are for personal use only. You may not modify, photocopy, download, upload, post, transmit, display, perform, publish, license, reprint, create derivative works from, mass duplicate, re-sell, digitize, and reproduce in any other form (print, digital or electric) or commercially apply, embed, share, Email, or redistribution in any other means. Use of any of the above is prohibited without the written permission of Linda Walsh.
However, you may link to my website(s)/blog(s) and the individual page(s)/blog post(s) (including 1 picture) but do not copy, reprint or duplicate my website(s)/blog(s) or individual page(s)/post(s ) without my permission.
Items made from Linda Walsh Originals E-Patterns are intended for personal use for fun or small scale personal and business profit as long as you credit us with the design. Large scale commercial use (i.e. mass production) of items made from Linda Walsh Originals E-Patterns are by permission only.
Please see my Terms and Conditions for additional information.
Copyright © 2004 - 2023 - All Rights Reserved - Written By Linda Walsh of Linda Walsh Originals and Linda's Blog. Linda is a doll maker and doll pattern designer.
No comments:
Post a Comment