Linda Walsh Originals Blog Pages

Monday, November 28, 2011

20 Years Later and Still As Good As New!


While everyone was out fighting the Black Friday crowds I was in crafting heaven - pleasantly sprucing up the artificial Christmas wreath decorations for the front of our house.

And, I have to say, I was actually reveling in the fact that after 20 years my artificial wreaths are still as good as new. I thought to myself, "Now that's a GOOD BUY."

I dare say most of the items purchased on Black Friday would not be as good as new 20 years from now.

The first few years that we lived in our house hubby and I would go out on Black Friday and buy fresh evergreen wreaths and fresh evergreen garland to decorate the front of our house for the holidays. The fresh greens always smelled great and looked beautiful but, they weren't cheap. I was always amazed at how expensive fresh greens were.

When we first started decorating the outside of the house we decided to not only decorate the house, but to decorate the three blue spruce trees that we have at the front of our house. Back then the blue spruce trees were small enough so we could decorate them. We used three blue flood lights and shone them up through the blue spruce creating a wonderful snowy effect.

We put small electric candles in the windows, hung fresh garland around our front door and lamp post, and hung four fresh evergreen wreaths with red bows on the front of the house.

We also added two large grapevine deer that my brother and I had found on a shopping trip to Sturbridge one year to the front yard. We quickly learned that we should stake them into the ground so the wind wouldn't blow them over.

White flood lights were used to light up the front of the house and when everything was on the house just looked so festive. We both loved it, but it was a lot of work to get it looking the way it did.

While we loved the fresh evergreen wreathes we both thought that the wreaths could be a little bigger as they really couldn't be seen from the street. However, we both knew that the cost of buying fresh evergreen wreaths the size we needed was just too expensive.

So, one year we decided to buy four very large artificial wreaths and decorate them with pine-cones, red tie berries, and small multi-colored glass bulbs. So, off to Michaels I went to buy the largest artificial evergreen wreaths I could find. Fortunately they had four 3-feet to 4-foot wreaths that I knew would be perfect. I bought four of the large wreaths and bought four smaller artificial wreaths that I had in mind to use elsewhere.

I also bought red tie berries, some multi-colored glass bulbs, wide red with gold trim wired velvet ribbon, and some other silk floral greenery I thought might be nice. I had in mind to create a pine-cone cluster on each side of the wreath but didn't need to buy any pine-cones as I had plenty of my own that I had collected myself and dried. I had already spray painted some of the pine-cones silver, some gold, and some with clear acrylic to preserve them.

When I brought the wreaths home I decided to decorate them right away. I made four large bows with multiple loops out of the red and gold trimmed wide wired ribbon and fastened one to the top center of each wreath. I added pine-cone clusters to the sides and bottom of each wreath and adorned these with the red tie berries. The small multi-colored glass bulbs were added throughout the wreath for decorative affect. The wreaths looked wonderful and I loved them and thought they would be a really good addition to our Christmas decorations.

We put these wreaths out for many, many years along with the blue flood lights, window candles, white flood lights and grapevine deer. It was always a LOT of work, but the end result was always so pretty to look at.

While the wreaths themselves looked beautiful every year and could definitely be seen from the street we both thought that, despite the flood lights, the decorations on them could only be appreciated when viewed up close. However, we weren't about to make a change so they would just have to do.

As the years went on the outdoor Christmas decorations started to change. We stopped lighting up the blue spruce trees as they just got too big. Eventually we stopped using flood lights to light up the house as it was just too much work. One year we stopped using the candles in the windows. And, several years ago my sister took the grapevine deer to her house as we weren't using them anymore and she thought they'd look great on her farm.

When we put the artificial wreaths away last year we realized that the years of being outside had finally taken their toll on the red berries and small multi-colored glass bulbs. Many of the red tie berries had corroded and many of the glass bulbs had broken. The pine-cones I had collected from the yard looked as good as new as did the artificial wreaths.


We decided that we would need to spruce them up before we could put them out next year. So, this year, we purchased several boxes of large multi-colored plastic bulbs that were 3" - 4" around, and some beaded swirly silver and red accents for the sides of each wreath. I thought they would add some wonderful color to the pine-cone clusters that were still on the wreath. We wanted large bulbs as we definitely wanted them to be seen from the street. And, we wanted them to be plastic so they would last.

It took several hours to update the decorations on the wreaths. By the time I was finished my hands and lower arms were not too happy with me and ready to go on strike. My hands were covered with tiny wire cuts from working with the artificial evergreen wreaths, wired floral, and plastic bulbs. However, when I was done both hubby and I were really pleased with the results. My hands might not have been - I was.

So, we took our newly decorated wreaths outside and put them up. We were thrilled with the results. The wreaths looked great and the 3" - 4" bulbs could definitely be seen from the street.

Twenty years ago I had bought the four artificial wreaths from Michaels for $20.00 or so each. It cost another $20 or so for the red tie berries and small multi-colored glass bulbs for a total of $100.00 or so for the 4 decorated wreaths. If you divide the cost of the wreaths ($100.00) by the length of time they lasted (twenty years) that translates into an annual cost of $5.00 a year for the wreaths to decorate the outside of our house. That's a GREAT buy. I dare say we would have spent a LOT more than that for the fresh evergreen wreaths. We probably would have had to mortgage the house by now!


Twenty years later and the pine-cones and artificial wreaths were still as good as new. I didn't need to replace them. Hopefully, we'll get twenty years out of the new decorations. My guess is in twenty years we'll have to replace the plastic decorations, but the pine-cones and artificial wreaths will still be as good as new.

Now that's a good buy.

Friday, November 25, 2011

Maybe We Should Call It - Gobble, Gobble, Gobble Day?


Thanksgiving Day is upon us and today our thoughts will turn to giving thanks, family, traditions, and celebrating. 

I prefer to call today - gobble, gobble, gobble day. 

Why? 

Because today we'll all be feasting until our stomachs are bulging (at least some of us will). I think we should call it calories, gobble, gobble day! Don't you? 

Thanksgiving Day is a huge holiday in the United States. 

Families and friends get together and give thanks for all our blessings. 

We have football games, and the Macy's Thanksgiving Day parade. 

And, the day after Thanksgiving marks the beginning of the Christmas shopping season (black Friday) which is, generally, the busiest shopping day of the year. 

We've been celebrating gobble, gobble, gobble day for a long time. 

We've been eating and shopping, then eating, eating and eating. 

And, finally, gaining weight. 

Are we sure we should be giving thanks for this? LOL LOL 

So, why do we do this? 

Well, we seem to think Thanksgiving was a day of observance for the Pilgrims. A day for them and us to give thanks for all we have and all we enjoy. 

But, the Pilgrims never held customary Thanksgiving Days in the fall. 

In fact, the Pilgrims only had one feast in 1621, after their very first harvest and this was NEVER repeated. 

The pilgrims were deeply religious people. A day of thanksgiving to them was a day for prayers and fasting. It was nothing like we have today. 

However, when we think of Thanksgiving we think of the one Harvest Feast that the Pilgrims did have with 90 people, including their Indian friends. 

So, of course their is a history to how did we got the Thanksgiving Day as we now know it? And, since I just love history, I thought I'd share it with all of you. 

The Pilgrims had landed December 11, 1620 and lost many of their group during the cold, harsh winter. Their first harvest in the fall was bountiful so they celebrated the harvest with the Indians who had helped them survive and the feast lasted three days. 

So, how did it turn into a national tradition? 

Well, that didn't happen until 169 years later when George Washington proclaimed a National Day of Thanksgiving in 1789. 

As is usually the case, some people wanted it, some (like Thomas Jefferson) did not. So, between 1789 and 1863 Thanksgiving was dependent upon whether the President proclaimed it as a National Day or not. 

During the Civil War Sarah Hale, a magazine editor, urged President Abraham Lincoln to reinstate Thanksgiving Day. 

In 1863 President Lincoln proclaimed the last Thursday in November as a National Day of Thanksgiving.

However, it was still dependent upon the President, however, to proclaim the day as a National Day every year. Every President since Lincoln proclaimed Thanksgiving Day as the 4th Thursday in November.

Seventy-six years later in 1939 Franklin Roosevelt, however, proclaimed Thanksgiving to be the 3rd Thursday in November to lengthen the holiday shopping season. He did this in 1940 and 1941, too. Doing so, however, upset many people. 

So, we have President Roosevelt to thank for linking SHOPPING to Thanksgiving. 

It wasn't until 1941 that congress declared Thanksgiving as a National Holiday. 

However, they changed it back to the 4th Thursday in November. 

Why the 4th? Who knows. Political pandering, probably. Payback for something? Who knows. We're talking about politicians here. 

In any event, Thanksgiving has remained the 4th Thursday in November and is inexplicably linked with shopping, parades, football games, feasting (and gorging, perhaps), Pepto Brismol (definitely after the gorging), and the winter dieting frenzy. 

After all when you eat, shop, eat, eat, and eat you're going to gain weight. 

So, Happy Thanksgiving to all. 

When you sit down for your feast today just remember these words "Gobble, gobble, gobble.

Oh, how we love to Gobble. 

Eat, eat, and eat! 

Oh, what a wonderful treat! 

Gobble, gobble, gobble. 

Oh, how we love to eat! 

Diet, diet, diet! 

Oh, NO I will NOT try it!" 

Happy Thanksgiving! Gobble, Gobble, Gobble! 

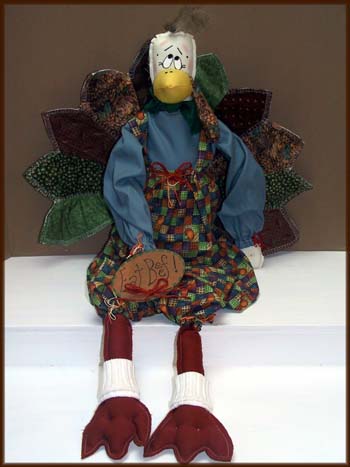
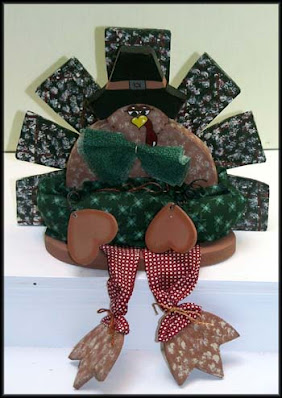
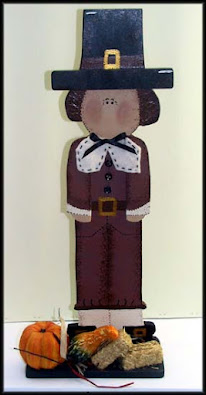
Pilgrims and turkeys are usually associated with Thanksgiving and are also a favorite of doll makers and doll patterns designers alike.  

Wednesday, November 23, 2011

Boy That Turkey Sure Smells Good!


Hmmm.........

Boy that turkey dinner really does smell good.

And, look pumpkin pie - I just LOVE pumpkin pie.....

I wonder if they'll invite me in........


HAPPY THANKSGIVING!


Trying To Find A Place To Hide!


Psst......

Hey, Joe - If we hide in there do you think they'll find us for Thursday?

Nah...........


HAPPY THANKSGIVING!


Thursday, November 10, 2011

My Recipe For A Snowman Cross Stitch Kit From Pine Mountain Designs


Every so often I see a kit that I think might be cute and easy to make.  Something I could quickly make for a Christmas present or "just because" type present. Something that would make a great seasonal git.  Such was the case with the "Recipe for a Snowman Pillow - Cross Stitch Kit" from Pine Mountain designs.

What drew my attention to the pillow kit was the pillow sham was pre-sewn. A definite time saver when you're as busy as I am. So, I bought it and decided to give it a try.

The "Recipe for a Snowman Pillow - Cross Stitch Kit" came in a resealable heavier plastic bag and contained the pre-sewn pillow sham, DMC floss, button decorations, tapestry needle, and instructions. The pre-sewn pillow was a combination of rectangular cotton strips surrounding a rectangular burlap piece that would be embroidered upon.

The cross-stitch chart and symbols were in black and white and easy to follow.  The instructions, cross-stitch chart, and symbol key were all contained on the front side of a single piece of paper.  Definitely an indication that this would be a fairly easy pillow to do.

The instructions called for a 10" x 16" pillow form to be inserted through the opening in the back. I went to a local JoAnn's store to buy my pillow but was unable to find a 10" x 16" pillow form. All they had were 12" x 16" pillow forms. So, I bought the 12" x 16" pillow form and crossed my fingers that it would work.

I had to insert my embroidery hoop back through the back opening of the pillow sham in order to attach my embroidery hoop so I could embroider the burlap section of the front of the pillow.  Using the pre-sewn pillow sham saved a lot of time in putting the pillow together, but added a little time to the embroidery process as you had to make sure you didn't catch the thread in the pillow back fabric.

The "Christmas Delights" kit was easy to do and I completed in in 10 1/2 hours. Like my "Christmas Delights" pillow concern I do think the burlap fabric chosen for this kit could have been of a tighter weave. It was very loose and I still have concerns as to how well this will hold up over time.

As was the case with the "Christmas Delights" pillow when it came to inserting my 12" by 16" pillow form into the back having my fingers crossed didn't help. It was too big and the back opening didn't close as the pillow sham kit had intended. It was bulging at the back opening. As I had already bought the pillow form for this project and the project was already completed I really didn't want to have to hunt for a 10" by 16" pillow form. So, I added a Velcro strip that I sewed on to the sides of the back opening and closed my pillow sham.  It worked and I have a full plump pillow which over time will deflate a little.

My pillow came out fine despite a few pillow form adjustments as you can see from the picture above and picture below.  It will make a darling Christmas gift or seasonal gift for someone.  I'm not sure who that will be at this point?  Hmmm....

Sunday, November 06, 2011

Inspired Creations By D - Sunny Day Suzie E-Pattern


"I am definitely a "glass half full" kind of gal who likes bright and sunny things.  So, it's no surprise that I would be drawn to my sister's Sunny Day Suzie floral wall art design.  It's just so bright, so cheery, so sunny, and so yellow.  Now you might be wondering why yellow is a big deal.  Well, to understand you'd have to know my Mother.
 
If my mother were reading this she would say  - yellow - YUCK!  She loved blue, brown, beige, black and white.  Never yellow, orange, or green.  

So, when I wore a bright yellow jacket, bright orange jacket, or bright lime green jacket I would get that "motherly" look of dislike.  You all know what I mean.  

And, I knew I'd get it - so, of course, that prompted me to wear those colors even more.

So, when I saw my sister's bright, sunny, and YELLOW Sunny Day Suzie design I, of course, thought of my Mother.

Copyright © 2011 - 2023 - All Rights Reserved - Designed By Debbie Bohringer

My "Miss America - What's Your Talent?" Article

A recent conversation that I had with me of my nieces reminded me of an article I had written 4 years ago entitled, "Miss America - What's Your Talent?" It prompted me to re-read my article. I enjoyed re-reading the article and decided that, maybe, she, my sister, and all of you would enjoy reading it, too. So, here's the article:

Miss America - What's Your Talent?

When I was growing up in the 1950's the attitudes towards women were different than they are today. This was during the middle of the "baby boom" era when wives were still expected to be "barefoot and pregnant - baking cookies in the kitchen!" It was a time when society still held rigid ideas of what an ideal women should and shouldn't be - a time when the ideal women was defined as "Miss America!" Someone who had a beautiful figure, beautiful face, wonderful attitude, just the right amount of knowledge, and, of course, talent.

I like many other young women of my day faithfully watched the "Miss America" pageant on TV with my Mother. I would sit and dream of being "Miss America" until it got to the talent competition. Then, I would freeze. I'd think to myself, "I can handle everything except the talent competition! What would I do for talent?"

You see, I couldn't sing, or dance, or play an instrument. I could sew up a storm and sew rings around anyone I knew, but that wasn't considered talent. What would I do? Come out on stage with my sewing machine and give everyone sewing lessons? Or, show everyone all the clothes that I'd made? The audience would fall asleep.

I could sew, I could craft like crazy, and I could design floral arrangements with the best of them, but that wasn't considered a talent. Well, if it wasn't talent I'd think to myself - I didn't know what was. There wasn't anything I couldn't make if I put my mind to it. Why was sewing and crafting not considered a talent? Just because it wasn't entertaining did that mean it wasn't talent?

The talent portion of the contest accounted for 1/3 of the contestant's overall score. In the talent portion of the competition contestants perform on stage before the judges and audience with the most common talents being singing, dancing, or playing a musical instrument. There have been other talents demonstrated like juggling, cheer leading, gymnastics, ventriloquism, drawing or painting. But, have you ever seen "crafting" or "sewing" as a talent?

So, I got frustrated and angry and gave up wanting to be Miss America. I resigned myself to being "talent-less!" As the years passed my creative juices continued to flow and I got better and better at sewing, crafting, and designing. At one point in my life everything I wore I had made. Then I got bored with making clothes for myself. I decided that I much preferred sewing smaller items like dolls as they took less time.

But, I never stopped thinking about "Miss America" and being "talent-less!" As the years passed I started to think that the ideal woman as defined by "Miss America" during the 1950's was so very wrong. The ideal was too confining and the talent criteria too restrictive. The talent parameters didn't encompass many of the other creative abilities of women and certainly didn't factor in all the different types of crafts that we have today.

So, I decided that women of all walks and ages are so gifted and talented in so many ways that it would be hard to define an "ideal" woman let alone set the criteria for "talent." I might be considered "talent-less" as far as the Miss America standards were concerned, but I was far from that as far as "crafters" standards were concerned.

By the standards defined in the 1950's Martha Stewart would be considered "talent-less!" I dare say most crafters would consider Martha Stewart to be the ultimate crafter with enormous "talent!"

I have changed a lot from the child who grew up with the 1950's ideals of a woman. If someone were to ask me today if I have talent I would not hesitate and would have a definitive and affirmative answer. I would only need to say three words that would define my talent.

Do I have talent? I absolutely have talent. "I'm a crafter!"


Copyright © 2007 - All Rights Reserved - Written By Linda Walsh of Linda Walsh Originals. Linda is a doll maker and doll pattern designer.

Friday, November 04, 2011

Inspired Creations By D - Dads Tiger Print Pattern and E-Pattern


I have to tell you that of all four of my sister's Inspired Creations By D floral wall art pictures her Dads Tiger is my favorite. 

Now I know what you're going to say. "It's because of your Dad - right?" Of course! 

When we were growing up my Dad just loved to garden and her loved planting lilies. So much so that he created gardens around the entire house and planted lilies and mums. He loved the brightly colored mums, especially in the Fall but, his favorite flower of all was the tiger lily. There was just something about the bright orange flower that drew him to it. So, as a result when the tiger lilies were in bloom we had a brown house with a natural orange border all around it. It actually looked really pretty. 

So, of course, my sister had to create a tiger lily and, of course, it's my favorite. Maybe she'll make me one and give it to me as a gift. Hint! Hint! 

Copyright © 2011 - 2023 - All Rights Reserved - Designed By Debbie Bohringer

Thursday, November 03, 2011

GoogleDocs For Creating and Displaying .PDF's


I've been playing again testing a few different avenues for small business crafters who have .PDF free e-patterns, e-tutorials, e-projects, and e-articles that they have created and want to display on their websites or blogs. I recently posted about Scribd.com which is a document hosting website in a Linda's Blog post entitled "I Decided To Try Scribd For Some Of My Free E-Books and E-Patterns." Today I experimented with GoogleDocs.com which is not only a document hosting website, but a document creations website.

Now you might be thinking that all hosting document hosting websites are the same.  Au contraire!

Not only can you upload .PDF's to GoogleDocs.com to obtain a linkable URL, but you can CREATE a document right on their website using a suite of office type programs. Their programs are free to use and do not require you to download anything to your computer and include documents creation, presentations, spreadsheets, forms, drawings, and tables. Each of these programs automatically store the items you are creating in your Google account. So, they are available to you everywhere.

If you've been a reader of my Linda's Blog for awhile you know that I LOVE Microsoft Publisher which is part of Microsoft Office. For me, Microsoft Office and Microsoft Publisher are still the best for me to use for my purposes, but GoogleDocs.com is a great way to get started if you want to create .PDF e-patterns, e-tutorials, e-projects, and e-articles and don't have Microsoft Office.

As mentioned GoogleDocs.com will not only upload already created .PDF's, but will let you create your own document. In creating them you can download your document as a .PDF to your own computer or you can PUBLISH your document online. If you create your own .PDF in another program and upload it to GoogleDoc.com you can only obtain a distinct URL that you can link to and which would  display your .PDF.

However, if you create the document using GoogleDocs.com office suite you can PUBLISH it which creates an HTML version of your document that can then be embedded within your blog or website.

Since I already had created my own free e-patterns and e-books I decided to upload those and obtain distinct URL's that I could link to.

I like how the GoogleDocs.com displays the .PDF with the separate pages showing as clickable icons in the left hand sidebar. You can search the document, zoom in or out, download it, print it, and make a copy of it. You can move from page to page via the sidebar or using the left and right arrows.

You can also view it one page at a time or two pages at a time like in the picture shown below:


As far as visibility is concerned you can share it as follows:

1) Public on the web - Anyone on the Internet can find and access. No sign-in required.
2) Anyone with the link - Anyone who has the link can access. No sign-in required.
3) Private - Only people explicitly granted permission can access. Sign-in required.

Using the office suite to create a .PDF takes a little getting used to, but you can create a document and then insert images into it. I think this works best for e-tutorials, e-projects, e-articles, and e-books as all their pages are generally letter size.

However, for e-patterns if you intend to create a two-page cover that can be turned sideways and folded to pattern size then you will have to create this in a separate picture program and then insert the image into your GoogleDocs.com document. GoogleDocs.com only accepts .jpeg, .gif, and .png image files so if you have created your pattern piece sheets as .bmp (to keep the size of your .pdf down) you'll have to convert them to .jpg before you could insert them into your document.

You can also use the suite to create a response form that users can fill out which you can email or embed into your website or blog.

I'm still partial to Publisher, but that's me. I'm old school and very loyal to programs that have worked wonderfully for me for years. However, I do like to play so the next time I'm in the mood to create another free e-book I'll give GoogleDocs.com another try.

Wednesday, November 02, 2011

Inspired Creations By D - Trillium Blues E-Pattern


If you're a reader of my Linda's Blog you know that I'm a doll maker and doll pattern designer who likes to dabble in lots of different arts & crafts and that I have been doing this for many, many decades.

Well, several decades ago I was in a quilting phase. Making quilts for my home and quilts as gifts for family and friends. I even dabbled with designing my own styles - which I enjoyed when it came to creating them on paper. However, creating them large scale and sewing them was both laborious and tedious. At least I thought so.

After creating a dozen or so quilts I decided I really didn't like sewing on such a large scale. I much preferred doll house quilting and doll bed size quilting. I LOVED the latter because they're small and don't take as much time.

So, I gave up large scale quilting in favor of miniature quilting - which is still on my to do list and several of my WIP's.

Well, my sister never gave up her love of quilting and decided last year to combine her love of quilting with her love of gardens. Like our Mother she has quite the green thumb.  As a result of her two loves  Inspired Creations By D was born.   However, instead of creating bed size quilts she wanted to create wall art  - wall size fabric quilt pictures.  So, she created one, then two, then three, and finally four different designs.

Now I might be a little prejudice because she is my sister, but I have to tell you I LOVE all the designs. 

Copyright © 2011 - 2023 - All Rights Reserved - Designed By Debbie Bohringer

Tuesday, November 01, 2011

My Favorite BIG Christmas Dolls and Santa's


I know that over the years I've mentioned the BIG dolls hubby and I made. Some of my favorites are the BIG Santa's and Mrs. Claus that I get to display at the holidays.

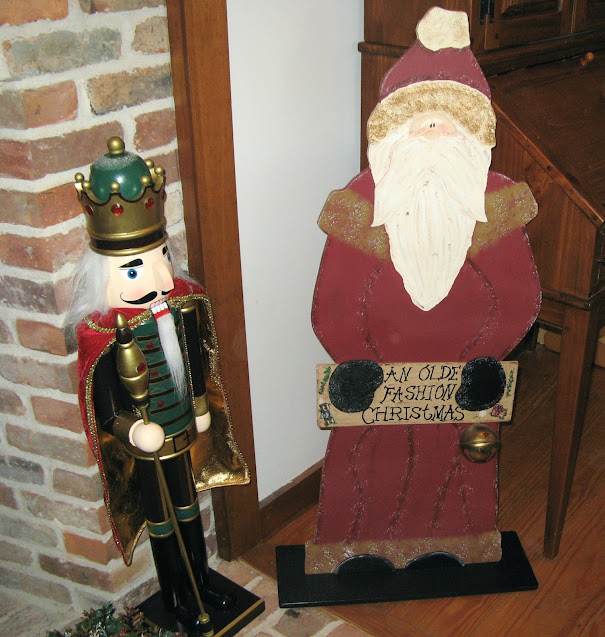
The tall wooden old-fashioned Santa shown above is 45" tall and 16" wide. He was created based upon a "From My Heart To Yours" pattern by Heidi Markish. The pattern called for the Santa to be holding a box filled with candles and artificial garland. I opted for just a sign and gold bell instead. I named him "Kristopher."

He is made our of 3/4" pine wood. He is a "sponge" painted Santa and was painted a deep burgundy red for an "olde fashioned" appearance. The fur along the bottom of his outfit, along his shoulders, and on the edge of his hat are all "sponge" painted with ocean sponges. His pompom is "sponge" painted as well. And there is blue, black, white, and red "sponge" painting all along his edges.

Kristopher is carrying a "sponge" painted sign that says "An Olde Fashion Christmas" and is carrying a medal bell. His beard and moustache are painted with multiple colors and applied using "wispy" strokes.


My dining room fireplace display includes three of my BIG dolls. A large bear, tall Mrs. Claus, and tall Santa Claus all of which are shown in the picture above.

The large bear on the left in the picture above stands 36" tall and was created based upon a Design Farm pattern designed by Lori Gardner and Sharon Reynolds. I named him "Harry."

Most of the year Harry is proudly displayed in my front hall. He stands there quietly surveying all that is going on in our house. Harry never makes a fuss or disturbs anyone. He's just there to watch and observe. During the holidays he gets included with the rest of the decorations.

Harry is wearing my Grandson's baby jeans. If you look closely you can see the diaper snaps that run along the inside legs. Harry doesn't need to have a diapers changed - my Grandson definitely did.

Harry is also wearing one of my Grandson's thermal tops. His vest is lined and decorated with 3 triangle top pockets with buttons. It is also decorated with a tree with cotton puffs for snow and embroidered with zigzag stitching all along the edges.

He is wearing a large lined hunters cap with ear flaps. Harry's body is made of wood covered with flush felt. His feet are made from my brother's old white socks embroidered with DMC floss for ties so they loo like sneakers. Harry's face is embroidered and he has large brown animal eyes and a lighter color plush felt for his snout and the inside of his ears.

I just love the expression on Harry's face. Sometimes he appears sad to me and sometimes he appears happy. You never know. I think he's just happy to be out and on display. I think I'll go and give him a BIG hug.


My BIG Santa and Mrs. Claus wood and cloth dolls (shown in the picture above) were actually made to decorate the area just outside my mother's apartment.  They were both created based on Shari's Country Classic patterns by Shari Johnson.  Santa was supposed to be holding a bear and a list and Mrs. Claus was supposed to be holding a doll and small bear in the pocket of her apron.  I opted to have my Mrs. Claus holding a basket filled with Christmas cookie molds and Santa just holding a "naughty or nice" list.

When my mother lived in an apartment building for senior citizens each and every year my mother and I would decorate an area just outside her apartment for Christmas. She loved it as did all her neighbors. Many of them commented to her about how much they loved our display.

Santa is wearing his favorite pair of jeans, his favorite green striped shirt, and his favorite embroidered vest. He has multi-colored buttons on his shirt, white socks, and 1" pine painted black for his shoes. Rope is glued to the tops of his shoes for ties. He has a full beard, glasses, and is wearing a Christmas cap.

He is carrying a candy cane tucked into the waistband of his pants. You never know when he might get hungry, so he wants to be prepared.

Mrs. Claus is a wood and cloth doll that stands 36" tall.  She is wearing her favorite lace decorated Christmas dress and favorite coordinating apron with a pocket. She has to have the pocket as she never knows when she may need to carry something and one only has two hands.  She also has her favorite Christmas shawl wrapped around her shoulders and is wearing her favorite white Christmas socks.

Mrs. Claus has a wire ribbon bow just under her chin and cloth bows on the tops of her feet. She has a full head of white hair and is wearing her favorite Christmas bonnet.

Because she never knows when she has to drop everything she's doing to bake Christmas cookies for the elves she is carrying the cookie molds around with her.

Santa and Mrs. Clause have their place in our dining room at Christmas time. Sometimes Mrs. Claus even helps me bake the Christmas cookies. Never Santa. He's too tired.....


One of my favorite BIG Santa's is the one I made in the blue Santa suit. I have to watch out for him. He's my sister's favorite color and she has wanted him for years so when she visits I have to make sure she doesn't take him home with her.

He stands 40" tall and was made based upon a Tenderberry Stitches pattern designed by Sharon Reynolds. He is a wood and cloth doll with dowels for legs and I named him "Blue To You Santa." The pattern called for a bald Santa in a green velour outfit to I opted instead to add a long flannel hat for Santa, lengthen his pants, add a large bear to his "Toy" bag and add a sled at his feet.

He is wearing his favorite blue Christmas outfit with embroidered hearts adorning the lower band of his jacket. The nightcap he is wearing is one of his favorite as it's a very long one and he likes that for the cold winter nights. He can wrap it around his neck to stay warm. He sports a full beard, socks, and big stuffed boots.

I hope you like my favorite BIG Christmas dolls and wood crafts.

Our Victorian Bridal Doll Elsa Has A New E-Pattern


Elsa is a free-standing doll all ready for her wedding day.

It's the first of October so she's hoping that it will be a bright and sunny day as she wants to look her best. She chose October as it shouldn't be rainy, shouldn't be snowy, and shouldn't be hot. However, she fastened her hair in a bun just in case it were to rain.

Her beautiful, thick head of flaming red hair tends to frizz on a rainy day unless it's contained in a bun. So, for her wedding day she's taking no chance. A bun it will be.

She has a long, fancy lace trimmed dress with a flowing train, and eyelet lace covered puffed and lace trimmed long sleeves. Her wedding gown also has an eyelet lace and gathered full length dress front insert with ribbon floral lace trim. Her veil is made of & fancy lace and floral. Underneath her gown she is wearing a lace trimmed slip.

She has a painted wood head and covered round wood base. Her inner body is made from a dowel covered with fabric and eyelet lace. Her arms are wire-shaped and covered.

Her red hair with bangs is fastened into a bun. Two large floral and lace pieces adorn the top of her veil and bodice of her dress. She is carrying a bouquet of flowers with streamers.

So far there are no signs of rain. Elsa has her fingers crossed. She just wants a beautiful wedding day.

Copyright © 2004 - 2023 - All Rights Reserved - Designed and Written By Linda Walsh


My Sister And Her Husband Are Now Officially A Farm!


Well, the day finally arrived.

My sister and her husband are now officially an alpaca farm .

The "children" arrived on Sunday and, according to my sister, were a little apprehensive getting out of the van, but once they discovered the delicious grass - they decided to stay.

Here's a few pictures: